
Hello there! Today, I am sharing a project that I made with a few products from the Reverse Confetti Special Release that just hit the Reverse Confetti store today! I am all about cute packaging, and products that make that easy, so I squealed out loud when I saw these new goodies!
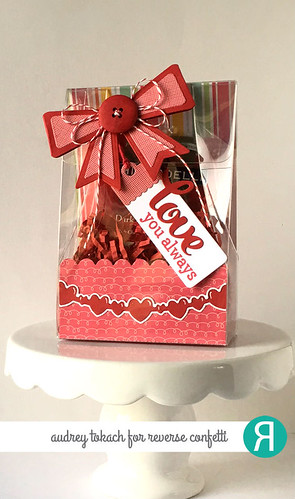
Here is my valentine treat box using the brand new In the Bag dies, Layered Bow dies and Clear Tote Bags!
The Clear Tote Bags arrive flat, and they are super easy to assemble. You just lock in the bottom of the bag, and fold gently on the score lines. The box is a pretty good size assembled, so you can fit lots of great goodies in there.
I used the In the Bag dies along with some fun patterned paper from my stash to line the inside of the box. First, I cut the scalloped piece. It is scored in two places to fold and line the bottom of the box. Then I cut a striped piece of paper, measuring just a hair under 4" x 6" to be the backing of the inside of the box. I adhered the striped piece to the scalloped piece, and then before putting it in the box, I diecut some red and white hearts using the Double Heart Garland border dies, which I glued to the scalloped piece before putting the insert into the box. I fill the box part way with some red paper shred to give my chocolates a little lift so that they could be seen behind the scalloped panel, added the candy, and closed the box. To dress things up a little further, I used the Layers Bow dies to add a cute paper bow. I cut the larger bow loops and bow tails from red cardstock, and then cut the smaller bow loops and tails from coordinating patterned paper. I glued all of the pieces today, and instead of using the bow center that is included in the die set, I opted for a big red button threaded with some red and white twine. Then I used the cut little tag dies that are part of the In the Bag die set, and cut a tag from white cardstock. The tag topper, one of two included in the die set, was cut from more patterned paper. I added a sentiment to my tag using the Lovey Words dies and Lovey Word Coordinates stamp set. I attached the tag to the bow using some Maraschino twine and then used scor-tape to adhere the bow to the box. A tiny glue dot holds the tag in place.
Here it is a little closer:
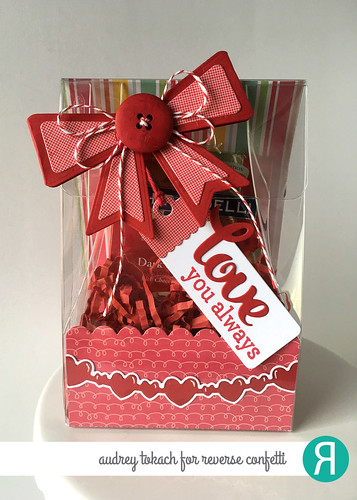
Isn't this bow just the cutest? There are so many possibilities. I might be putting paper Layered Bows on everything from now on.

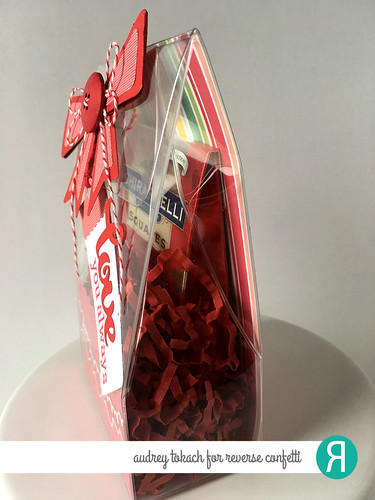
Here you can see a side view of the box. There is plenty of room to fit other goodies in there along with the chocolates (which I found at Target, by the way). These boxes and dies are an adorable way to dress up gifts. So easy to make a $1 box of chocolates look like a million bucks!
Be sure to hop along with the rest of the Reverse Confetti gang, and see what everyone else made with these fun new products!
Reverse Confetti Blog
Amy Kolling
Audrey Tokach - **you are here**
Heather Pulvirenti
Jennifer McGuire
Lisa Addesa
Lisa Henke
Kay Miller
Amy Rohl
Amy Tsuruta
Nichol Magouirk
Amy Sheffer
Sarah Gough
Laurie Schmidlin
Wanda Guess
Susan Liles
Leigh Penner
Thanks so much for stopping by! :)


12 comments:
Audrey, this is so SWEET!
Awesome! What a quick and easy way to create something with such a bang! Love it!
super cute! gosh I love your layered bow, so pretty!
Audrey,
Cute, Awesome, Adorable really neat treat with all the Reverse Confetti products.
Oh, I love this, Audrey!
How fun are these new RC bows and bags!?
The double heart layer die is so pretty! The colors of the bag are so rich...reminds me of cherries and chocolate...yum!
Wow - thank you for sharing your project! It is inspiring!
Absolutely lovely! So loving the new releases!
Those totes are awesome!!! Love the liners for them too!
LOVE all these die cuts....especially the mini hearts on the bottom.
How clever and cute! It's a great project which many are going to want!
Post a Comment