Thursday, October 26, 2017

Reverse Confetti October SFYTT


Hello there!  Today, I have a post to share with you featuring Reverse Confetti goodies, and the October SFYTT!

Here is this month's sketch:


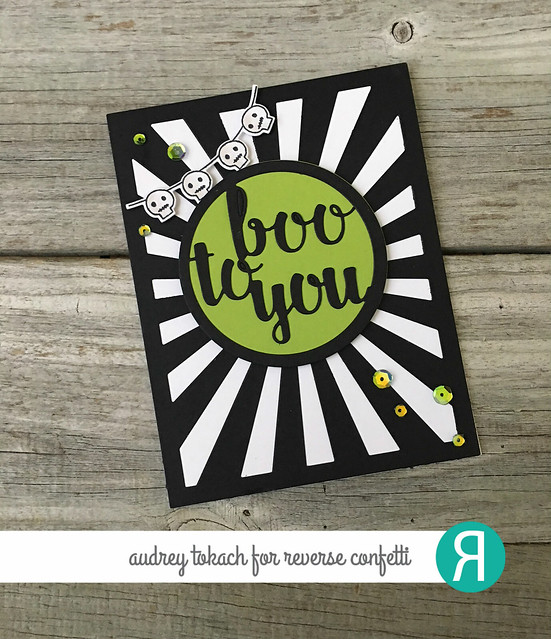
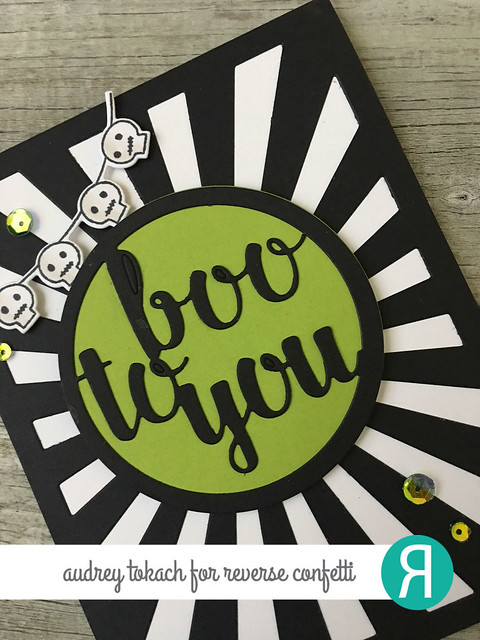
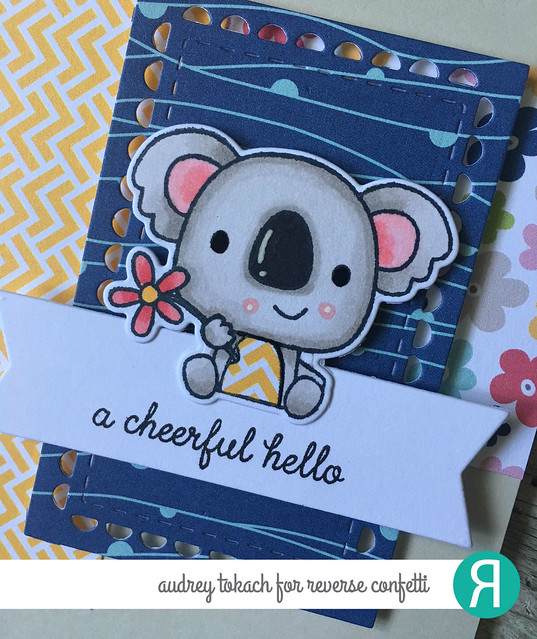
For my card, I pulled out some patterned paper from the Under the Umbrella paper pad, and one of my favorites, the koala from the Bear Hugs stamp set.  I cut various papers from the same paper collection to follow the sketch, and adhered them to a Stone card base.  For the layer that the koala is sitting on, I diecut the smallest Lacy Scalloped Frame Confetti Cuts from some darker patterned paper.  I really wanted my koala to stand out.  I stamped a sentiment on a white banner diecut using the Tag Me Confetti Cuts die set, and popped up my little koala using foam tape.


October SFYTT

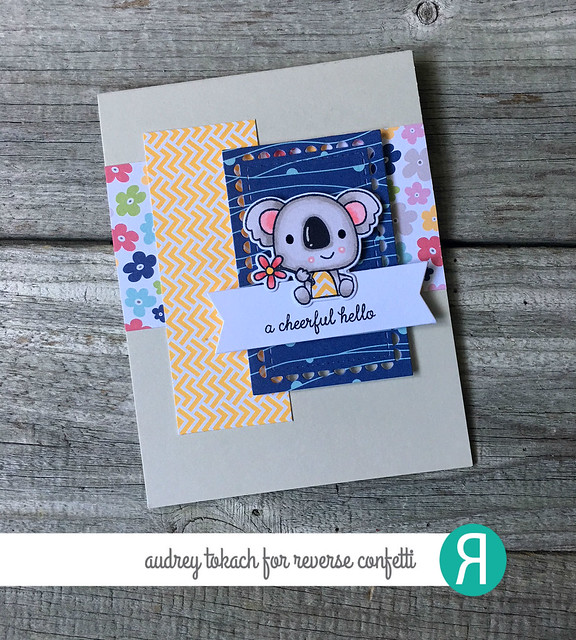
I added some white gel pen accents, and paper pieced his little belly with some of the same paper I used in the sketch for a fun pop of color.

October SFYTT

There's still time to play along with our October sketch challenge!  I hope you will join us for a chance to win a Reverse Confetti gift certificate! :)

Thanks for stopping by!!


Thursday, October 19, 2017

Boo To You {Reverse Confetti}


Hello there!  Today, I have a card to share with you for the current Fusion Challenge - Striped Wreath!  I was inspired by the bold striped pattern with the pop of lime green, and with halloween just around the corner, I could use a few more spooky greetings! :)  Here is the inspiration photo:


I used a bunch of goodies from Reverse Confetti to create my card!  I started off with an A2 card base in Premier Polar White cardstock.  Then, I used the Sunburst Cover Panel Confetti Cuts and some Midnight cardstock to create my striped background.  I glued that to the card base with a glue pen.  Then, I used the Boo To You Circle Confetti Cuts die set for my focal point.  I diecut the solid circle from some Lime cardstock, and cut the detail layer from Midnight cardstock.  I glued them together, an popped them up in the center of the sunburst with some foam tape.  I wanted to incorporate the skeleton from the inspiration photo, so I pulled my Too Cute to Spook stamp set, stamped the skeleton garland image in back ink, and shaded them with a few grey copic markers, then diecut with the coordinating Too Cute to Spook Confetti Cuts dies.

Boo To You

I draped the skeletons in the top left corner, popped up with some foam tape, and then added a scattering of green iridescent sequins to finish things off.

Boo To You

That's all for me today!  Thanks so much for stopping by! :)


Wednesday, October 18, 2017

Lawn Fawn Inspiration Week: Plan On It Fitness


Hello there!  Welcome to the last day of Lawn Fawn inspiration week!  Today, I have a card to share with you using the Plan on It: Fitness.  The Plan on It stamp series is intended for use in your planner, but they work equally well on cards!

To create my card, I started off with a white A2 card base.  I diecut the Stripey Backdrop from Storm Cloud card stock and glued that to the card base with a glue pen.   I diecut two squares, one from white cardstock using the Dotted Squares Stackables, and one from Chili Pepper cardstock using the Zig Zag Squares Stackables.  On the dotted square, I stamped a collage of fitness words included in the Plan On It: Fitness stamp set, using Manatee ink.  Then, I stamped a row of tiny images included in the stamp set, and colored them with copic markers.  I chose a sentiment from the set and stamped it on a strip of Storm Cloud cardstock, then heat embossed it with the new white embossing powder.  Finally, I popped the square up on the striped backgound, and added some white gel pen accents.

You Got This

Be sure to visit the Lawn Fawn blog for lots more inspiration from the design team!  I hope you enjoyed this week! :)

Thanks for stopping by!

Tuesday, October 17, 2017

Lawn Fawn Inspiration Week: Stitched Scalloped Stackables

Hello there!  Welcome to another day of Lawn Fawn inspiration week! Today, we are showcasing the Outside In Stitched Scalloped Stackables!

To create my card, I started by ink blending three shades of Distress Oxide inks onto a white card base, and then splattering it with clean clear water.  I used the largest die from the Outside In Stitched Rectangles to diecut a rectangle just a smidge smaller than the card base, then ran that through my machine again, this time, cutting a Outside In Stitched Scalloped Circle.  I popped the panel up on the card base with foam tape.  I diecut the largest snowflake from the Stitched Snowflakes die set, and glued that in the center of the circle.  Then I stamped and diecut the adorable little Winter Otter.  I gave him a hat using the tiny beanie from Holiday Party Animal.  I curved a sentiment on my acrylic block that came from the Toboggan Together, in Blue Jay ink, and diecut some Mini Snowflakes from Blue Jay card stock.  To finish things off, I added some white gel pen accents, and tied a bow with some Blue Jay Twine.

Stitched Scalloped Circles

Be sure to visit the Lawn Fawn blog to get lots more inspiration from the design team and join me again tomorrow for our final day of inspiration week!

Thanks for stopping by! :)

Monday, October 16, 2017

Lawn Fawn Inspiration Week: Perfectly Plaid Chill


Hello there!  Welcome to another day of Lawn Fawn inspiration week!  Today, we are sharing projects using the new Perfectly Plaid Chill paper collection!

To create my card, I started off with an A2 card base.  Then I used the Large Stitched Rectangles Stackables to add a stitched edge to a piece of Perfectly Plaid Chill paper.  I then positioned the same Stitched Rectangle die on an angle and ran it though my diecut machine to cut a wonky white rectangle.  I popped it up over top of the plaid with foam tape.  Then I stamped my favorite sheep from Baaah Humbug along with some party elements from the Party Animal stamp set.  To ground the sheep and bird pair, I stamped and diecut the "Happy" from the Happy Happy Happy stamp set, and diecut it with the coordinating dies.  Underneath, I stamped "Birthday" to complete the sentiment.  To finish things off, I added some white gel pen accents and some cute wood stars.

Perfectly Plaid Chill

Be sure to visit the Lawn Fawn blog for lots more inspiration from the design team!  See you again tomorrow! :)

Thanks for stopping by!!

Sunday, October 15, 2017

Lawn Fawn Inspiration Week: Stitched Hillside Backdrops


Hello there!  Welcome to another day of Lawn Fawn Inspiration Week!  Today, the design team is showcasing the Stitched Hillside Backdrops: Portrait and Stitched Hillside Backdrops: Landscape!

I used the Stitched Hillside Backdrops: Portrait for my card.  I started off with a A2 card base, which I covered with a piece of Perfectly Plaid Chill patterned paper for the sky.  Then, I cut my Stitched Hillside Backdrop from white cardstock, and adhered it with a glue pen.  I stamped and colored images from Winter Village, diecut them with the coordinating Winter Village dies, and arranged my scene before popping everything with with foam tape.  I stamped a sentiment from Winter Village above the top row of houses, then added a scattering of Mini Snowflakes to the sky to finish off my card.

Stitched Hillside Backdrops

Be sure to visit the Lawn Fawn blog for lots more inspiration from the design team!  Hope you will join me again tomorrow because I have more to share with you! :)

Thanks for stopping by! :)

Saturday, October 14, 2017

Lawn Fawn Inspiration Week: Happy Happy Happy Add-On and Winter Tags


Hello there!  Welcome to day two of Lawn Fawn Inspiration Week!  Today, the team is showcasing several items, including the Happy Happy Happy Add-On stamp set and the Winter Tiny Tags die set.  To create my card, I started off with a white A2 card base.  Over top of that, I diecut the Snowy Backdrops die from mermaid cardstock and adhered it with a glue pen.   Then I used the Simple Stitched Hillside Borders to diecut a white snowy hill.  I diecut three trees using the Winter Tiny Tags dies, one cut from Noble Fir cardstock, and two cut from Knit Picky patterned paper.  I used the tiny star from the Scalloped Treat Box Winter House Add-On to top each one and popped them all up on the hill with foam tape.  I added some colored rhinestones to the center tree, then stamp "merry" from the Happy Happy Happy Add-On stamp set in Lobster ink and diecut them with the coordinating dies.  I added a red frame around the edge of the card using the Stitched Rectangle Frames dies, then added a scattering of sequins and a Peppermint Lawn Trimmings bow to finish things off.

Winter Tags

Be sure to visit the Lawn Fawn blog for lots more inspiration from the design team!  Hope to see you again tomorrow as I have more to share with you!

Thanks so much for stopping by! :)

Friday, October 13, 2017

Lawn Fawn Inspiration Week: Stitched Ornaments


Hello there!  Today, the Lawn Fawn team is kicking off Inspiration Week by showcasing the new Stitched Ornaments dies!  These dies are so fun and versatile! Perfect for elegant and whimsical cards alike!  For my card today, I want for a more elegant feel.  I started off by diecutting a stitched rectangle using the largest die from the Outside In Stitched Rectangles Stackables die set.  I diecut the largest ornament from the Stitched Ornaments die set from white cardstock, as well as the ornament topper, the bow string, the tiny star from the set, and two trees from the Stitched Hillside Backdrops Portrait die set (you will see more of that later this week!)  I used distress inks in Blueprint Sketch and Chipped Sapphire to ink the ornament, then added splatters of clean clear water to bleach out some areas.  When that was dry, I added some white acrylic paint splatters as well.    I cut a second ornament in white, then used the Simple Stitched Hillside Borders dies to cut the bottom piece off to use as the ground for my mini scene.  On top of that, I popped up the diecut trees with foam tape, followed by the tiny star.  I knew I wanted to emboss the sentiment, so I tapped my embossing ink pad over top of the ornament topper diecut and added two layers of the new silver embossing powder to make it look like metal.  I popped the ornament up on the stitched panel with foam tape, then added a scattering of Mini Snowflakes, before heat embossing a sentiment from the Snowy Backdrops stamp set at the bottom.  Then, I mounted the panel on an A2 white card base with more foam tape to finish off the card.

Stitched Ornaments

Be sure to visit the Lawn Fawn blog for lots more inspiration from the design team, and stop by every day this week to see more!

Thanks for popping in! :)

Sunday, October 8, 2017

Reverse Confetti October Blog Hop!


Hello hello!  It's Reverse Confetti Blog Hop day!  This month, I have a trio of halloween tags to share with you!

I created these tags with a variety of images from the Best Witches and Too Cute to Spook stamp sets.  I really love this line of critter stamps because they mix and match together perfectly!  I paired the images with Topped of Tags.  Keep reading to get all the details!


Tag Trio_Blog Hop

For the witch tag, I started off with a Grape Soda Topped off Tag.  Over that, I diecut a Dots Tag Layer from Midnight card stock.  I stamped and colored the cute little witch from Best Witches, and the jack-o-lantern from Too Cute to Spook.  I added a sentiment from Best Witches to a banner diecut using the Greetings Frame Confetti Cuts.  I popped everything up using foam tape, and added a scattering of stars diecut using the Best Witches Confetti Cuts from BumbleBee cardstock.  I added some white gel pen accents and tied on some Solid Honeydew Twine.

Tag Trio_Witch

For the halloween cat tag, I diecut the Topped Off Tag from Lime Green cardstock, and topped it with the Big Stripes Tag Layer Confetti Cuts.  I stamped and colored the cat, broom, witch hat and jack-o-lantern from Too Cute To Spook, and diecut them with the coordinating Too Cute to Spook Confetti Cuts.  I stamped a sentiment from the same set on to a banner from the Greetings Frame Confetti Cuts.  I added some white gel pen accents and tied on some Mandarin twine.

Tag Trio _Cat

For the mummy tag, I diecut the Topped off Tag from Tangerine Twine.  I added the Web Tag Layer cut from Midnight cardstock.  I stamped the mummy and bat from Best Witches and the treat bucket from Too Cute to Spook, and colored them before diecutting them with the coordinating Confetti Cuts dies.  I sentiment from Too Cute to Spook was stamped on a Greetings Frame banner, and like the other tags, I added a scattering of diecut stars.  I added some white gel pen accents, and tied on some solid Marigold twine.

Tag Trio_Mummy

That's all I have to share with  you today, but be sure to visit the rest of the design team to see what they have created with Reverse Confetti goodies!  Thanks so much for stopping by!!

Audrey Tokach **You are here**
And, ‘Fetti Friend... Juhi Khanna


BLOG TEMPLATE BY DESIGNER BLOGS