Wednesday, July 26, 2017

Reverse Confetti July SFYTT


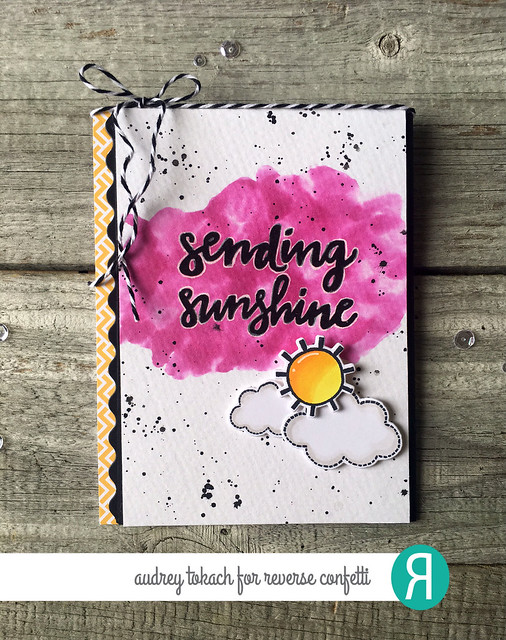
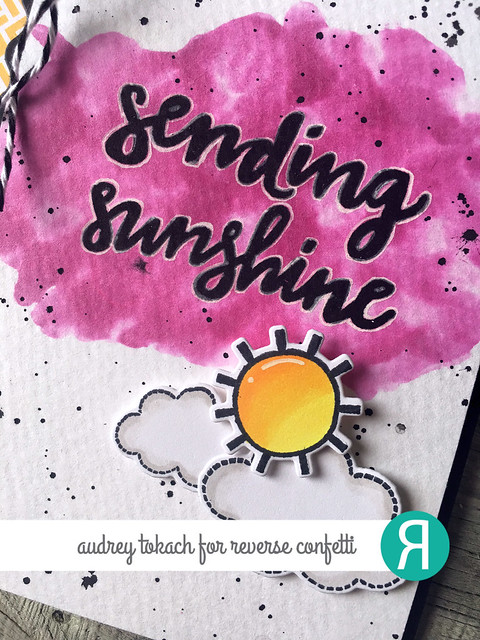
Hello hello!  Today, I have a card to share with you using the Reverse Confetti July SFYTT!  There is still time to play along for your chance to win a RC gift certificate!

Here is the July Sketch:


And here is my card...

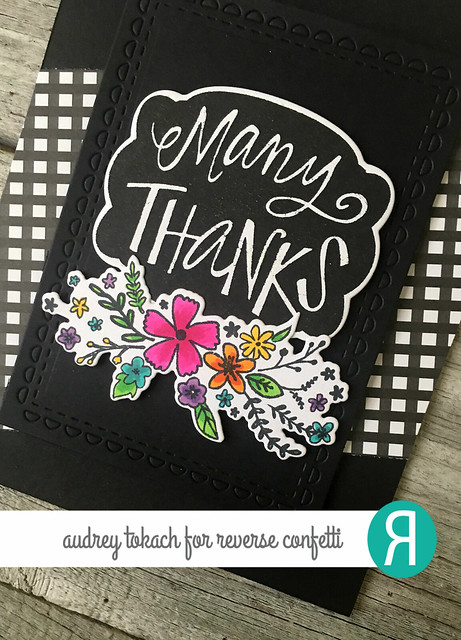
I have been seeing lots of black in card making lately, and I love the contrast between black, crisp white, and the bright colors I love so much! For my card, I started off with a black A2 card base.  I added a strip of gingham patterned paper from the Fright Night patterned paper pad, on a diagonal across the card base.  Then I used the Lacy Scallop Frames Confetti Cuts to diecut a rectangle from more black cardstock.  For my focal point, I stamped the Many Thanks image from the Labeled stamp set in black ink, and then diecut it with the Give Thanks Label Confetti Cuts.  I stamped the flower cluster from Banner in Bloom, and colored it with Copic Markers, diecut it with the coordinating Banner in Bloom Confetti Cuts, then popped up the label and flower cluster with foam tape.  Finally, I popped the entire panel up on the card base with foam tape for added dimension.

July SFYTT

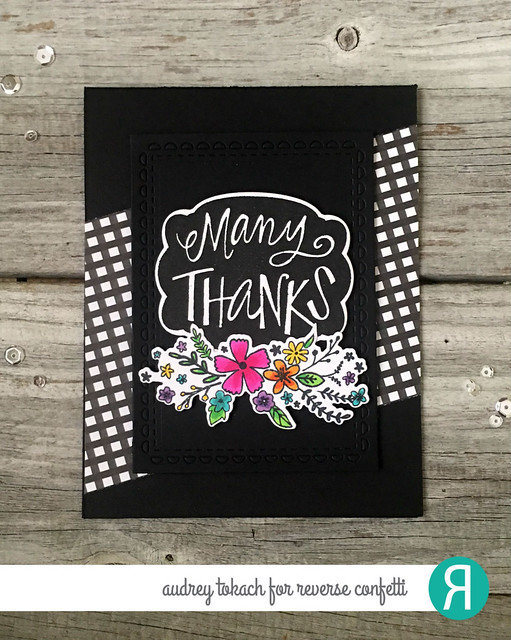
I think the bold black color scheme with pops of white make for a striking and unusual combination!  It was quite fun working with colors that aren't my normal go-to combos.

July SFYTT

That's all for me today!  I hope you will play along with the July SFYTT! :)

Thanks for stopping by!!


Tuesday, July 25, 2017

Lawn Fawn and Marvy Collaboration Week!

Hello there!  Today, I have a fun post to share with you!  The Lawn Fawn team is joining up with the gang from Marvy Uchida to bring you inspiration using a combination of products from both companies!

The Marvy team so generously sent me some goodies to play with!  I used their Color In Watercolor Twist Crayons to watercolor a background.  I used a waterbrush to collect color from the tip of the crayon, and then painted it on wet watercolor paper.  I used shades of blue and green, adding a few layers, and drying in between.    When it was dry, I diecut the paper with the Small Stitched Rectangles Stackables.  I stamped and colored images from Mermaid for You, then diecut them with the coordinating Mermaid for You dies, and arranged them on my background.  Some are adhered flat with a glue pen, and others are popped up with foam tape.  I added some accents with a white gel pen, and added some Morning Dew Nuvo Drops for some bubbles! :)

Lawn Fawn_Marvy Collab

There is lots more inspiration on the Lawn Fawn blog, today and throughout the rest of the week!

Thanks for stopping by! :)

Friday, July 14, 2017

Sending Sunshine {Reverse Confetti}


Hello there!  Today, I have another card to share with you using new products from the July Reverse Confetti release!

To create my card, I started off by watercoloring a bit of Magenta ink onto watercolor paper.  When it was dry, I stamped a sentiment from the new Mahalo stamp set in black ink, then splattered the panel with some black watercolor.  I stamped and colored the sun from Weather it Together and diecut it with the coordinating Weather it Together Confetti Cuts, then popped it on top of a few clouds from the Take Flight stamp set.  I added a scalloped border to the left side of the panel using the Edge Essentials Confetti Cuts, and then added a strip of patterned paper from the new Under the Umbrella paper pad.  I mounted the panel on a white card base, then added a bow using Charcoal Twine.  

Mahalo

To make the sentiment pop a bit more, I added an outline using a white gel pen.  It is a simple detail but really makes a huge difference.

Mohalo

I will be entering this card in the current Fusion Challenge, which is summer themed! :)


Thanks so much for stopping by!!


Saturday, July 8, 2017

Reverse Confetti July Blog Hop


WOOHOO!  It's new release day over at Reverse Confetti!  All of the new goodies that we have been showcasing over the last few days are available NOW in the Reverse Confetti store and at your favorite retailers! :)


The card that I have to share with you today showcases the new No Tomorrow stamp set and coordinating No Tomorrow Confetti Cuts along with a bunch of previously released products.

To create my card, I started off with a horizontal A2 card base of Premier Polar White cardstock.  I diecut the Striped Frame Cover Panel from black cardstock, then, used Pistachio ink to add some green ombre to the center of the frame before gluing it down.  I stamped and colored the adorable dinosaurs from No Tomorrow, then diecut them with the No Tomorrow Confetti Cuts.  To add to my scene, I used the balloons and presents from Monkey Business, the banner from Leaping Lions, and the cake from Later Alligator.  I stamped and colored those, then diecut them with their coordinating dies.  I glued some pieces down with a glue pen and popped some up with foam tape.  I stamped a sentiment from No Tomorrow on a banner diecut from the Tag Me Confetti Cuts set, cut from Premier Polar White cardstock.  To finish things off, I added some accents with a gel pen, and a scattering of iridescent sequins.


No Tomorrow

One of the things that I love most about the critter series from Reverse Confetti is the ability to mix and match across sets.  Because they are drawn in the same super cute whimsical style, the possibilities are really endless!

No Tomorrow

 I will be back soon with more projects using the July release, but there is still LOTS more to see!  The rest of the design team has more cuteness to share with you! Be sure to hop along and leave some love! :)  Thanks for stopping by!!

Amy Kolling

Tricia Barber

Heather Pulvirenti

Lisa Henke

Amy Rohl

Heather Hoffman

Amy Tsuruta

Kathy Schweinfurth

Audrey Tokach - **you are here**

Deanne Kuntz

Jeanne Jachna

Laurie Schmidlin

Susan Liles

And, ‘Fetti Friend…

Therese Calvird


Friday, July 7, 2017

Countdown to Confetti - Day 3


Hello there!  Welcome to day 3 of the Countdown to Confetti with Reverse Confetti!  All of the new products being featured will be available on July 8 at the Reverse Confetti store and at all of your favorite retailers!


Today, my card mixes some old and new.  I paired the adorable little Mouse Mail mice with the new Berry Sweet stamp set and coordinating Berry Sweet Confetti Cuts.  To create my card, I started off by ink blending some of the new Coral ink onto a piece of the new Premier Polar White cardstock with an ink blending tool.  I used the Lotsa Dots stencil over top with more Coral ink for a tone on tone pattern.  I stamped and colored the mice with Copic markers, along with the giant strawberry. For the berry leaves, I inked the top part in the Grass ink, and the bottom in the new Parakeet ink.  To ground my critters, I added a strip of patterned paper from the new Under the Umbrella patterned paper pad, and stamped a sentiment from the Berry Sweet stamp set.  I popped the panel up on a Salsa cardstock base.  For some added interest, I added some score lines to the bottom of the cardbase and a pinked edge border cut from black cardstock using the Edge Essentials Confetti Cuts.  Finally, I added a bow using Charcoal twine, and added some white gel pen accents.


Berry Sweet

If you are familiar with the Mouse Mail stamp set, the little girl mouse is holding a letter.  I inked her up, and used a baby wipe to clean the ink off of the letter so it would not stamp.  I diecut her with the coordinating die, and used my scissors to trim around her little arm.

Berry Sweet

I used a black glaze pen for the eyes and noses on the mice, as well as the seeds on the strawberry.  Little details like this make all the difference! :)

Berry Sweet

The design team has lots more to share with you today!  Be sure to hop along and comment for your chance to win a $15 Reverse Confetti gift certificate!

Amy Kolling

Tricia Barber

Heather Pulvirenti

Lisa Henke

Amy Rohl

Heather Hoffman

Amy Tsuruta

Kathy Schweinfurth

Audrey Tokach - **you are here**

Deanne Kuntz

Jeanne Jachna

Laurie Schmidlin

Susan Liles


BLOG TEMPLATE BY DESIGNER BLOGS