Thursday, September 28, 2017

Confetti Camera - Sneak Peek!


Hey there!  I'm on Confetti Camera today on the Reverse Confetti blog!  Here is a tiny peek at the project that I have to share with you today:

Confetti camera peek

To see the full project, head on over to the Reverse Confetti blog!

Thanks for stopping by! :)

Tuesday, September 26, 2017

Reverse Confetti September SFYTT


Hello there!  Today, I have a card to share with you for the Reverse Confetti September Sketch For You to Try!  Here is this month' sketch:


And here is my card!  I started off with a Premier Polar White card base.  I added a piece of patterned paper from the Very Merry patterned paper pad, to the bottom of the card base.  I diecut the Rounded Stripe Panel from Brick cardstock and glued it flat to the card base with a glue pen.  Then, I used the Fa La La Circle Confetti Cuts to diecut my focal point.  The scalloped circle is cut from Avocado cardstock, while the text layers are cut from Premier Polar White and Brick cardstock.  I popped the circle up with foam tape.  Then I diecut three snowflakes using the Snowflake Trio Confetti Cuts die set, and glued them down with a glue pen.  Finally, I added some iridescent jewels to the center of the snowflakes to finish things off.

September SFYTT

This sketch is a fun one!  Lots of possibilities!

September SFYTT

Be sure to play along with us this month, for your chance to win a Reverse Confetti gift certificate!

Thanks for stopping by! :)


Monday, September 25, 2017

Lawn Fawn and Scrapbook Adhesives Collaboration!


Hello there! We have lots of fun planned for you this week as the Lawn Fawn team is teaming up with our friends over at Scrapbook Adhesives!  They have wonderful products like tape runners, awesome 3D foam squares and Dodz! So after you see the projects here, make sure to head over to their blog for more inspiration!

For my project today, I started off with a Sugarplum card base.  I diecut another piece of Sugarplum card stock with the Outside In Stitched Rectangles, then splattered that piece with some Picket Fence Distress Paint.  I used the Stitched Hillside Borders dies to add a snowy hill, which I adhered with the EZ Runner Adhesive.  I stamped and colored the tree and stack of presents from  Christmas Dreams and popped them up with some 3D Foam Squares.  I diecut some Mini Snowflakes to scatter around the tree, and stamped a sentiment from the Snow Day stamp set.  Finally, I added some white gel pen accents, and popped the finished panel up on the card base with some more 3D Foam Squares.

Merry and Bright

That's all for me today!  Be sure to visit the Lawn Fawn blog for lots more inspiration from the design team!  Thanks so much for stopping by! :)

Thursday, September 21, 2017

Lawn Fawn Inspiration Week Round Up!


Hello there!  I am so sorry for my lack of blog posts this week!  The past few weeks have been complete chaos with the planning for, and arrival of hurricane Irma!  She showed up here in Florida and stole our electricity for several days.  Apart from that, we were very lucky, and had very minor damage.  School was out for the week last week, and things are finally getting back to normal around here.  Rather than make a series of blog posts and clog up your feeds, I thought I would do one giant post of all of the projects that I made to share with you for the Lawn Fawn September Inspiration Week!  If you have any questions about any of the projects, please don't hesitate to ask! :)

Without further a-do, here are my projects!  They have already been featured on my Instagram, and on the Lawn Fawn blog, so you may have already seen them.  Just act surprised! LOL!

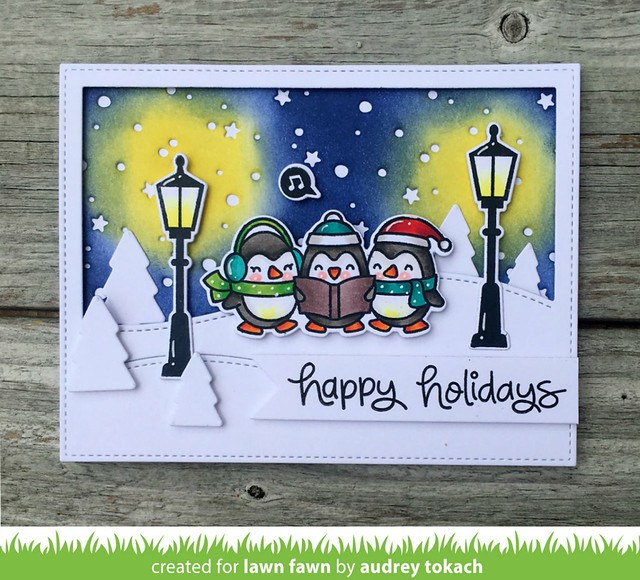
Here We Go Awaddling, Stitched Hillside Backdrop Landscape and Stitched Hillside Backdrops Portrait, Snowy Backdrops die:

Here We Go A'Waddling

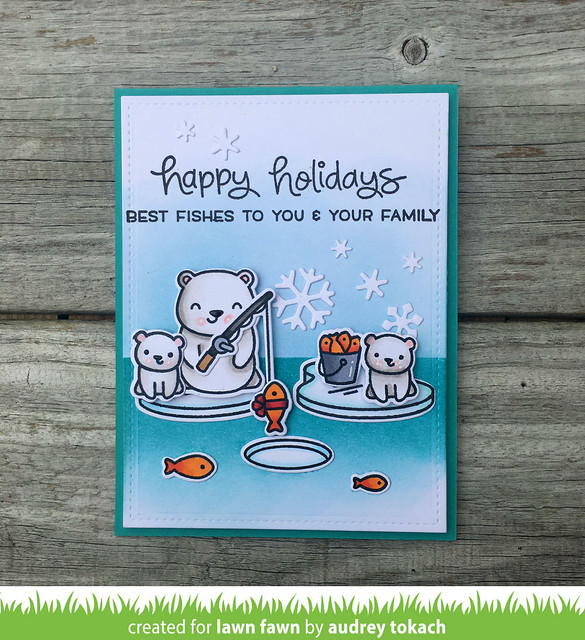
Beary Happy Holidays, Mini Snowflakes:

Beary Happy Holiday

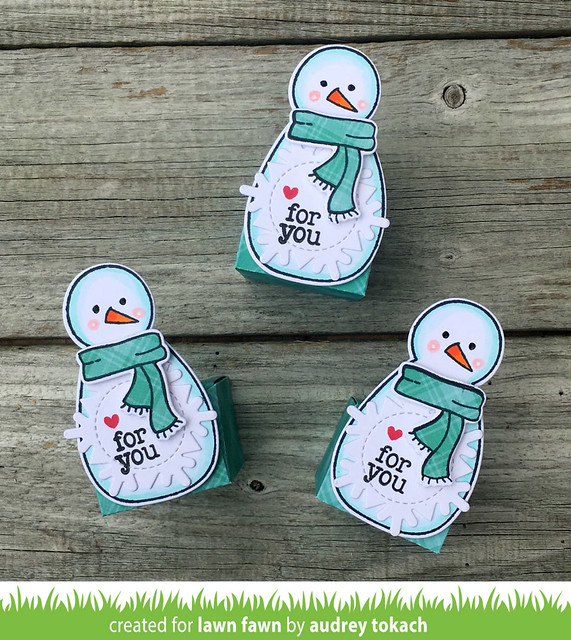
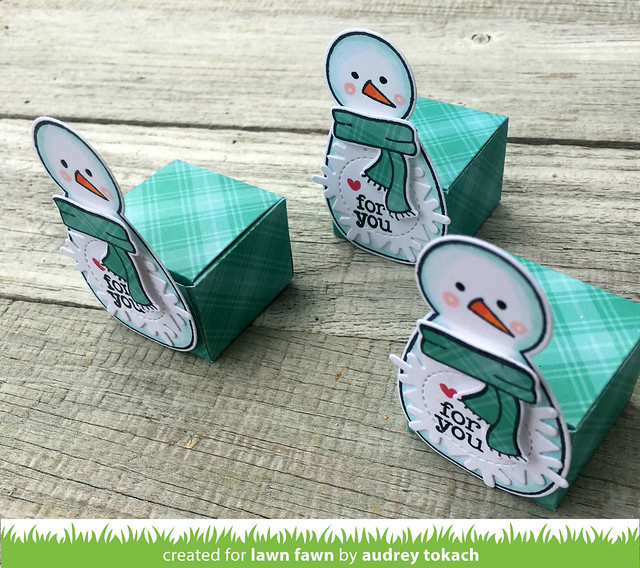
Tiny Gift Box, Winter Tags, Making Frosty Friends, Perfectly Plaid Chill papers:

Mini Cube 3

Mini Cube 1

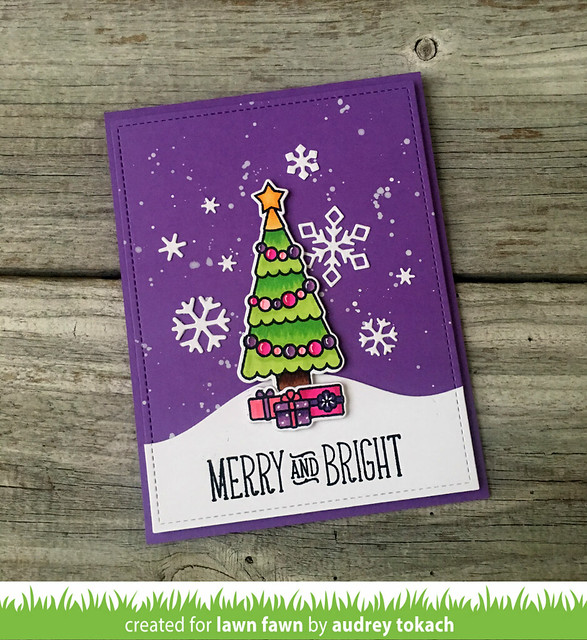
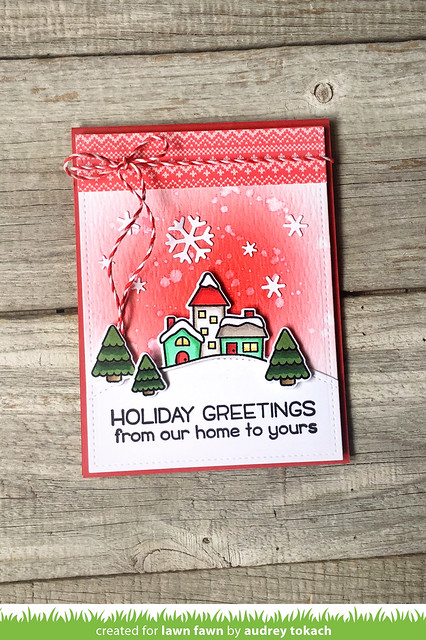
Winter Village, Mini  Snowflakes, Knit Picky papers

Winter Village

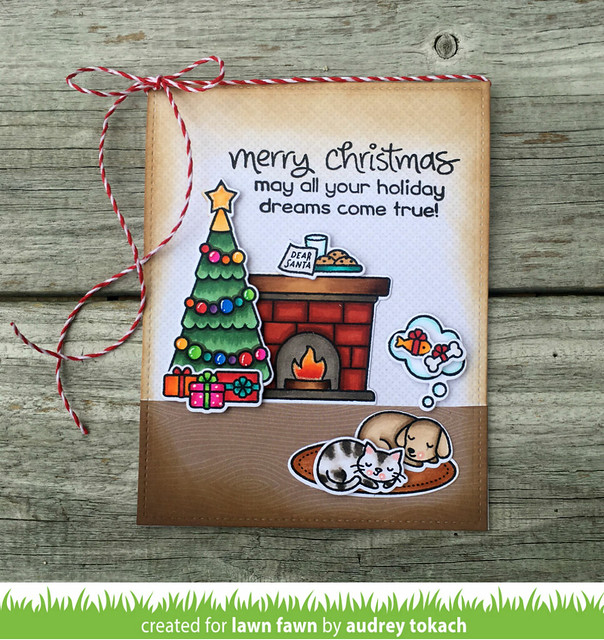
Christmas Dreams, Knit Picky papers, Knock on Wood papers

Christmas Dreams

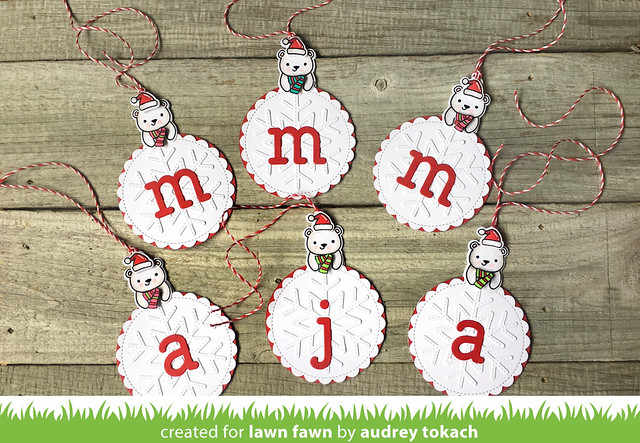
For You Deer, Outside In Stitched Scallop Circles, Stitched Snowflakes, Louie's ABCs

For You Deer Tags

For You Deer Tags

Hope you enjoyed my projects this month!  Stay tuned for more Lawn Fawn goodness, just a few days away!

Thanks for stopping by! :)

With Sympathy {Reverse Confetti}


Hello there!  Today, I have a sympathy card to share with you using products from Reverse Confetti.  Unfortunately, I have needed to make several of these difficult cards over the last few months.  They are tough for me to create because it's for such a sad occasion.  Instead of focusing on that though, I try to think about the person that I am sending the card to while I make it, and pour lots of extra love into creating it.

To make this card, I started off with an A2 Iced Aqua card base.  I used the Wonky Stripe Panel Confetti Cuts to cut a fun panel from Stone cardstock.  I cut it again with some patterned paper from the Free Spirit paper pad.  I glued the diecut to the center of the card, and then used the triangle pieces cut from the patterned paper to fill in a few of the open areas.  I stamped a sentiment from the Sentiment Essentials stamp set in Stone ink, and then diecut it with the coordinating Sentiment Essentials Confetti Cuts.  I popped that up with some foam tape.  Behind the sentiment, I nestled in some leaves from the Build a Bunch stamp set, which I stamped in Stone ink, and shaded with warm grey Copic markers.  Those were then diecut with the coordinating Build a Bunch Confetti Cuts. I added a tiny butterfly, perched on top of the leaves.  I stamped one of the tiny butterflies from the Butterfly Dreams stamp set in Stone ink onto Iced Aqua cardstock, and then diecut it with the coordinating Butterfly Dreams Confetti Cuts.  I added a bit of detail with a copic marker and a white gel pen.


With Sympathy

I added a strip of 1/8" scor-tape to just the center if the butterfly, then carefully folded the wings up for a bit of dimension.  To finish things off,  I added a scattering of clear sequins.

With Sympathy

That's all for me today!  Thanks so  much for stopping by! :)


Sunday, September 10, 2017

Essentials By Ellen New Release

Hello there!  I have a fun post to share with you today!  I have been in the throws of hurricane preparation for the last few days as hurricane Irma is due to pass right over top of my home later today.  It was so nice to be able to sit down and write a blog post and distract myself with something that I love!

I am so honored to have been asked to join in the latest Essentials By Ellen release from Ellen Hutson!  The cutest little Leading Lady is being introduced, and she, along with a bunch of other fabulous new goodies are available in the Ellen Hutson store today!  Read on to find out more!


Let me introduce Leading Lady - Baker Lady!  She is as cute as a button and this stamp set is perfect for holiday as well as everyday cards!  To create my card, I started off by watercoloring a background using shades of Cracked Pistachio and Lucky Clover distress ink onto a piece of Tim Holtz Distress watercolor paper.  I added a strip of polka dot paper to the bottom of the panel to serve as the counter top for my little Baker Lady.  (Now I wish I had polka dot counters!)  I stamped and colored a bunch of images from the Leading Lady - Baker Lady stamp set, and then diecut them with the coordinating Baker Lady dies.  I paper pieced her apron and hair bow with some plaid paper, and popped everything up with foam tape.  Then I stamped a sentiment from the same stamp set, and mounted the panel on a red card base.  To finish things off, I added some white gel pen accents.

Isn't she just so cute?! :)


EH Baker Lady

Here is a peek of the stamp and die sets:


There are so many other great new products being introduced today too!  Be sure to hop along to see what the other designers have to share with you!


Baker Lady – Audrey Tokach   **You are here**

Thanks for stopping by! :)

Friday, September 8, 2017

Reverse Confetti September Blog Hop


Hello there!  It's time for another awesome Reverse Confetti release!  It's blog hop day and that means that all of the new release items that you have seen over the last few days are available in the Reverse Confetti store NOW!


Today, I have a get well card to share with you!  I used a "holiday" stamp set to create a non-holiday card.  I love stamp sets that give you such versatility and more bang for your buck!

I started off with a Premier Polar White card base, and used the new Leaf Lattice Cover Panel, cut from Premier Polar White, to add a white on white layer.  I glued it down flat with a glue pen, and splattered some gold metallic watercolor over top.  Then I stamped and colored the wreath and some of the tiny flowers from the new Fall For You stamp set, then diecut them with the coordinating Fall For You Confetti Cuts.  I popped them up on the card base with foam tape.  For a sentiment, I stamped the "get well soon" image from the previously released Sentiment Essentials stamp set, and diecut it with the coordinating Sentiment Essentials Confetti Cuts.  Then I popped that up in the center of the wreath.

Get Well Soon

If you wanted to make this a more mail friendly card, you could glue everything flat to the card base instead of adding foam tape, but you all know  how much I LOVE my foam tape. LOL!  I think that the white-on-white pattern and subtle gold splatters add so much to the card without overpowering that gorgeous wreath image.  I think this wreath is perfect for every season, and you can get so many different looks just by changing the color scheme.

Get Well Soon

Hop along with the rest of the design team for more inspiration, make your wishlist, and then go shopping! :)  Thanks for stopping by!!


BLOG TEMPLATE BY DESIGNER BLOGS