Sunday, June 5, 2016

Countdown to Confetti - Day 1


Hi there!  Today starts the Countdown to Confetti!  All of the new Reverse Confetti products that are featured here today will be available in the Reverse Confetti store on June 8th!


Today, I have projects to share with you using two new sets this month, and a few other new goodies.  My first pair of projects feature my favorite of the release, Mermaid Kisses. To make my card, I started off watercoloring a piece of watercolor paper to create a underwater background for my scene.  When it was dry, I stamped, and colored the mermaid, jelly fish, plants and shells from the stamp set, and diecut them with the coordinating Mermaid Kisses Confetti Cuts.  I decided where I wanted all of the pieces, and then popped them up with foam tape onto the watercolor panel, then I stamped a sentiment from the same set in the top left corner of the panel.  I added white gel pen accents, and popped the panel up on a white card base using more foam tape.
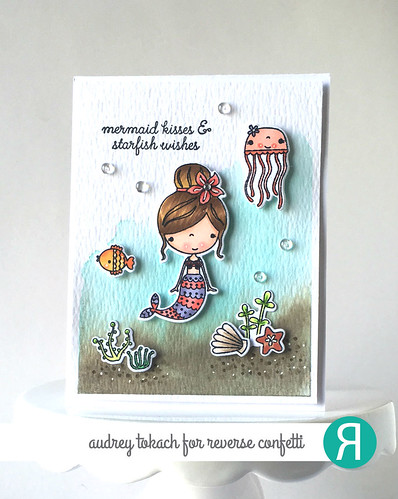
Mermaid Kisses

I created a matching tag using the Mermaid Kisses stamp set, and coordinating Confetti Cuts, along with the Topped Off Tag Confetti Cuts, and the brand new Scalloped Tag Layer die.  I diecut the scalloped layer from light aqua cardstock, then cut the Topped Off Tag from a piece of acetate and a piece of white cardstock.  I adhered the acetate to the scalloped layer, then added a wall of foam tape around the edge of the tag, dumped in some sequins, and then adhered the white tag to the back to create my shaker.  I used all of the same elements from my card to create the rest of my tag.
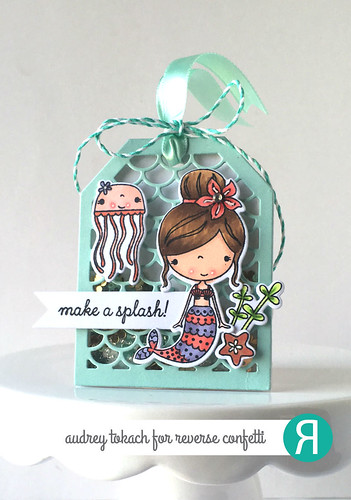
Mermaid Kisses Tag

Here you can see the two pieces together.  I just love this stamp set! :)
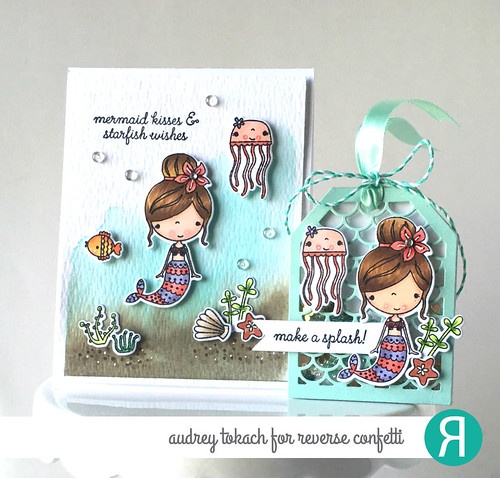
Mermaid Kisses

My second project today uses the new Seaside stamp set and coordinating Seaside Confetti Cuts.  To create this card, I used Distress Ink and an ink blending tool to sponge some ink on the top part of a white card base.  I diecut the new Starburst Cover Panel from yellow card stock to create my starburst sky.  I used the Edge Essentials Confetti Cuts to create a wavey border on one of the new By the Sea Quick Card Panels.  I stamped the cute whale from the Seaside stamp set on grey ink, then diecut him with the Seaside Confetti Cuts dies.  I popped him up on the panel using foam tape.  To finish my scene, I stamped the checkered clouds from the Weather it Together stamp set, and diecut them with the Weather It Together Confetti Cuts.  Finally, I stamped a sentiment from the Seaside stamp set onto a hand cut banner and added some fun iridescent sequins to the water.
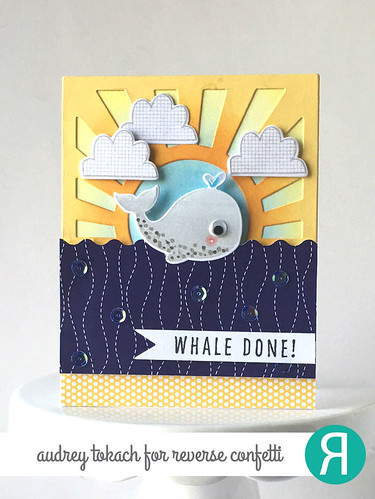
Whale Done!


I love adding little accents like white gel pen, Copic Marker dots, googly eyes and sequins to add more life to my card.  Those finishing touches are my favorite! :)
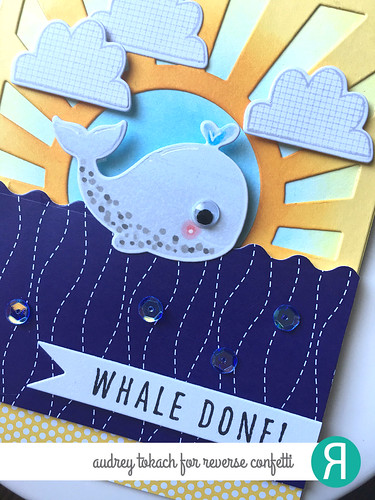
Whale Done!

That's it for me today!  Be sure to visit the Reverse Confetti blog for links to all of the other design team member who are sharing projects with you today! Leave comments along the way for a chance to win a $15 RC gift card.  And don't forget to stop by the RC Facebook page, where another gift certificate is being given away to a lucky winner!

See you back here tomorrow for Day 2 of Countdown to Confetti! :)  

Thanks for stopping by!!


Thursday, May 26, 2016

CardMaker Magazine/Reverse Confetti Blog Hop


Hello there!  Today the Reverse Confetti gang is hopping along with CardMarker Magazine!  My card today uses this month's SFYTT also!

Here is the May sketch:


And here is my card:

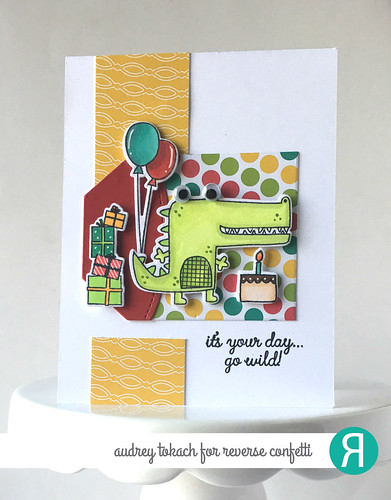
To create my card, I started off with a white card base.  I added a strip of patterned paper using  the Party Time Quick Card Panels.  Then, also using the Party Time Quick Card Panels, I diecut a tag using the Topped Off Tag Confetti Cuts.  I added a topper cut from red cardstock using the Top 'o the Tag Confetti Cuts.  I stamped and colored the alligator, and cake from Later Alligator, the balloons from Monkey Business, and the presents from Lift Me Up and diecut them with the coordinating Confetti Cuts.  I popped them up on the tag with foam tape.  Then I added a sentiment from Lift Me Up, and some accents with a white gel pen.

Go wild!

That's all for me today!  Next stop on the hop is Diane Jaquay!  If you get lost along the way, the full hop order can be found on the CardMaker Magazine blog!

Thanks for stopping by! :)


Wednesday, May 18, 2016

A Tweet Hello {Reverse Confetti}

Hello there!  Today I have a Reverse Confetti post for you!  I just got the Tweet Life Stamp set and couldn't wait to ink it up! :)


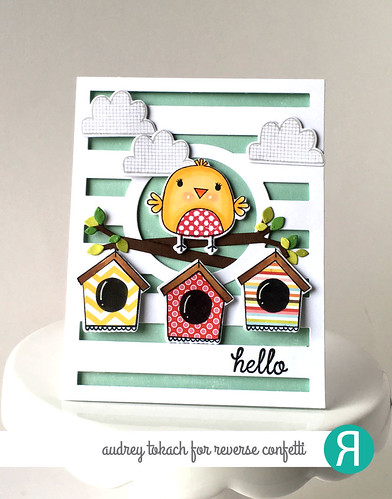
To create my card, I started off by adhering a piece of aqua patterned paper to a white card base.  Then, I diecut the Big Stripes Cover Panel Confetti Cuts out of white cardstock.  I mounted it onto the card base using foam tape.  Then I stamped and colored the little bird from Tweet Life with Copic markers and then diecut him, and the branches he is sitting on, using the Tweet Life Confetti Cuts die set.  I stamped the birdhouse from the stamp set, three times onto white cardstock and diecut them.  The cardstock helped to sturdy up the bird houses for paper piecing.  To further create the scene, I stamped  a few of the large clouds from the Weather It Together stamp set and diecut them with the coordinating Weather It Together Confetti Cuts.  I added all of the pieces to the striped panel using foam tape, and stamped a sentiment from the Tweet Life stamp set on the bottom right  corner of the card.  

Tweet Hello

I will be entering this in the current Curtain Call Challenge - Birdhouses.


That's all for me today!  Thanks so much for stopping by! :)


Tuesday, May 17, 2016

I Wheelie Like You {Lawn Fawn}

Hi there!  Today I am sharing this card on the Lawnscaping Challenges blog.  I love making mini card sometimes, because the change in "canvas size" is refreshing to me.  I often make mini cards when I want a smaller stamp set to be the star of the show.

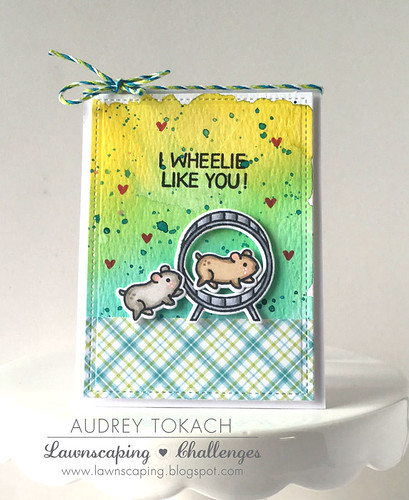
For this card, I started off by creating a watercolor background for my little scene.  When it was dry, I diecut it with one of the Small Stitched Rectangles Stackables die set.  I stamped, colored and diecut the cute little hamster and wheel from the Wheelie Like You stamp set.  I wanted a pair of hamsters, so I stamped and colored two of them.  I used a snippet of Perfectly Plaid patterned paper to ground my scene, and then popped the hamsters and wheel up using foam tape.  I stamped the sentiment from the stamp set just above the images, then mounted the panel on a white card base, and added a twine bow to the top of the card to finish it off.

I Wheelie Like You

That's all for me today!  Thanks so much for stopping by! :)


Monday, May 16, 2016

Lawnscaping Challenge #130 - Sparkle and Shine

Hello there!  It's time for another Lawnscaping Challenge!  This week, we are all about sparkle, shine and shimmer!


This challenge is sponsored by our friends at Lawn Fawn!


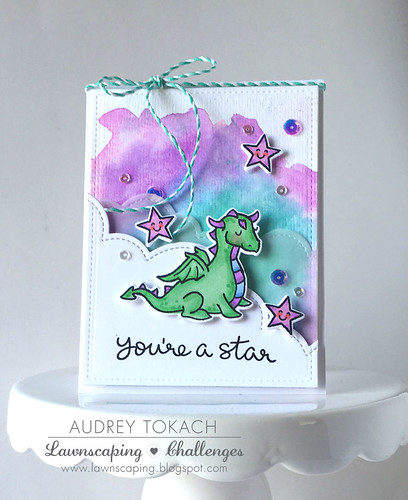
For my card today, I started off by watercoloring a background.  Then, when it was dry, I diecut a stitched edge using the Small Stitched Rectangles dies.  I diecut some clouds out of white cardstock and vellum using the Puffy Clouds Borders. On the white cloud layer, I stamped a sentiment from the So Jelly stamp set.  Then I stamped, colored and diecut the dragon and stars from the Critters Ever After stamp set.  I popped them up using foam tape, and then added some iridescent sequins for some sparkle.


You're a Star

Be sure to visit the blog for lots more inspiration from the design team!  I hope you will join us for a chance to win!

Thanks for stopping  by!

Supplies:

All listed and linked above :)

Sunday, May 8, 2016

Reverse Confetti May Blog Hop

Woohoo! It's the day we have been waiting for all week!  Happy release day!  All of the Reverse Confetti new release goodies are available NOW in the Reverse Confetti store!


Today my card showcases a few new goodies that I haven't had a chance to show you yet!

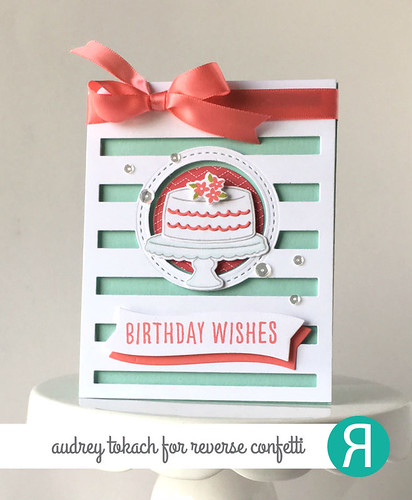
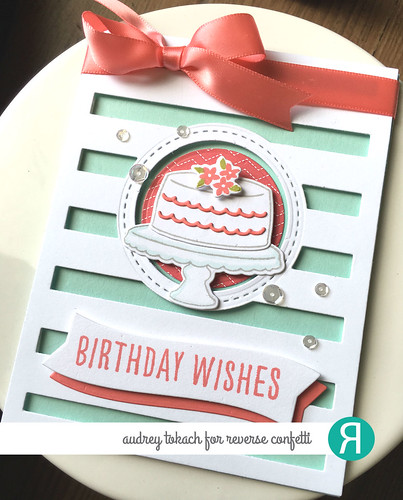
I started by diecutting the new Big Stripes Cover Panel from white cardstock.  I added a stitched detail around the circle opening in the panel using the new Detailed Circles Confetti Cuts.  I added a snippet of patterned paper to the center of the circle using the new Party Time Quick Card Panels.  For my focal point, I stamped the cake and cake plate from the Candles 'n Confetti stamp set, and diecut them with the coordination Candles 'n Confetti Confetti Cuts.  I added flower and icing details to the cake using stamps and dies from the same set.  I adhered the striped panel diecut to an aqua card base using foam tape, then I added the cake image with a combination of foam tape and glue pen.  I added a sentiment from the Celebrations stamp set to a banner diecut from the Flowers for Mom Confetti Cuts die set.  To add a pop of color at the bottom of the card, I diecut a second banner in coral cardstock and glue it to the sentiment banner, slightly offset.


Birthday Wishes

To finish things off, I added a scattering of sequins and a beautiful coral colored satin bow.

Birthday Wishes

Thanks for stopping by!!
Hop along with the rest of the gang, and then go fill up your cart! *wink*


‘Fetti Friend–Laura Bassen
‘Fetti Friend—Wanda Guess
‘Fetti Friend—Thanh Vo
Audrey Tokach - **You are here**
‘Fetti Friend—Candi Billman


BLOG TEMPLATE BY DESIGNER BLOGS