Friday, January 7, 2022

Reverse Confetti Countdown to Confetti - Day 3

Hello there!  It's day three of the Countdown to Confetti at Reverse Confetti!  This might be one of my favorite releases ever!  All of the products that you see over the next few days will be available in the Reverse Confetti store and at your favorite retailers on January 8th!   

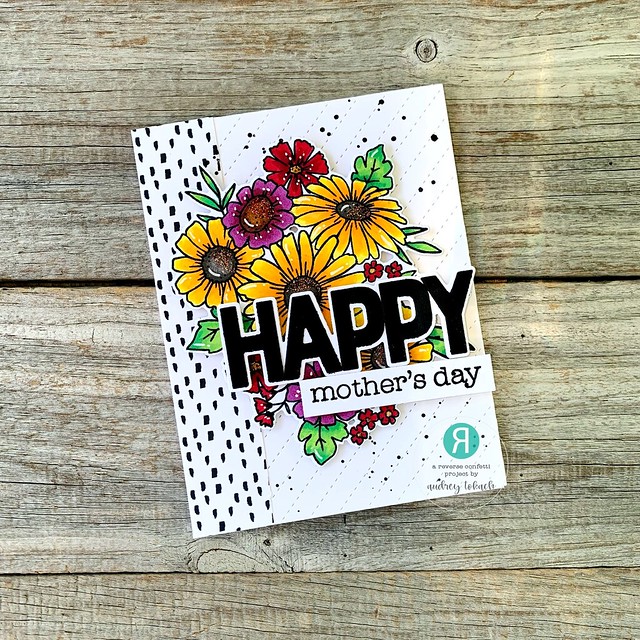
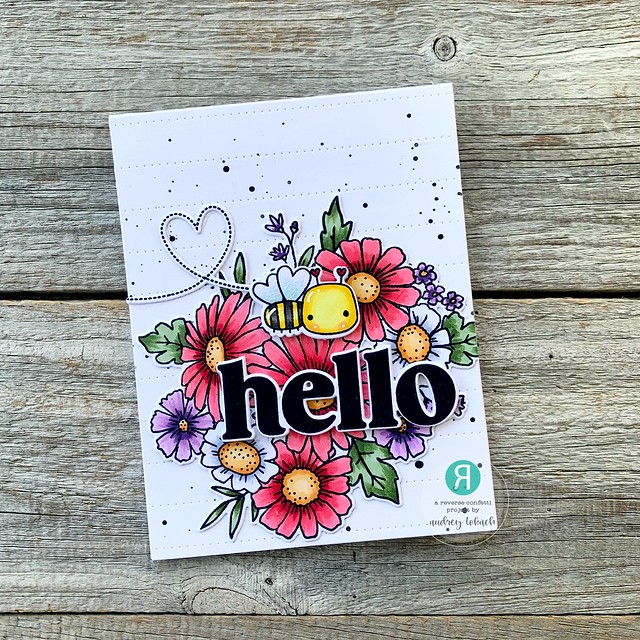
Today, I get to share my two favorite projects of this release!  The new Hello Daisy stamp set is a gorgeous floral bouquet, and it pairs perfectly with the new Love Bugs stamp set, if I do say so myself ;)

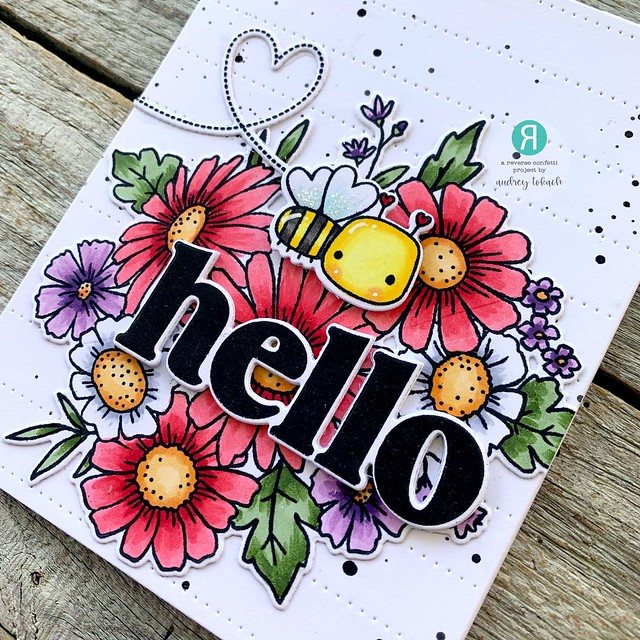
To create this card, I started off by diecutting a piece of white cardstock with the Along the Dotted Lines Cover Panel  (one of my most favorite RC products if you can't tell!) which I splattered with black watercolor.  I stamped and colored the floral cluster from Hello Daisy with my Copic markers and diecut it with the coordinating Hello Daisy Confetti Cuts dies.  Then, I stamped one of the cute little bees from Love Bugs along with the flight trail and diecut them with the coordinating Love Bugs Confetti Cuts dies.
January 7 - Hello Daisy 1

I glued the floral image down with a glue pen, and popped the bee up with foam tape.  The sentiment from Hello Daisy is a bold solid font, which I stamped in black ink, and diecut.  I also cut the diecut three more times from white and stacked them together for dimension without foam tape.  I finished off the card with some glitter on the bee's wings and some white gel pen accents.

January 7 - Hello Daisy 2

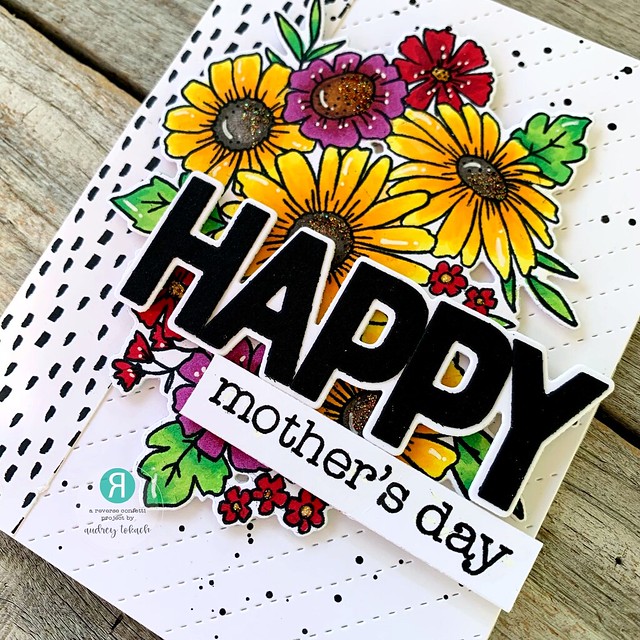
My second card also features the Hello Daisy stamp set, this time colored a little differently to mimic Black Eyed Susans, one of my Nana's favorite flowers.  I created this card much the same way as the last.  I diecut white cardstock with the Diagonal Stitches Cover Panel, splattered it with black watercolor, then added a strip of black and white patterned paper to the left edge.  I stamped and colored the Hello Daisy flowers with Copic Markers, this time in colors that remind me of wild flowers.  Then, I diecut the images with the coordinating Hello Daisy Confetti Cuts.

January 7 - Hello Daisy 3

For the sentiment, I used the previously released Happy Coordinates stamp set and coordinating Happy Confetti Cuts.  I diecut the HAPPY in black with a white shadow, then stamped a Mother's Day sentiment underneath, popped up on a strip of white cardstock.  To finish off my card, I added some Stickles glitter and white gel pen accents.

January 7 - Hello Daisy 4

That's all for me today!  Be sure to hop along with the rest of the team and our special guests this month!  Comment along the way for your chance to win a Reverse Confetti gift certificate!  I hope you will come back tomorrow for release day and the big blog hop!

The hop starts here:

Reverse Confetti

Audrey Tokach - * you are here*

Maria Russell

Lisa Henke

Amy Kolling

Kellianne Wilson

Dana Kirby

Amy Tsuruta

Melissa Phillips

Jeanne Jachna


Thursday, January 6, 2022

Reverse Confetti Countdown to Confetti - Day 2


Hello there!  It's day two of the Countdown to Confetti at Reverse Confetti!  This might be one of my favorite releases ever!  All of the products that you see over the next few days will be available in the Reverse Confetti store and at your favorite retailers on January 8th!   

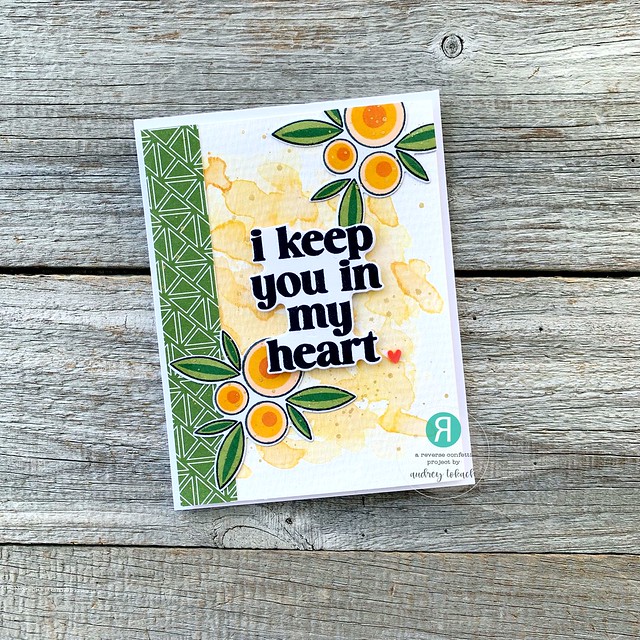
Today, we are showing off the new Poppies stamp set and coordinating Poppies Confetti Cuts!  For my first card, I started off by watercoloring a piece of watercolor paper with Distress Ink ink Wild Honey.  I cut the panel down to 4" x 5.25" and added a strip of patterned paper to the left side of the panel.  Then, I stamped the Poppies in black ink and filled them in with three shades of orange ink and two shades of green ink.  I adhered them down with a glue pen and splattered on gold metallic watercolor over everything.

January 6 - Poppies 1

After the watercolor dried, I stamped a sentiment from the new Big Heart Sentiments stamp set and diecut it with the coordinating dies.  I popped that up in the center of the panel, and added a tiny clay heart as punctuation for my sentiment.  To finish off the card, I popped the panel up on an A2 card base with foam tape.

January 6 - Poppies 2

For my second card, I started off by diecutting a piece of patterned paper with the Stitched Rays Cover  Panel (which I belive was recently retired).  Over top of that, I added a horizontal strip of contrasting patterned paper.  Then, I used the Celebrate Tag to serve as a backdrop for my sentiment.  The large sentiment is another from the new Big Heart Sentiments stamp set, and the smaller sentiment is from the Poppies stamp set.  This time, I stamped the Poppies in shades of yellow.

January 6 - Poppies 3

I finished off the tag with some jute twine and a black diecut heart along with some gel pen accents.

January 6 - Poppies 4

That's all for me today!  Be sure to hop along with the rest of the team and our special guests this month!  Comment along the way for your chance to win a Reverse Confetti gift certificate!  I hope you will come back tomorrow to see more of the new release!

The hop starts here:

Reverse Confetti

Audrey Tokach - * you are here*

Maria Russell

Lisa Henke

Amy Kolling

Kellianne Wilson

Dana Kirby

Amy Tsuruta

Melissa Phillips

Jeanne Jachna


Wednesday, January 5, 2022

Reverse Confetti Countdown to Confetti - Day 1

Hello there!  It's day one of the Countdown to Confetti at Reverse Confetti!  This might be one of my favorite releases ever!  All of the products that you see over the next few days will be available in the Reverse Confetti store and at your favorite retailers on January 8th!   I have three projects to share with you today, so grab a cup of coffee and we will get going!

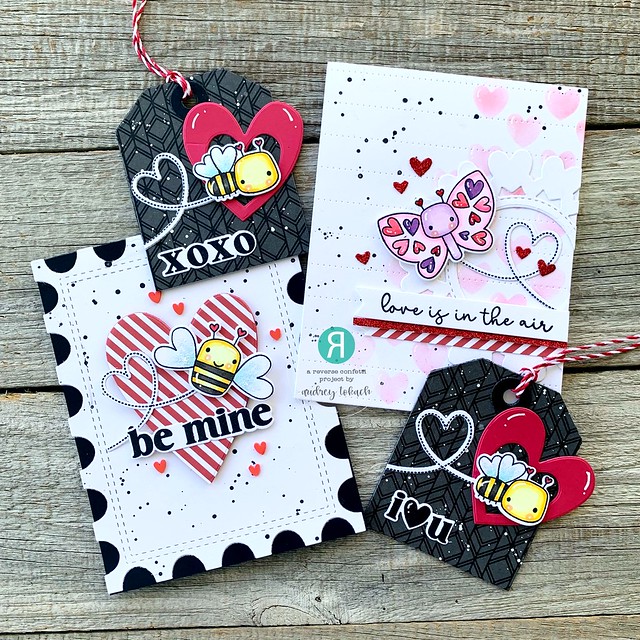
How ADORABLE are these Love Bugs?!  Read on to see how I created this little ensemble!

January 5 - Group

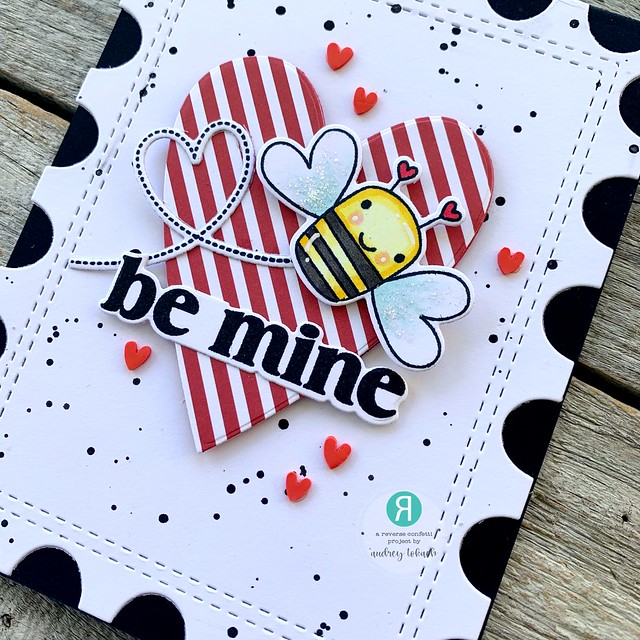
First up, I created this card with the new Love Bugs stamp set and the Postal Cover Panel.  I started off by diecutting the Postal Cover Panel from white cardstock, and splattered it with black watercolor.  I used the largest heart from the die Postal Cover Panel die set to add a striped heart behind the focal image.  I stamped and diecut one of the little bees from the Love Bugs stamp set, along with the flight path, and diecut them with the coordinating Love Bugs Confetti Cuts.

January 5 - Big Heart Sentiments 1

The sentiment is from the Big Heart Sentiments stamp set, which has coordinating dies!  To finish off this card, I adhered it to a black card base, added some white gel pen accents and Stickles glitters to the bee's wings, and finally a scattering of tiny clay hearts from my stash.

January 5 - Big Heart Sentiments 2

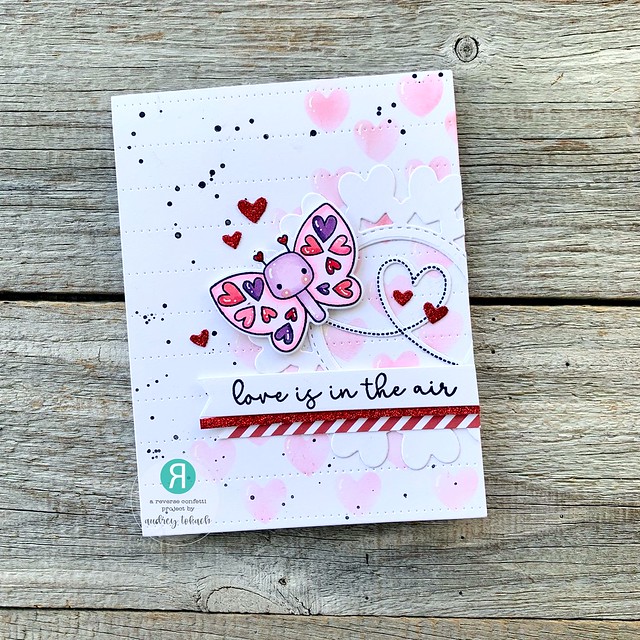
Next up, a card using the cute little butterfly from the Love Bugs stamps set!  I diecut a piece of white cardstock with the Along the Dotted Lines Cover Panel, and splattered it with black watercolor.  Then, I diecut the Oh My Heart Cover Panel from copy paper and used it as a stencil to add faint pink hearts to the right side of the panel.  I used the new Large Circle of Hearts Confetti Cuts cut from white cardstock to add a frame over top of the stenciled area.  I stamped the butterfly and the flight trail from Love Bugs and popped it up with foam tape.

January 5 - Valentines Sentiments 1

I stamped a sentiment from the new Valentine Sentiments stamp set on a white banner and added strips of striped paper and red glitter paper underneath.  I finished off the card with a scattering of red glitter hearts, some Christmas Red Stickles on the butterfly's antennas and some white gel pen accents.

January 5 - Valentines Sentiments 2

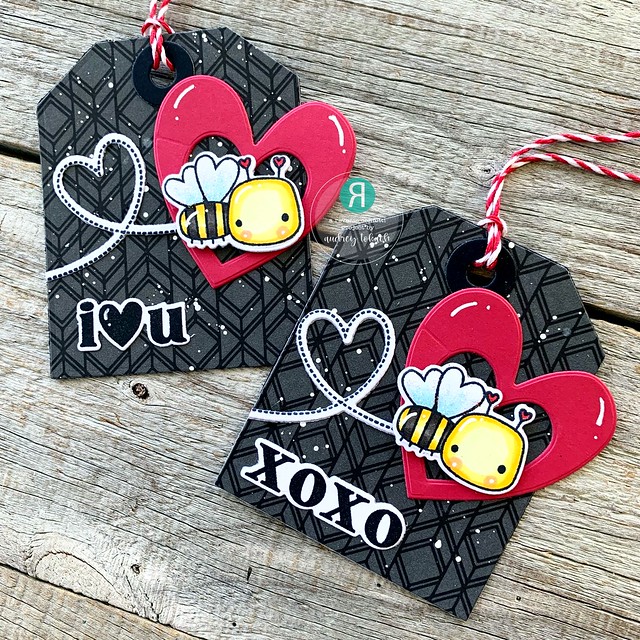
Finally, I made a set of tags to complete the ensemble.  I diecut the new Lovely Tag Confetti Cuts die twice from black pattened paper and splattered each with watered down white acrylic paint.  Then, keeping the two heart dies from the set connected, I ran them through my diecut machine with red cardstock to create a heart frame.  I stamped one of the bees and the flight trail from Love Bugs, colored them, and diecut them to pop them up with foam tape.

January 5 - Love Bugs 1

I added a sentiment to each using sentiments from the Big Heart Sentiments stamp set, which I diecut with the coordinating dies.  To finish off the tags, I added Stickles glitter to the bee's wings, and some white gel pen accents before tieing each with some red and white twine.

January 5 - Love Bugs 2

That's all for me today!  Be sure to hop along with the rest of the team and our special guests this month!  Comment along the way for your chance to win a Reverse Confetti gift certificate!  I hope you will come back tomorrow to see more of the new release!

The hop starts here:

Reverse Confetti

Audrey Tokach - * you are here*

Maria Russell

Lisa Henke

Amy Kolling

Kellianne Wilson

Dana Kirby

Amy Tsuruta

Melissa Phillips

Jeanne Jachna


Friday, December 31, 2021

Sunny Studio Stamps - Heart Bouquet


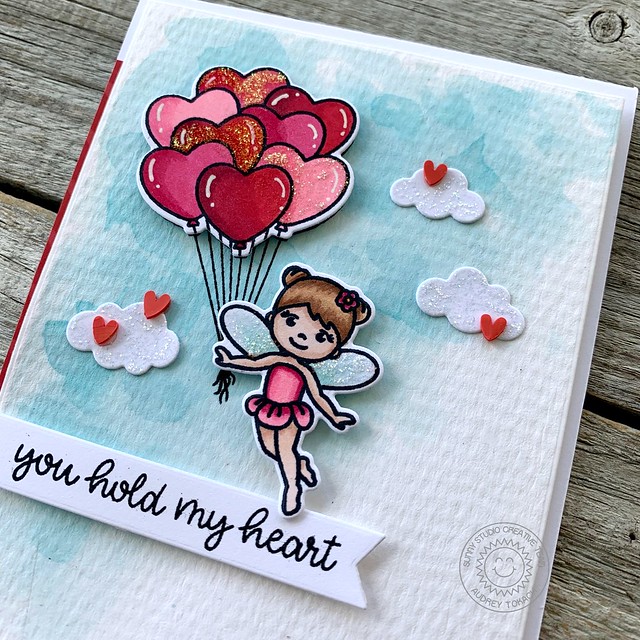
Hello Friends!  I am here with one last card for 2021 featuring Sunny Studio Stamps!  Today, my card uses the Heart Bouquet stamp set, which pairs perfectly with the adorable Garden Fairies!  To create my card, I started off by watercoloring a background using Tumbled Glass Distress ink.  The panel measures 4" x 5.25". I placed the Heart Bouquet where I wanted it, and stamped it in black ink onto the panel so that I could have the balloon strings.  Then, I stamped and colored the balloons from Heart Bouquet, and diecut them with the coordinating Heart Bouquet dies.  The cute little fairy from the Garden Fairy stamp set was colored in coordinating shades of pink, and popped up as if she was holding the bunch of balloons.  

Audrey_HeartBouquet1

Around her, I added a trio of tiny clouds diecut using the Comic Strip Everyday dies.  Before popping the panel up on an A2 card base, I added a strip of red heart paper from the Rainbow Bright 6x6 paper pad to the left edge of the card base.  To finish off my card, I added some white gel pen accents, Diamond Stickles for some sparkle, and a scattering of tiny clay hearts.

Audrey_HeartBouquet2

That's all for me today!  Thanks so much for stopping by! :)


Tuesday, December 28, 2021

Heffy Doodle - Feel Better Soon!


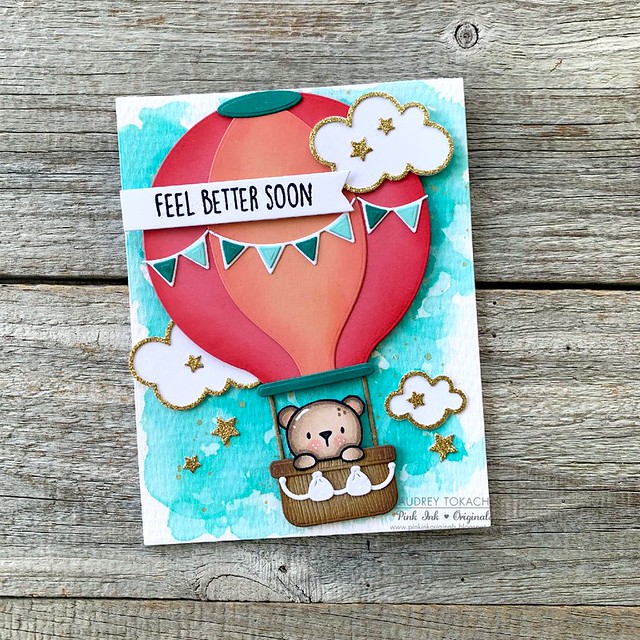
Hello friends!  Today, I am here with my second post as Heffy Doodle guest designer for the month of December!  As soon as I saw the super adorableHot Air Balloon, I knew I had to have it!  This card uses also uses one of the cute little critters from the Bed Heads stamp set.  To create my card, I started off by painting a piece of watercolor paper with Salvaged Patina Distress Ink to create a sky.  I diecut all of the pieces of the balloon, using pink and coral cardstock for the main part of the balloon, teal and aqua cardstock for the accents, and woodgrain cardstock for the balloon basket.  The little bear from the Bed Heads stamp set was colored with Copic markers and fussy cut with my scissors, though if you prefer, there are coordinating Bed Heads Dies available.

Heffy Doodle

I added a trio of clouds to the sky around the balloon.  The dies that I used have a coordinating frame die, but you could achieve a very similar look with the Swirly Cloud Dies or the Big Stitched Cloud Dies, along with some gold Stickles around the edges.  A sentiment from the Bed Heads stamp set was stamped on a banner diecut and popped up near the top of the card.   I added a scattering of tiny glittery stars from my stash, and some white gel pen accents to finish off my card.


Heffy Doodle

I am so thrilled and thankful to have been asked to guest design this month!  Heffy Doodle products are so  much fun, and make creating a dream!  Thank you to Lesley and crew for having me!  Wishing you all a happy, healthy and blessed 2022!

Friday, December 24, 2021

Sunny Studio Stamps - Lacy Snowflakes


Hello friends! Happy Christmas Eve to those who celebrate!!  Today I am  here with a fun winter themed project using one of my favorite stamp sets from Sunny Studio, Feeling Frosty and the Lacy Snowflake dies!  To create my card, I started off by watercoloring a piece of watercolor paper cut to 4" x 5.25" with Speckled Egg Distress Ink.  When it was dry, I splattered on some watered down white acrylic paint.  I stamped and colored one of the adorable snowmen from Feeling Frosty, along with a tree from the set, and diecut them with the coordinating Feeling Frosty dies.  I popped them up on a snow bank cut cut using the Slimline Nature Borders dies.  To add some interest to the sky, I cut three Lacy Snowflakes from white cardstock and adhered them above the snowman with a glue pen.  

Audrey_LacySnowflakes1

A sentiment from Feeling Frosty was stamped on a banner diecut and popped up near the bottom of the card.  Before mounting the panel to an A2 card base with foam tape, I added a strip of red patterned paper from the All is Bright paper pad. To finish off my card, I added a trio of tiny clay hearts and some white gel pen accents.

Audrey_LacySnowflakes2

That's all for me today!  Thanks so much for stopping by! :)

Friday, December 17, 2021

Sunny Studio Stamps - Icing Borders


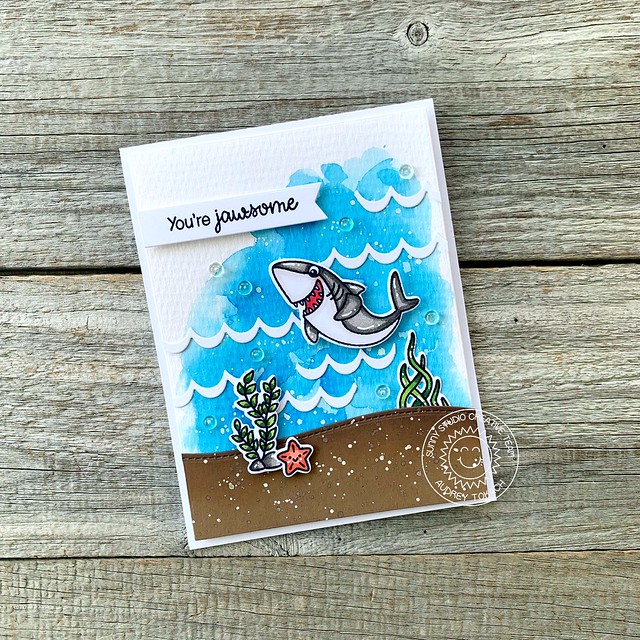
Hello friends! Today, I have a fun card to share with you that uses the Icing Borders from Sunny Studio Stamps in a unconventional way!  To create my card, I started off with a piece of watercolor paper cut to 4" x 5.25".  I used Distress ink in Salty Ocean to watercolor an underwater background.  I diecut a piece of kraft cardstock with the Slimline Nature Borders dies, then inked the edges with Vintage Photo Distress Oxide before splattering the entire panel with watered down white acrylic paint.  Then, I stamped and colored the adorable shark from the Sea You Soon stamp set, and diecut him with the coordinating Sea You Soon Dies.  I used images from the Best Fishes stamp set to decorate the ocean floor, and diecut them with the coordinating Best Fishes Dies.  

Audrey_IcingBorders1

I popped all of the images up with foam tape, then used the Icing Borders dies cut from white cardstock to add waves all around them.  I cut them smaller to fit in the spaces around the shark.  I stamped a sentiment from the Best Fishes stamp set on a white banner and popped that up at the top of the panel, then adhered the panel to an A2 card base.  To finish off my card, I added some white gel pen accents and a scattering of tiny bubbles.

Audrey_IcingBorders2

That's all for me today!  Thanks so much for stopping by! :)

BLOG TEMPLATE BY DESIGNER BLOGS