Monday, December 26, 2016

Reverse Confetti December SFYTT


Hello there!  Today I have a card to share with you for the Reverse Confetti December SFYTT!

Here is December's sketch:


And here is my card:


December SFYTT 

To create  my card, I started off with a piece of watercolor paper.  I masked off the bottom with a few post it notes, and used an ink blending tool and ink to create an ombre effect on the of portion of the watercolor paper.  I like to use this type of paper because I find that the ink blends better for me than on smooth cardstock.  I diecut the new Bar Tag Layer from patterned paper from the Warm Hearts paper pad, and then cut a solid tag from Mist cardstock using the Topped Off Tag Confetti Cuts.  I stamped a sentiment from the new You're So stamp set in Navy ink, and diecut the word "fabulous" from Navy cardstock several times, gluing them on top of eachother for dimension.  I used the You're So Confetti Cuts die set.  I added a banner cut from more Warm Hearts patterned paper, popped the tag up using foam tape, and then added a button and scattering of wooden stars to finish off the panel, then popped the whole thing up on a Navy card base using foam tape.

December SFYTT

There is still time to play along with the December SFYTT!  You could win a Reverse Confetti gift certificate!!

Thanks for stopping by! :)


Tuesday, December 13, 2016

Lawn Fawn December Inspiration Week - Octopi My Heart


Hello there!  Welcome back to day 2 of Lawn Fawn Inspiration Week!  Today, we are showcasing my favorite products from the release, Octopi My Heart and the Fancy Scalloped Rectangles and Fancy Scalloped Circles.

To create my card, I used Peacock Feathers, Mermaid Lagoon and Chipped Sapphire Distress inks to create and ink blended background on watercolor paper.  Then I diecut the background with a Dotted Circle Stackable.  I diecut 2 of the largest Fancy Scalloped Circle Stackables.  I stamped. colored and diecut two of the adorable little octopus from the new Octopi My Heart mini stamp set.  I pulled out my Mermaid for You stamp set and stamped and colored the rocks and seaweed from that set.  I arranged everything on the ink blended circle, and popped it up on one of the Fancy Scalloped Circle.  I scored the other Fancy Scalloped Circle diecut, and attached it to the back of the decorated one with Scor-tape.

Octopi My Heart

That's all for me today, but be sure to stop by the Lawn Fawn Blog to see lots more inspiration from the design team!

Thanks for stopping by! :)

Monday, December 12, 2016

Lawn Fawn December Inspiration Week - Love Letters

Hello there!  Happy Monday!  Lawn Fawn Inspiration Week has begun!  A new release of lovey-dovey goodness is coming your way!  Over the next few days, the design team will be sharing projects using the new products!  Today, we are showcasing Love Letters and Happy Mail.  I have used Love Letters and a few other new goodies on my card today.

To create my card, I started off with a white A2 card base.  I diecut the largest die from the new Fancy Scalloped Rectangles die set from white cardstock.  Then I used an ink blending tool to ink blend a pink ombre background using Picked Raspberry, Worn Lipstick and Spun Sugar distress inks.  I diecut that background using the largest die from the Small Dotted Rectangles Stackables die set.  I stamped, colored and diecut images from the new Love Letters stamp set.  To ground them, I added some banners, some cut from Perfectly Plaid patterned paper, and some cut from cardstock.  I used the new Valentine Borders dies to diecut a string of tiny hearts from one of the banners, then added a tiny white scalloped border, also from the Valentine borders die set.  I used the hearts that were cut from the banner and scattered them about to finish the card. Finally, I popped the whole panel up on the card base using foam tape.


Love Letters

Be sure to visit the Lawn Fawn blog to see lots more inspiration from the design team!  And stop back here tomorrow for another project that I created using the December new release products! :)

Thanks for stopping in! :)


Thursday, December 8, 2016

Reverse Confetti December Blog Hop!


Woohoo!  It's Reverse Confetti Release Day, and we are hopping!  All of the new release is available NOW in the Reverse Confetti Store!


Today, I have a tag set to share with you using several goodies from the new release including the new Peekaboo Tag Layer, Mouse Mail, and Outlined.

You should have come from Amy Tsuruta's blog! If you have gotten lost or want to start at the beginning, you can head over to the Reverse Confetti blog.

For this pair of tags, I used the Peekaboo Tag Layer along with images from Candles n' Cake and Mouse Mail.  The first tag is cut from patterned papers from the Holly Jolly paper pad, and the second tag is cut from patterned paper from the Fright Night paper pad.

Peekaboo Tags

For this set of tags, the first one was the Peekaboo Tag Layer cut from watercolor paper, and ink blended to look like a galaxy sky.  To the front I added a star from the Seeing Stars Confetti Cuts set.  The second tag is cut from the Warm Hearts paper pad with a cute little flower from Blooms n' Buds.

Peekaboo Tags''

Inside of each tag, I stamped a sentiment from the Outlined stamp set.

Peekaboo Tags

Next stop on the hop is Amy Sheffer!!

Thanks for stopping by today! :)


Wednesday, December 7, 2016

Countdown to Confetti - Day 3


Hello Hello!  It's that time again!  The Countdown to Confetti has begun!  Over the next few days, we will be sharing all of the new release goodies with you, and the December release will be available in the Reverse Confetti store on December 8th!


Today, we are showcasing a new set called Figure of Speech.  This set is full of fun, whimsical speech bubbles perfect on their own, or paired with any of the adorable critters in the Reverse Confetti collection!  I paired them with the adorable new nice from Mouse Mail for my card today!


Figure of Speech

To create my card, I started off with a Lime cardstock base.  Then, I used the Big Stripes Cover Panel cut from Navy cardstock for the next layer.  I adhered that to the lime green card base with a glue pen and added a patterned circle in the center with paper from the Warm Hearts Paper Pad.  I stamped one of the mice from Mouse Mail, colored, and diecut him, and stamped one of the sentiments from the Figure of Speech stamp set in black ink and then diecut that.  I popped both pieces up with foam tape to complete my card.


Figure of Speech

That's all for me today!  Be sure to visit the Reverse Confetti blog for lots more inspiration from the design team, and stop back by tomorrow for our new release blog hop! :)

Thanks for stopping by!!


Tuesday, December 6, 2016

Moments Inked Meal Planner Review


Hello there!  Today I have a review to share with you!  Recently, Papertrey Ink sent me their newest addition to the Moments Ink line up.  They recently introduced their 2017 planner, and along with that came the introduction of the Moments Inked Meal Planner!

If you are anything like me, you make a grocery list and leave it on the counter at home.  When you get to the store having forgotten the list, you fill your cart with things you don't really *need* and leave spending double what you intended!  LOL!  The MI Meal Planner fixes those problems for me!

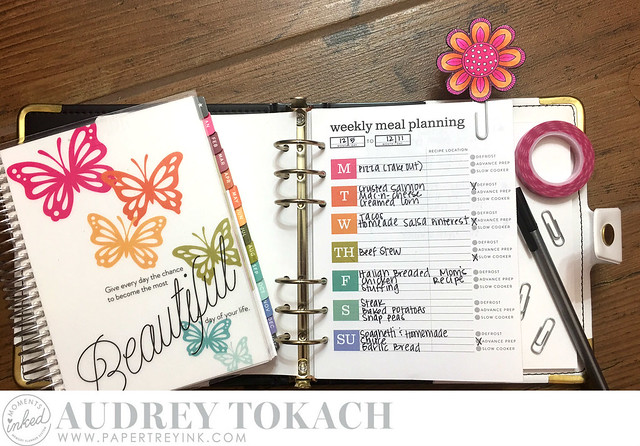
The Meal Planner comes in two formats, spiral bound, and binder insert.  Here you can see my 2017 planner on the left, and the binder insert meal planner on the right.  The meal planner coordinates perfectly with color scheme of the annual planner, and using them together makes my matchy-matchy heart skip a beat!

PTI Moments Inked Meal Planner

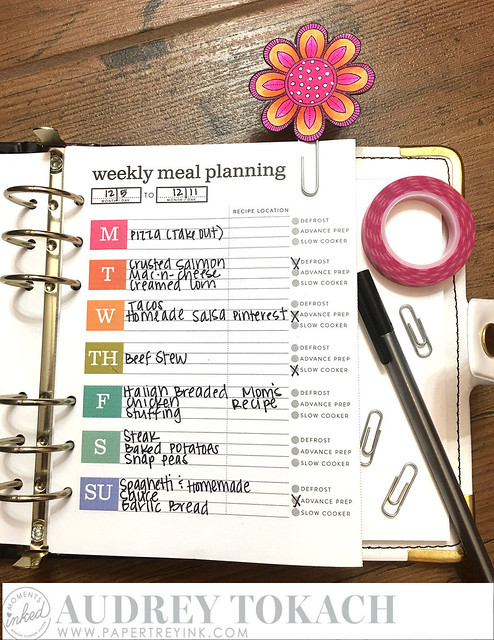
I love that with the binder insert version, you are able to integrate the pages right into your daily planner (as seen in yesterday's post) or dedicate a binder just for meal planning as I have shown here.  Dinner is the hardest meal of the day for us, so I have dedicated this page of my meal planner to weekly dinner planning, but there are three lines for every day of the week to allow for breakfast, lunch and dinner planning.  To the right of that column, there is a recipe location column to note where the recipe for that meal can be found, and next to that, there are check boxes to remind you to defrost, advance prep, or put something in the slow cooker.

PTI Moments Inked Meal Planner

I am wanting to teach my children how to cook, so I plan to create step-by-step cards for easier meals to start, and as they get comfortable in the kitchen, work up to harder recipes.  I diecut the Moments Inked Die Pages from white cardstock, and stamped lines from Moments Inked: Posted II.  I wrote step by step instructions for our beef stew dinner, and can easily remove the page and stick it on the kitchen counter for my son's to tackle dinner prep.

PTI Moments Inked Meal Planner

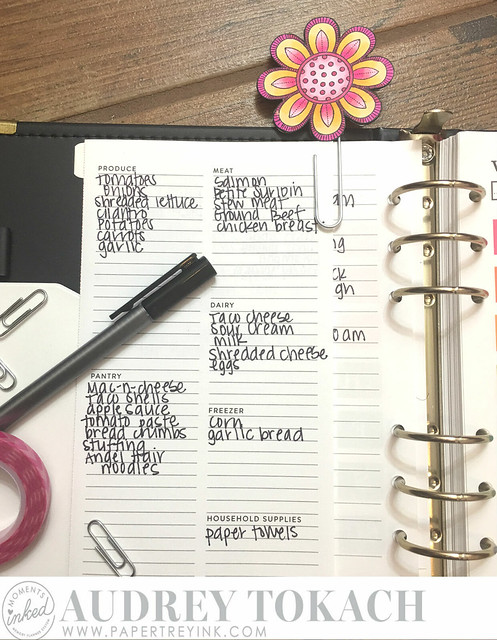
On the back side of the meal planner insert page, is a perforated grocery list, separated by category, for making grocery shopping a breeze!  Write your list for the week for only the meals you have planned!  Money saved!  And time saved too, as it's already mapped out for you what you need to pick up in each department of the grocery store!

PTI Moments Inked Meal Planner

When you unfold the page, there is an additional shopping list for categories not listed on the front page, an errands column and room for notes.  I tend to try and group my errands together to minimize excess running around, and dedicate one day of the week for errands, and seeing everything listed in one place is quite helpful for me.

PTI Moments Inked Meal Planner

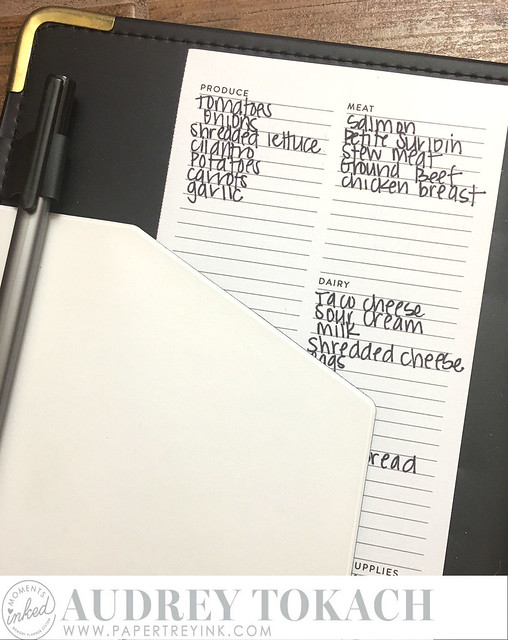
The perforated tear-out grocery list is one of my favorite features.  I love that you can leave it intact and take your whole meal planner to the store, or tear it off, and take only the list (If you can remember to and don't leave it on the counter like me! LOL!)  

PTI Moments Inked Meal Planner

All-in-all, I think the Moments Inked Meal Planner is a great addition to the Moments Inked lineup.  It is clean and simple, and very easy to use.  The bright pops of color add fun to the pages, and make meal planning and grocery shopping not so much of a chore!  I am looking forward to seeing how much money I save in 2017 by planning out my meals, and only shopping for what we will use for the week.  That will minimize leftover and waste greatly, and save money for us in the process.

If you have't already, check the meal planner!  At $25 for the binder inserts and $30 for the spiral version, the price point is excellent.  55 weekly meal planner pages are included, which means you can plan out the whole year without having to buy more pages!

We'd love for you to share your Moments Inked Memory Planner or Meal Planner pages with us!  Use the hashtag #momentsinked on Instagram or facebook to show us what you are doing!


That's all for me today!  Thanks so much for stopping by! :)


BLOG TEMPLATE BY DESIGNER BLOGS