Tuesday, December 14, 2021

Heffy Doodle December Guest Designer!


Hello Friends!   I am thrilled to be joining the Heffy Doodle team as a guest designer for the month of December!  Today, I have a get well card to share with you using the adorable Bed Heads stamp set!  To create my card, I started off with an A2 card base.  I wanted to create a little bedroom scene for my card, and added faux shiplap to the card front using a vertical strip die set from my stash and some white cardstock.  For the flooring, I cut horizontal stripes from tan woodgrain cardstock, and then inked the edges with some Vintage Photo Distress Oxide ink.  Then, I stamped  several images from the Bed Heads stamp set, which I colored with Polychromos colored pencils before fussy cutting them with my scissors.  I don't mind fussy cutting, but if you prefer, there are also coordinating Bed Heads dies available.  For some added fun, I paper pieced the little pig's bedding with a bright floral patterned paper and coordinating yellow knit pattern.

Heffy Doodle Speedy Recovery

I arranged the elements in my scene how I wanted them, and adhered some flat with a glue pen and added foam tape to others for some extra dimension.  The little picture frame on the wall holds a tiny clay heart.  I stamped a sentiment from the Bed Heads stamp set on a diecut banner and popped that up above the sickly little pig's head.  To finish off my card, I added some white gel pen accents to all of the images.

That's all for me today!  Thanks so much for stopping by! :)

Friday, December 10, 2021

Sunny Studio Stamps - Lazy Christmas


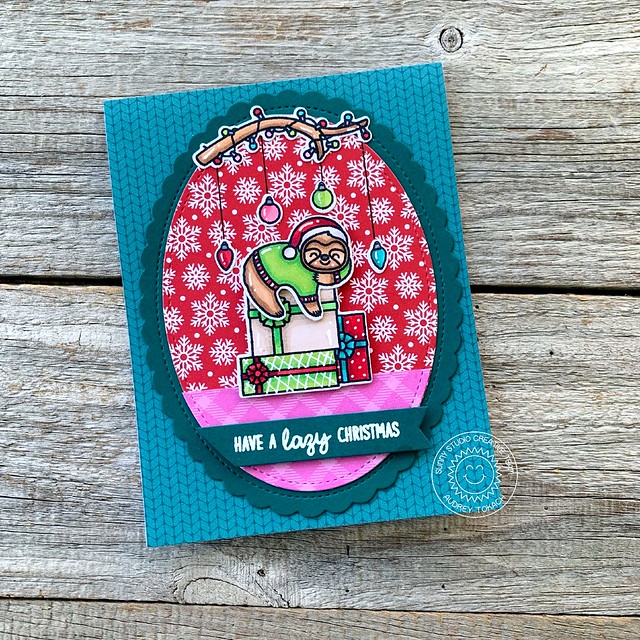
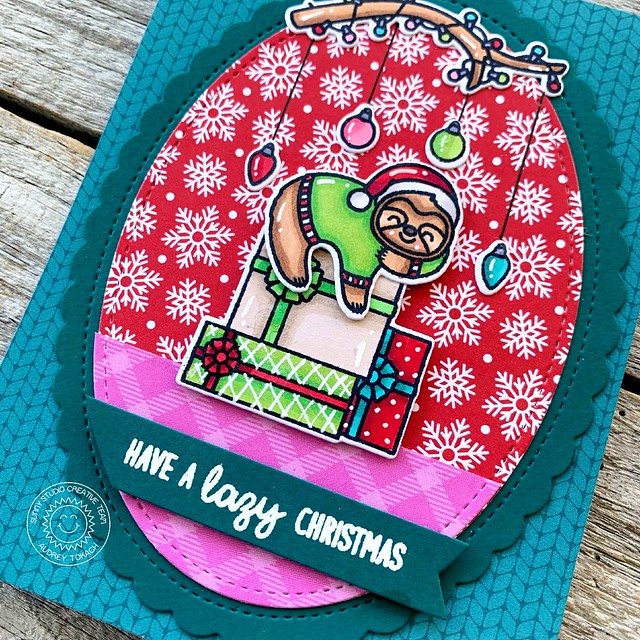
Hello friends!  I am here with a fun Christmas card to share with you today using products from Sunny Studio Stamps!  To create my card, I started off by adding a piece of Sweater Weather paper to an A2 card base.  Then, I diecut a piece of snowflake paper from the All is Bright paper pad using the Stitched Oval 2 Dies.  I also cut a piece of pink plaid paper from the All is Bright paper pad to act as the ground for my scene.  Then, I stamped and colored the stack of presents, one of the sloths, the branch and a few of the ornaments from Lazy Christmas, and diecut them with the coordinating Lazy Christmas Dies.  I arranged all of the pieces to create a scene, adhering some with a glue pen and some pieces with foam tape for extra dimension. 

 SS_LazyChristmas1

I stamped a sentiment from the set onto dark teal cardstock and heat embossed it with white embossing powder, then popped it up under the stack of presents. I matted the oval with the largest Scalloped Oval Mat 1, diecut from dark teal cardstock, and then adhered the oval to an A2 card base.  To finish off my card, I added some white gel pen accents.

SS_LazyChristmas2

That's all for me today!  Thanks so much for stopping by! :)

Wednesday, December 8, 2021

Reverse Confetti December Creative Hop!


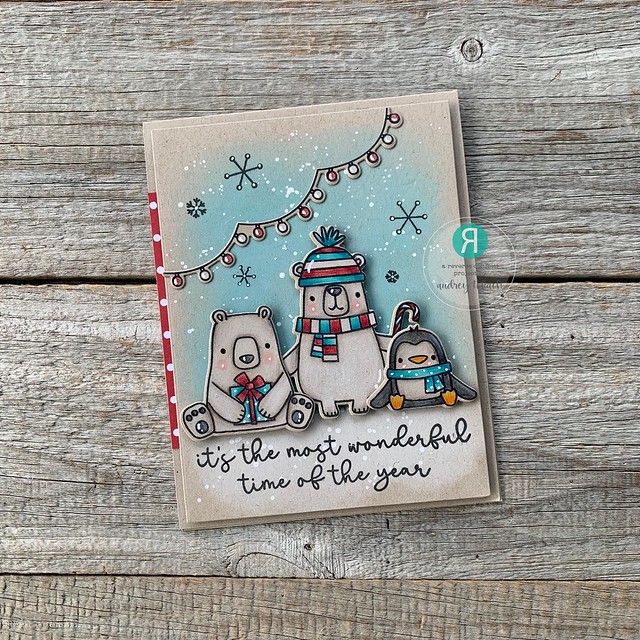
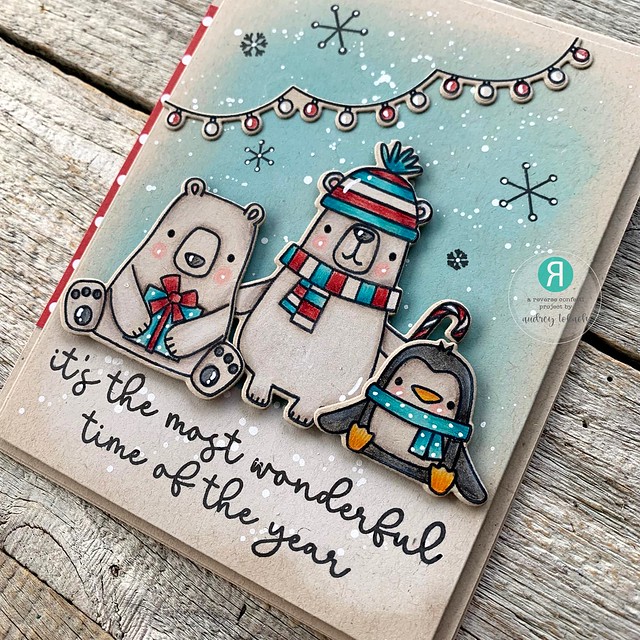
Hello there!  It's the 8th of the month, and that means it's time for the Reverse Confetti Creative Hop!  For my card today, I did one of my favorite techniques - colored pencil on kraft cardstock!

To create my card, I started off with a piece of kraft cardstock cut to 4" x 5.25".  I masked off the top 2/3 of the panel, and added a blue background using Tumbled Glass Distress Oxide ink and splattered the background with white acrylic paint.  Then I reversed the mask and added white pigment ink to the bottom of the panel.  I stamped a few of the images from the adorable Polar Party stamp set, and colored them with my Polychromos colored pencils before diecutting them with the coordinating Polar Party Confetti Cuts dies.

RC December Blog Hop

I popped the images up with foam tape, and stamped a few of the snowflakes from the set above the critters.  Under then, I stamped a sentiment from the Sparkle & Shine Sentiments stamp set.  Before popping the panel up on an A2 card base, I added a strip of polka dot paper from the Winter Solstice paper pad.  To finish off my card, I added white gel pen accents.

RC December Blog Hop

Be sure to hop along with the rest of the team and our special guests! So  much inspiration coming your way! :)

Reverse Confetti

Carissa Wiley

Candice Fisher

Dilay Nacar

Ali Farmer

Audrey Tokach - *you are here!*

Ashley Ebben

Tricia Barber

Lisa Henke

Amy Kolling

Lien Leysen

Andrea Shell

Kellianne Wilson

Dana Kirby

Amy Tsuruta

Olga Moss

Stefanie Loh

Jeanne Jachna


Thanks so much for stopping by! :)

Friday, December 3, 2021

Newton's Nook Deck the Halls with Inky Paws Blog Hop!


Hello there!  I am thrilled to be joining the gang at Newton's Nook Designs for their annual Deck the Halls with Inky Paws Blog Hop!  Before I share my project for today, I want to share details on a super awesome sale that goes along with the hop!  The more you buy, the more you save, so clear off those wishlists! Now through December 5th!


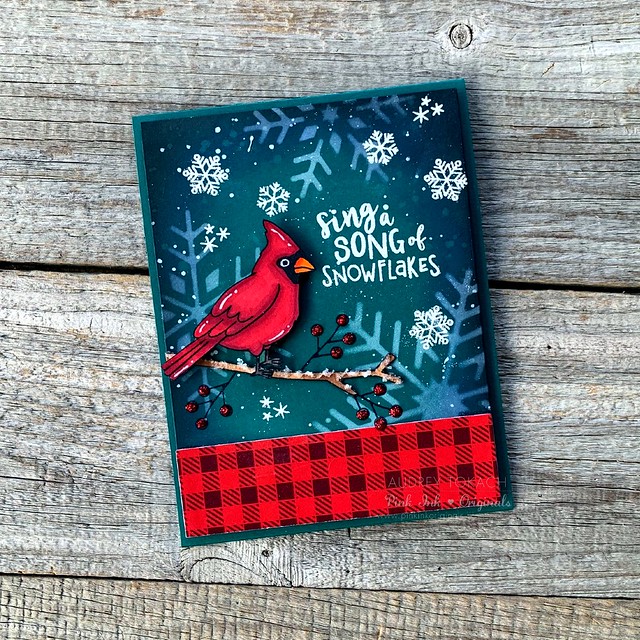
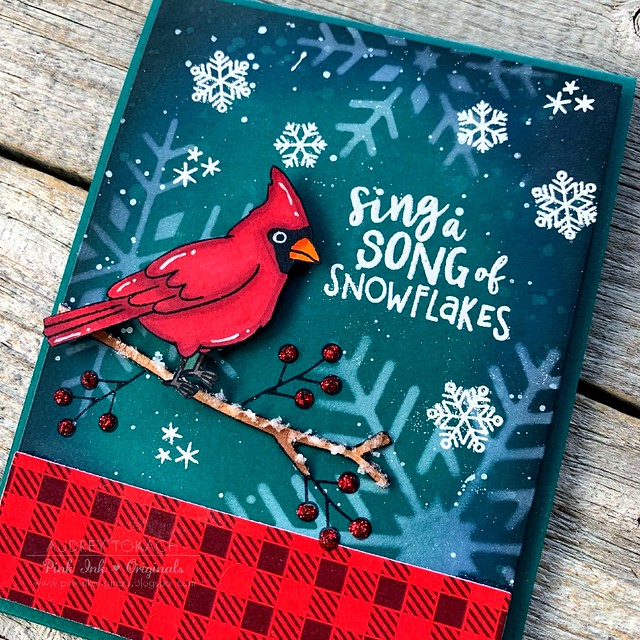
Now to share my card with you!  I am a crazy bird lady, and when I saw the gorgeous Winter Birds stamp set, I fell in love!  Cardinals are my favorite, so of course, he is the star of the show!  To create my card, I started off with a piece of dark teal cardstock cut to 4" x 5.25".  I inked the edges with Chipped Sapphire and Black Soot Distress Oxide inks, then added splatters of clean clear water and white acrylic paint.  I used a snowflake stencil from my stash, but NND has some beautiful snowflake stencils you could use!  I stamped and colored the cardinal, branch and berries and fussy cut them with my scissors.  If you prefer, there are coordinating Winter Birds dies, too.  To tie in the red, I added a strip of red gingham paper from the Meowy Christmas paper pad to the bottom of the panel.  I adhered the brand down with glue pen, and popped the cardinal up with foam tape.

Newton's Nook Winter Birds

A sentiment from the set was heat embossed in white embossing powder, along with a scattering of snowflakes from the set.  I added snow to the branch using Tim Holtz Snowfall texture paste, and some glitter and dimension to the berries using Stickles in Christmas Red.  Finally, I added some white gel pen accents, and popped the panel up on an A2 dark teal card base.

Newton's Nook Winter Birds

Enter to Win! Deck the Halls with Inky Paws Hop Prizes!
We will be choosing two lucky winners to win a $25 store credit for Newton's Nook Designs online shop! To enter, just leave comments on the Design Team Member and Guest blogs (see list below)! Two winners will be chosen at random from the collective blogs in the blog hop. Make sure to check out each of their blogs and comment for your chance to win. You will not know which blog has been chosen so the more you comment on the better your chances are of winning! You have until Sunday, December 5th at 9 pm EST to comment -- winners will be announced on the NND blog on Monday, December 6th.

Sunny Studio Stamps - Bear Hugs


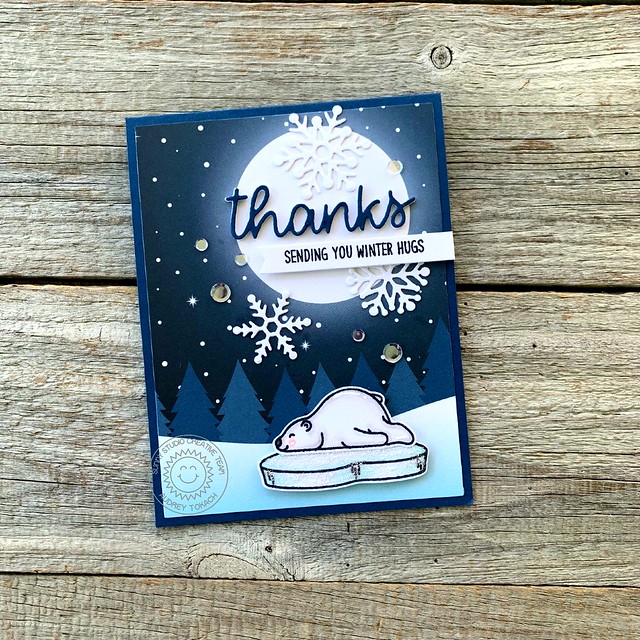
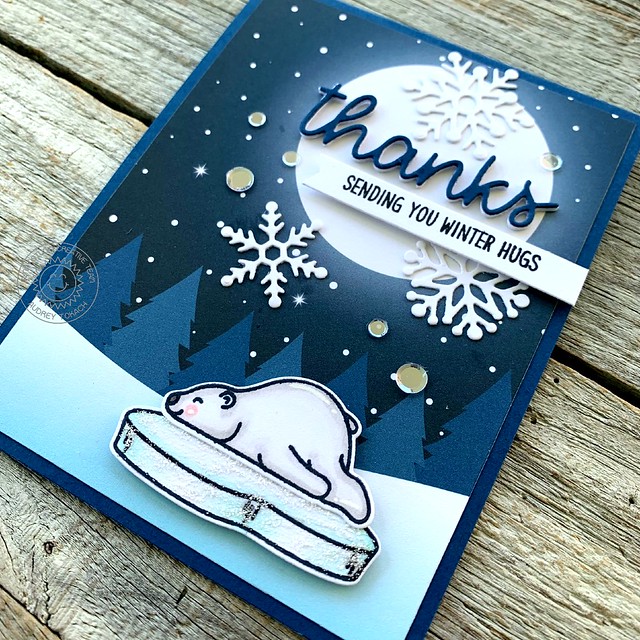
Hello Friends! I am here  today with some Sunny Studio Stamps Bear Hugs for you!  To create my card, I pulled out the Very Merry paper pad.  I love the preprinted backgrounds that are part of this collection!  I chose the night sky background, and trimmed it down to 4" x 5.25".  I stamped and colored the sleeping polar bear and the floating ice image from Bear Hugs and diecut them with the coordinating Bear Hugs dies. 

SS_BearHugs1

 I wanted a large sentiment to break up the moon image, so I pulled out the Thank You Words dies and diecut "thanks" from set and cut it twice from white cardstock and once from navy cardstock.  I stacked them together for dimension.  I also stamped a smaller sentiment from the Bear Hugs stamp set onto a banner diecut and popped that up underneath.  To add more interest to the sky, I diecut a trio of the Lacy Snowflakes and placed them around the sentiment.  To finish off the card panel, I added white gel pen accents, Frosted Lace Stickles to the iceberg, and a scattering of clear confetti.

SS_BearHugs2

That's all for me today!  Thanks so much for stopping by! :)
Monday, November 29, 2021

Newton's Nook Guest Feature

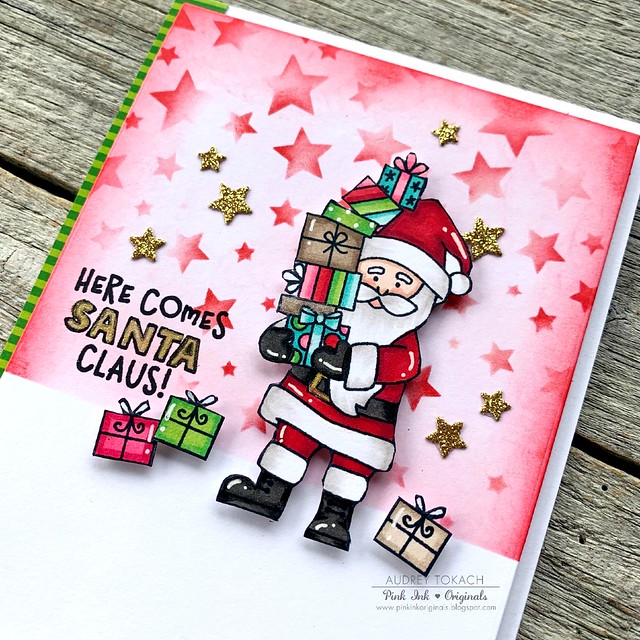
Hello there!  I am so excited to be a Newton's Nook Designs guest designer for "Deck the Halls with Inky Paws" week!  I'm here with a fun Christmas card to share with you featuring the adorable Dear Santa stamp set!  To create my card, I started off with a piece of white cardstock cut to 4" x 5.25".  I masked off the bottom 1/3 of the panel and used the Cascading Stars Stencil with some Festive Berries Distress Oxide ink to add a star pattern to the top of the panel.  Then, I stamped and colored one of the Santas and a few presents from the Dear Santa stamp set and fussy cut them out with scissors.  I popped everything up with foam tape using the masked off area to ground the scene.

 Newton's Nook Santa

To the left of Santa, I stamped a sentiment from the set in black ink, and used my Gansai Tambi Starry Colors watercolors to add gold to part of the sentiment.  To add a bit more gold, I diecut some stars from gold glitter paper using a die from my stash and glued them over a few of the stars in the background.  Before popping the panel up on an A2 card base, I added a strip of striped paper from the Meowy Christmas paper pad to the left edge of the card base.  To finish off my card, I added some white gel pen accents to the images.

Newton's Nook Santa

That's all for me today, but thanks so much for stopping by! :)

Friday, November 26, 2021

Sunny Studio Stamps - Snow One Like You


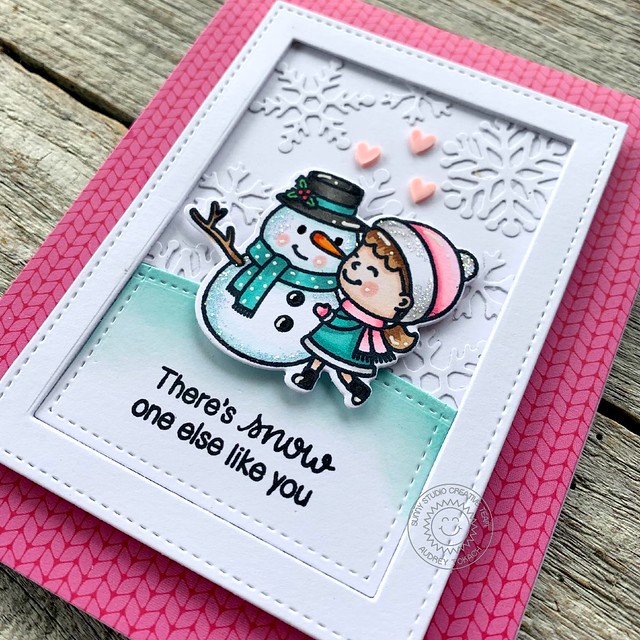
Hello friends! Today, I am here with a fun card to share with you using the Snow One Like You stamp set from Sunny Studio Stamps!  To create my card, I started off by adding a piece of pink cable knit patterned paper from the  Sweater Weather 6x6 paper pad to an A2 card base.  For the focal point, I started by adding white Lacy Snowflakes to a piece of white cardstock to serve as the background for my scene.  I created a frame with two rectangle dies from the Stitched Rectangles dies, and used the Slimline Nature Borders dies to cut a hill from the smaller rectangle which I then inked with Salvaged Patina Distress ink.

Snow One Like You

  Then, I stamped and colored the adorable image from the Snow One Like You stamp set, and diecut it with the coordinating dies.  I popped it up on the background I created, and stamped the sentiment from the set under the image.  I glued the focal point frame to the card base, and added some white gel pen accents, black glaze pen to the snowman's eyes, Frosted Lace Stickles and a trio of tiny clay hearts to finish off my card.
 
Snow One Like You

That's all for me today!  Thanks so much for stopping by! :)
BLOG TEMPLATE BY DESIGNER BLOGS