Friday, October 22, 2021

Sunny Studio Stamps - Deck the Halls


Hello friends!   I'm decking the halls with Sunny Studio Stamps!  To create my card, I started off with a piece of watercolor paper cut 4" x 5.25".  I used Distress ink in the shades Twisted Citron, Mowed Lawn and Rustic Wilderness to watercolor a background on the top left of the card, leaving white space at the bottom and along the right edge.  I usually stamp the sentiment on my card last, but this time, I knew I wanted in to fit in the white area, so I stamped it first.  The sentiment and images com from the adorable Deck the Halls stamp set.  I colored three ornaments from the set, and diecut them with the coordinating Deck the Halls dies.  To hang then, I threaded some silver cord from my stash through the hole that the die creates in each ornament, and wrapped it over the top edge of the panel, securing it on the back side with Scotch tape.  I popped each ornament up with foam tape.  

Sunny Studio Deck the Halls

To fill in the area behind them, I diecut three of the Lacy Snowflakes from white cardstock and glued them to the background with a glue pen.  Before popping the panel up on an A2 card base, I added a strip of candy cane striped paper from the All is Bright 6x6 paper pad to the left edge of the card front.  To finish off the card, I added some white gel pen accents, Stardust Stickles and some extra snowflakes using white Nuvo Drops.

Sunny Studio Deck the Halls

That's all for me today!  Thanks so much for stopping by! :)

Friday, October 15, 2021

Sunny Studio Stamps - Christmas Critters


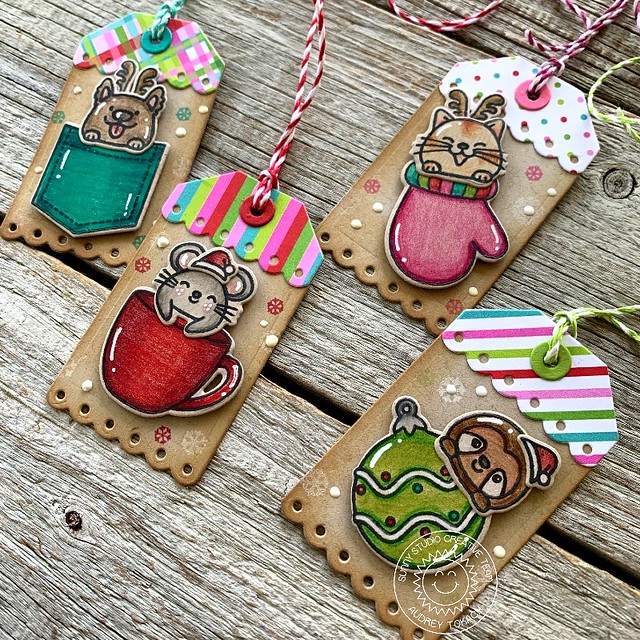
Hello there friends!  I am here today with a set of Christmas gift tags using products from Sunny Studio Stamps!  To create my tags, I started off by diecutting one of the tags from the Sliding Window Die set from kraft cardstock four times.  I inked the edges of each with Walnut Stain Distress Oxide ink.  Then, I diecut the tag topper from four different patterns from the All is Bright 6x6 paper pad, and adhered a topper to each tag along with a hole reinforcer cut from coordinating cardstock. 

Christmas Critters Tags

I stamped several images from the Christmas Critters stamp set, colored them with colored pencils, and diecut them with the coordinating Christmas Critters dies.  I popped up an image and critter onto each tag with foam tape, and stamped tiny snowflakes from the stamp set in both white pigment ink and colored dye inks.  To finish off the tags, I added some white Nuvo Drops, white gel pen accents and coordinating twine to each one.

Christmas Critters Tags

That's all for  me today!  Thanks so much for stopping by! :)


Friday, October 8, 2021

Sunny Studio Stamps - Words of Gratitude


Hello Friends!  I am  here today with a card to share with you using the new Words of Gratitude stamp set and Thank You Words dies from Sunny Studio Stamps.  To create my card, I started off with a piece of white cardstock cut to 4" x 5.25".  I used Shaded Lilac Distress Oxide ink and a cloud stencil from my stash to add a cloudy sky to the top part of the panel.  After it was dry, I splattered on some pearl white watercolor.  I stamped and colored the adorable fairy on the flower and one of the butterflies from the Garden Fairy stamp set, and diecut them with the coordinating Garden Fairy Dies.  

SS_WordsofGratitude1

Then, I diecut "thank you" from the Thank You Words die set three times from white cardstock and stacked them together with a glue pen.  I finished off the greeting using a sentiment from the Words of Gratitude stamp set, stamped in black ink on a white banner.  The fairy and butterfly were popped up with foam tape, and I added white gel pen accents and Diamond Stickles to them for added interest.  Before popping the panel up on an A2 card base, I added a strip of striped paper from the Subtle Grey Tones 6x6 Paper Padto the left edge of the card base.  Finally, I added some tiny stars from the Garden Fairy stamp set scattered about the scene, and a few tiny pink heart confetti.

SS_WordsofGratitude2

That's all for me today!  Thanks so much for stopping by! :)

Reverse Confetti Creative Hop & a SALE!


Hello there!  It's the 8th of the month, and that means it's time for the Reverse Confetti Creative Hop!  Today is extra special because I have a coupon code to share with you!  Use code FALL for 15% off of your entire order, through October 11, 2021!

I have a fun card and tag set to share with you today using some of my favorite Reverse Confetti goodies!  Grab a cup of your favorite beverage and read on to see how I created this space themed ensemble! :)

Reverse Confetti Moon Men

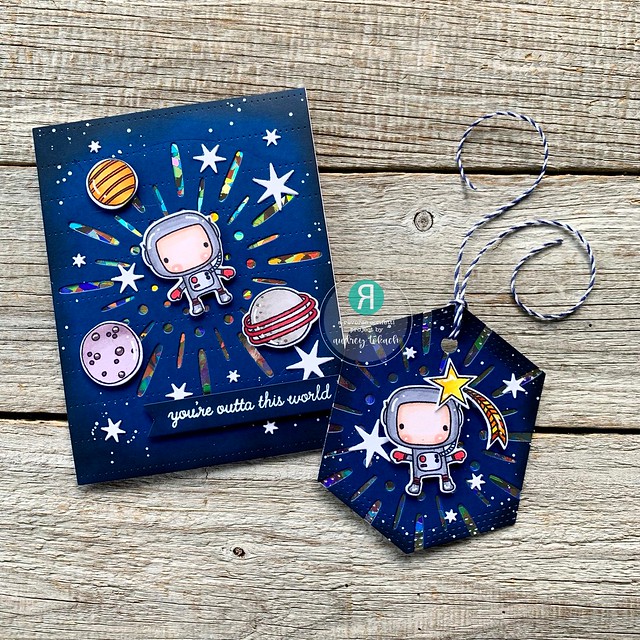
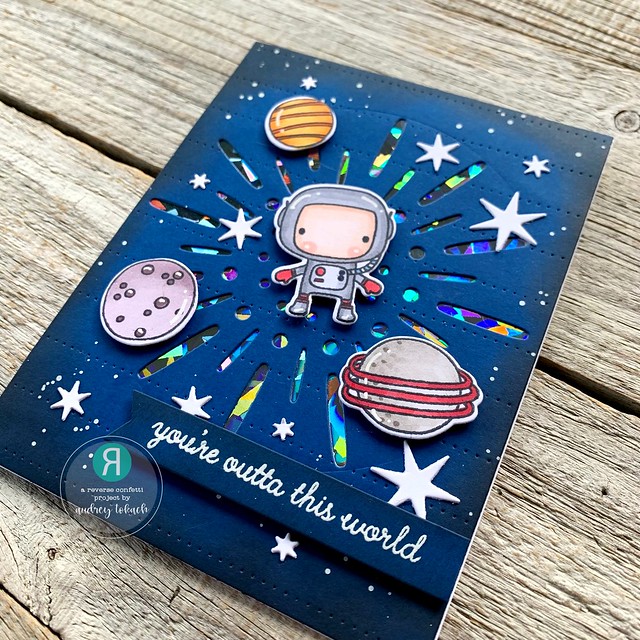
To create my card, I started off with a piece of Navy cardstock cut using the Along the Dotted Lines Cover Panel.  Then, I ran the panel through my diecut machine again, this time with the Circle Element Confetti Cuts die.  I  inked the edges of the panel with Black Soot Distress Oxide, and spattered the panel with white acrylic paint before backing the panel with some holographic cardstock from my stash.  I stamped the colored several images from the Moon Men stamp set, and diecut them with the coordinating Moon Men Confetti Cuts.  I popped the emelents up with foam tape, then added a scattering of white stars cut from the Starstruck Cover Panel.  I heat embossed a sentiment from the same stamp set in white embossing powder on a Navy cardstock banner, and added some white gel pen accents before adhering the panel to an A2 card base.

Reverse Confetti Moon Men

Here you can see just how magical the holographic cardstock looks with the Cirlce Elementdie!

Reverse Confetti Moon Men

I created a coordinating tag using the Stitched Hex Tag Confetti Cuts die.  I created the tag the same way that I did the background on the card panel, added an adorable astronaut and shooting star to the center, and finished it off with some navy and white twine from my stash.

Reverse Confetti Moon Men


That's all for me today, but be sure to hop along, and then go shop the fall sale!!

If you want to start at the beginning of the hop, here is the full list! :)

Reverse Confetti

Candice Fisher

Dilay Nacar

Ali Farmer

Audrey Tokach - **you are here**

Tiffany Pryce-Russom

Jeanne Jachna

Lisa Henke

Lien Leysen

Amy Kolling

Andrea Shell

Amy Tsuruta

Olga Moss

Keia Shipp-Smith

Dana Kirby


Friday, October 1, 2021

Sunny Studio Stamps - Fall Friends


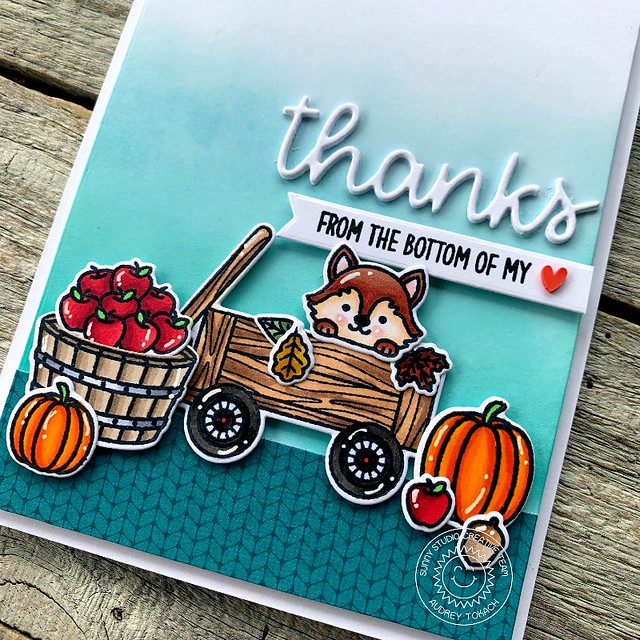
Hello friends!  Today, I have a Fall Friends card to share with you, using products from Sunny Studio Stamps!  To create my card, I started off with a piece of white cardstock cut to 4" x 5.25".  I ink blended a teal ombre on the bottom 2/3 of the panel using Distress Oxide inks in Tumbled Glass, Salvaged Patina and Peacock Feathers.  To ground my scene, I added a piece of knit paper from the Sweater Weather patterned paper pad.  Then, I stamped and colored images from the adorable Fall Friends stamp set, and diecut them with the coordinating Fall Friends Dies. 

Fall Friends

 I arranged my scene on the bottom of the panel, with some pieces glued flat with glue pen and others popped up for added dimension.  For my sentiment, I used a combination of stamps and dies.  I diecut the Thank You Words Die three times from white cardstock and glued them together.  Underneath that, I stamped a sentiment from the Words of Gratitude stamp set onto a white banner, and finished off the sentiment with a tiny clay heart.


Fall Friends

That's all for me today!  Thanks so  much for stopping by! :)

Friday, September 24, 2021

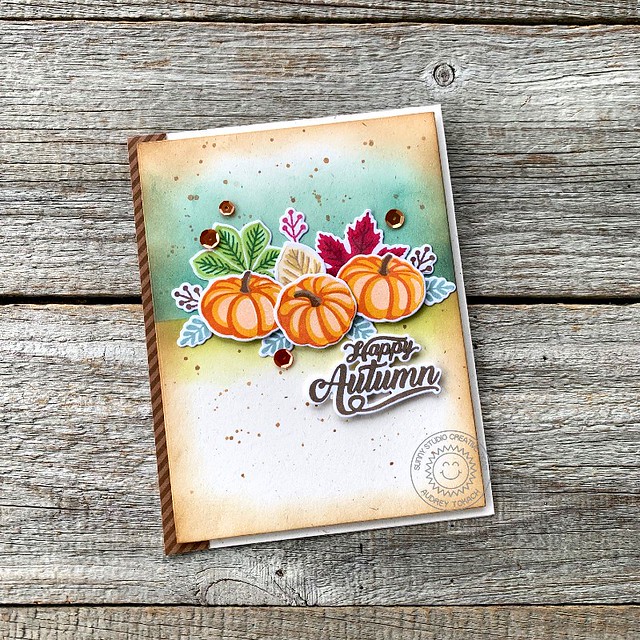
Sunny Studio Stamps - Crisp Autumn


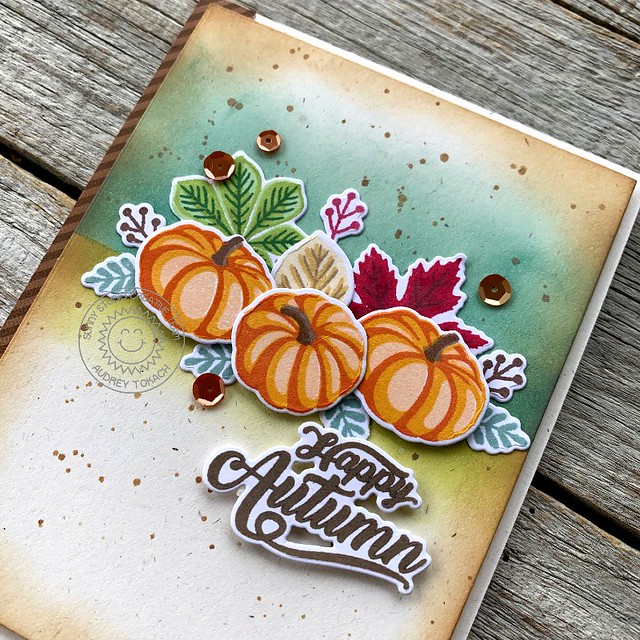
Hello friends!  Today I have a fun autumn card to share with you!  To create my card, I started off with a piece of ivory cardstock cut to 4" x 5.25".  I masked off the top portion of the panel and ink blended on some Evergreen Bough Distress Oxide.  Then, I reversed the mask and ink  blended on some Peeled Paint Distress Oxide ink.  To give a  more rustic feel to the panel, I blended Walnut Stain Distress Oxide around the edges, and splattered some all over the panel.  I stamped and diecut images from the Crisp Autumn layering stamp set.  I used dye inks in shades of orange, green, red, gold and teal then diecut them with the coordinating Crisp Autumn Dies. 

Crisp Autumn

 I arranged the images, and adhered some flat with glue pen, while others were popped up with foam tape.  Then, I stamped the sentiment from the set, which I also diecut and popped up.  I adhered the panel to an A2 card base, and added a strip of Dots & Stripes Jewel Tones patterned paper to the left edge.  To finish off my card, I added some bronze sequins.

Crisp Autumn

That's all for me today!  Thanks so much for stopping by! :)

Friday, September 17, 2021

Sunny Studio Stamps - Chloe Numbers Dies


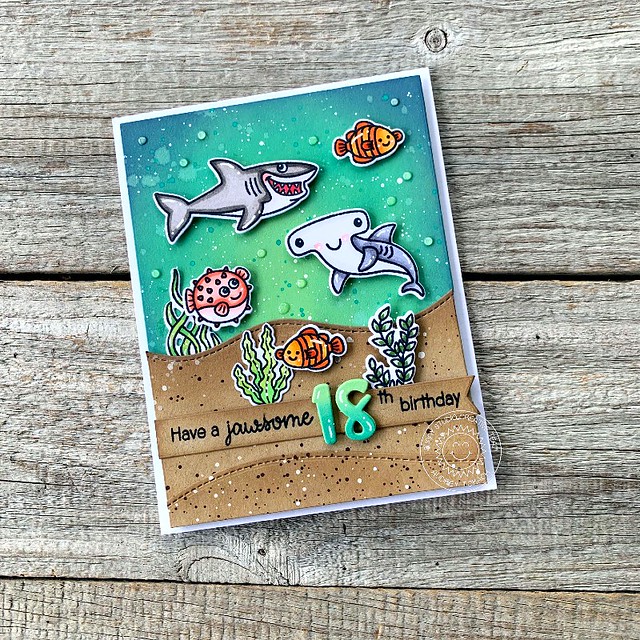
Hello friends!  I am here today with a birthday card to share with you!  I love personalized cards.  The recipient knows that it was made especially for them.  My card today is an 18th birthday card for my shark-loving son.  He has always had a fascination with sharks and ocean life since he was a little boy, and the majority of his birthday cards have been ocean themed.  I was able the really personalize his card this year to celebrate his milestone birthday with the new Chloe Number dies!  

To create my card, I started off with a piece of mint green cardstock cut to 4" x 5.25".  I ink blended the edges with Distress Oxide inks in Cracked Pistachio, Peacock Feathers, and Chipped Sapphire.  Then, I splattered on some clean water, teal watercolor and watered down white acrylic paint for added interest.  I stamped and colored images from the Best Fishes stamp set and diecut them with the coordinating Best Fishes dies.  I added a sandy bottom to my scene with the Slimline Nature Borders dies, cut from kraft cardstock and inked with Walnut Stain Distress Oxide.  I arranged the images, and popped them up with foam tape.  

Sunny Studio Stamps

I used several sentiments from the stamp set to build a custom greeting.  I started by stamping the text images, leaving room for the Chloe Number diecuts.  I diecut the numbers from the same mint cardstock, and stacked 4 of them on top of each other for dimension.  I inked the top layer with Peacock Feathers Distress Oxide ink.  To finish off my card, I added some white gel pen accents and some bubbles using Morning Dew Nuvo Drops.

Sunny Studio Stamps

That's all for me today!  Thanks so much for stopping by! :)
BLOG TEMPLATE BY DESIGNER BLOGS