Sunday, May 8, 2016

Reverse Confetti May Blog Hop

Woohoo! It's the day we have been waiting for all week!  Happy release day!  All of the Reverse Confetti new release goodies are available NOW in the Reverse Confetti store!


Today my card showcases a few new goodies that I haven't had a chance to show you yet!

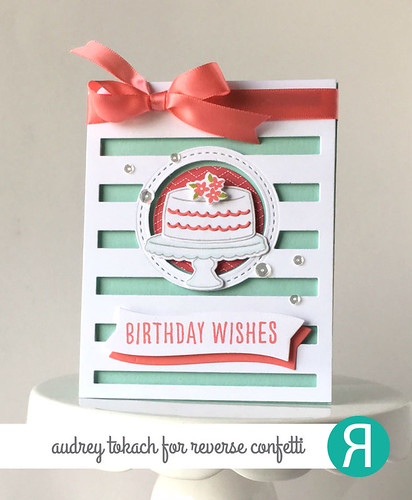
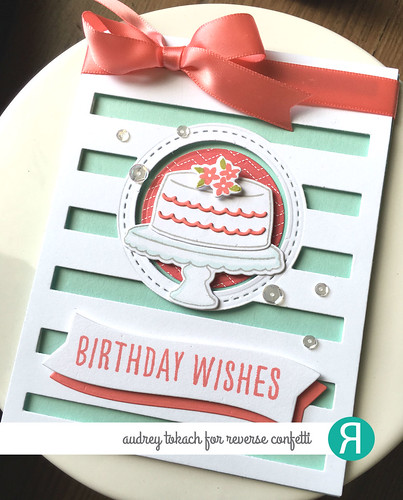
I started by diecutting the new Big Stripes Cover Panel from white cardstock.  I added a stitched detail around the circle opening in the panel using the new Detailed Circles Confetti Cuts.  I added a snippet of patterned paper to the center of the circle using the new Party Time Quick Card Panels.  For my focal point, I stamped the cake and cake plate from the Candles 'n Confetti stamp set, and diecut them with the coordination Candles 'n Confetti Confetti Cuts.  I added flower and icing details to the cake using stamps and dies from the same set.  I adhered the striped panel diecut to an aqua card base using foam tape, then I added the cake image with a combination of foam tape and glue pen.  I added a sentiment from the Celebrations stamp set to a banner diecut from the Flowers for Mom Confetti Cuts die set.  To add a pop of color at the bottom of the card, I diecut a second banner in coral cardstock and glue it to the sentiment banner, slightly offset.


Birthday Wishes

To finish things off, I added a scattering of sequins and a beautiful coral colored satin bow.

Birthday Wishes

Thanks for stopping by!!

Hop along with the rest of the gang, and then go fill up your cart! *wink*


‘Fetti Friend–Laura Bassen
‘Fetti Friend—Wanda Guess
‘Fetti Friend—Thanh Vo
Audrey Tokach - **You are here**
‘Fetti Friend—Candi Billman


Saturday, May 7, 2016

Countdown to Confetti - Day 3

Hey there!  Welcome back to Day 3 of the Reverse Confetti 3rd Birthday Celebration!  I have even more new goodies to share with you today!  Everything will be available in the Reverse Confetti store, tomorrow, May 8th.


First I have to say that it was totally by accident that the balloons on this card are the same colors as the balloons on the birthday graphic above.  So funny!

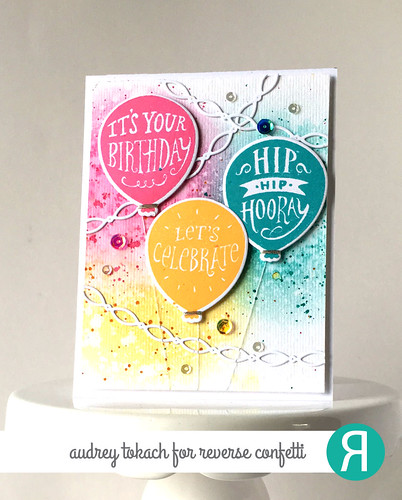
Anywho, my card today features the new Boxes 'n Balloons stamp set!  To create my card, I started by using an ink blending tool and Distress ink to sponge halos of color, slightly overlapping on a piece of watercolor paper.  I used Picked Raspberry, Wild Honey, and Peacock Feathers.  After I laid the colors down where I wanted them, I added sprayed some clean clear water on the paper and soaked it up after a few seconds.  Then I added some splatters of ink in the same colors over each area.  I stamped the balloons from the Boxes 'n Balloons stamp set in coordinating ink colors, and diecut them with the Boxes and Balloons Confetti Cuts.

Watercolor Balloons

For the balloon strings,I wrapped some silver thread around the base of the each balloon several times and knotted it on the back.  then I took the loose end of each string and wrapped it around the bottom of the panel and taped it on the back.  For some extra detail, I diecut the new Linked Garland dies from white cardstock and adhered them with a glue pen.  I added a scattering of sequins and popped the panel up on a white card base with foam tape.


Watercolor Balloons

Be sure to visit the Reverse Confetti blog for lots more inspiration from the Reverse Confetti design team.  Leave a comment here, and along the way, for your chance to win one of three $30 Reverse Confetti gift certificates!

I hope you will join us tomorrow for the 3rd birthday blog hop!

Thanks for stopping by!! :)


Friday, May 6, 2016

Countdown to Confetti - Day 2


Hey there! Welcome back to Day 2 of the Countdown to Confetti! If you missed my post yesterday, this month, Reverse Confetti is celebrating their 3rd birthday!  We have been busy showcasing all of the new products that are coming your way on May 8th.  If you want to take a peek at yesterday's post, you can find it here!


Today, we are showcasing two new stamp sets that you will find in the Reverse Confetti store in a few days!  I just love the fun, sketchy, whimsical birthday cakes in the Candles n' Confetti stamp set!  With all of the elements in this set, the mix and match possibilities are endless! Decorate a cake for any occasion, in any color scheme!!

For my project today, I created a set of watercolor birthday tags.  I started off by watercoloring stripes in a bunch of different color combos using a 1/2" flat brush.  When my pieces were dry, I diecut tags using the Topped Off Tag Confetti Cuts. I added a fun pinked edge to each tag using the new Top 'o the Tag Confetti Cuts die set.  Instead of using the pinked edge as a topper, I adhered it to the bottom of the tag for a totally different look!  I also added a coordinating hole reinforcer that you can find in the Tag Me Confetti Cuts die set.  I stamped the cake, candles, candle flames, and cake plate.  A little tip.  Even though the Candles n' Confetti dies are open dies, it is best to cut, THEN stamp the image if you are using the cake image with the candles.  It is much easier than doing the reverse, because it is easier to line up this way.  After everything was stamped, I diecut the little scalloped icing from the Candles n' Confetti Confetti Cuts, and adhered them to each cake with a glue pen.  Then I popped the cake up on the plate with foam tape, and centered them on the tag.
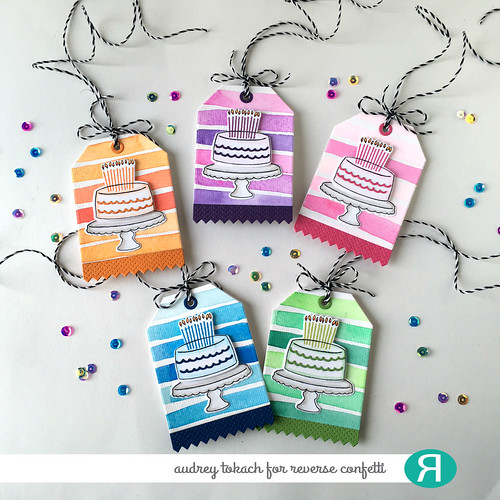
Watercolor Birthday Tags

I love the stitched details on the Top 'o the Tag Confetti Cuts!  It adds so much fun texture along with the texture from the watercolor paper!
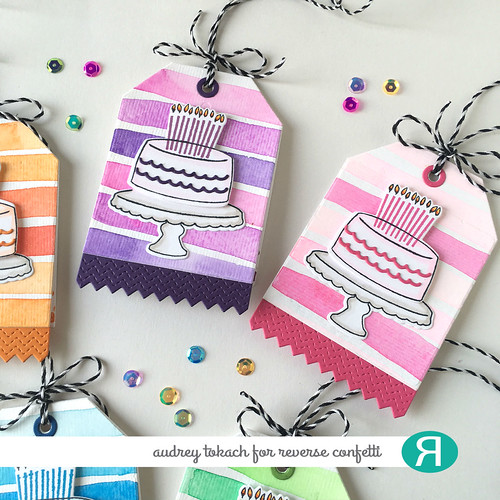
Watercolor Birthday Tags

I decided to add a second tag; a place to add a sentiment and write a little message since these will likely be added to gift packages.  It eliminates the need for an additional card.  To do this, I die cut a second Topped off Tag from white cardstock. I added a score line about 3/4 from the top of the tag and folded the top of the tag backwards at the score line, then adhered them together with a tape runner.  The score line makes it easy to read the message inside.

Speaking of that...  Before I adhered them together, I stamped a sentiment from another new stamp set called Celebrations.  For a fun touch, I stamped a confetti image, also from the Celebrations stamp set, along the bottom of the tag in a coordinating ink color. 


Watercolor Birthday Tags

To finish things off, I added a bit of black and white striped twine and a tiny bow to each tag.  I think tag sets like this would also make a great gift! I don't know about you, but I am usually scrambling at the last minute trying to decorate a gift while I am running out the door.  Now I am good to go for at least the next 5 birthdays!  Ha! :)
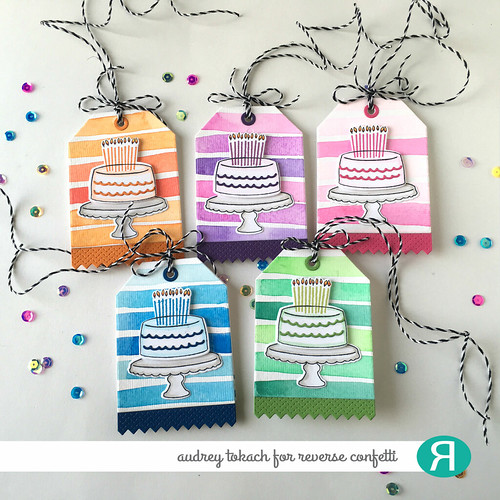
Watercolor Birthday Tags

I hope you enjoyed my post today!  Be sure to visit the Reverse Confetti blog for more projects and product peeks using the new release goodies coming your way in a few days!  Comment here, and on all of the other blogs you visit for a chance to win one of three $30 Reverse Confetti gift certificates!

Hope you will stop back by again tomorrow for even more new goodies!  Thanks for stopping by! :)


Thursday, May 5, 2016

Countdown to Confetti - Day 1

Whoot whoot! It's day 1 of countdown to Confetti!  This month, Reverse Confetti is celebrating their 3rd birthday!  This release is jam packed with awesome products, awesome prizes and awesome friends to help celebrate!  The new release will be available in the Reverse Confetti store on May 8th!


Today, we are showcasing the newest critters in the RC lineup!  Adorable giraffes!  The new Lift Me Up stamp set and coordinating Lift Me Up Confetti Cuts are too cute for words!  This set is perfect for birthdays, new babies, and so much more!

For my card today, I started off by watercoloring a piece of Tim Holtz Distress Watercolor paper with my pan watercolors from Michaels.  I used a 1" flat brush to paint the stripes. I love how the imperfect stripes adds to the whimsy of the card design.  To create my focal point, I used one of the new Party Time Quick Card Panels as the backdrop for my scene.  I stamped and colored the giraffes before diecutting them with the matching dies.  I stamped and diecut the balloons from the Monkey Business stamp set to make the party scene even more festive.

Oh Happy Day!

There was no need to stamp a sentiment because there was already one on the Quick Card Panel, but there are plenty of great sentiments included in the stamp set.  Another product that is coming your way this month is the Linked Garland Confetti Cuts.  They are so fun!  You can diecut the solid die, or the outline die to use alone, or stack them on top of each other for a totally different look.  It really mimics the creap paper banners that my mom used to decorate with when I was a kid.  So fun!!

Oh Happy Day!

Be sure to visit the Reverse Confetti blog to see lots more inspiration using the new Lift Me Up stamp set, and there may even be a few peeks at other new products!

Stop back by tomorrow for more projects using the new release goodies!  There are prizes to be won!  Be sure to comment for a chance to win one of three $30 Reverse Confetti gift certificates!

Thanks for stopping by! :)


Monday, May 2, 2016

Lawnscaping Challenge #129 - Critters

Hi there! It's time for another Lawnscaping Challenge!  This week, we are calling all critters!


This challenge is sponsored by Ellen Hutson!


For my card today, I started off by water coloring a piece of Tim Holtz Distress Watercolor Paper with my Artist Loft pan water colors.  When it was dry, I diecut the piece with the Small Stitched Rectangles Stackables.  Then I stamped a diecut the little skunk from the You're Stinkin' Cute stamp set which was a Lawn Fawn Black Friday Exclusive (but I think you will see him available again soon!). I added a strip of patterned paper from the 6x6 Let's Polka in the Meadow paper pad, and then popped the panel up on a white card base.  Finally, I added a bow with Orchid Lawn Trimmings.

You're Stinkin' Cute

Be sure to check out the blog for all of the challenge details and for lots more inspiration from the design team!

Thanks so much for stopping by! :)

Supplies:
Stamps: Stinkin' Cute
Dies: Stinkin' Cute, Small Stitched Rectangles
Paper: Let's Polka in the Meadow 6x6, Tim Holtz Distress Watercolor Paper
Other: Copic Markers, Artist Loft Watercolors, White Gel Pen, Foam tape, Lawn Fawn Orchid Lawn Trimmings

Sunday, May 1, 2016

Sparkle and Shine Challenge #29 - Floral

Hello there!  It's time for another Sparkle and Shine Challenge! 
Here is our photo inspiration:


We are sponsored this week by our friends at Create a Smile Stamps.

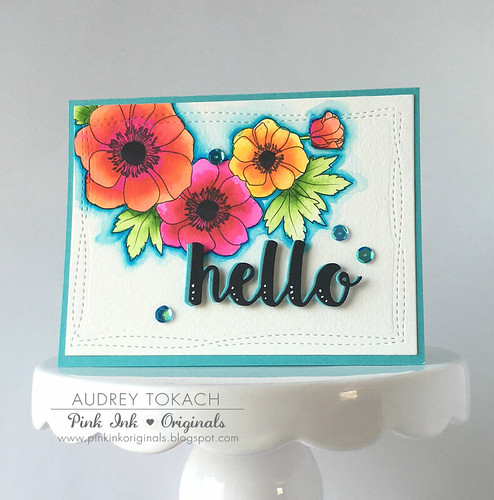
For my card today, I water colored one of the Papertrey Ink Bold Blossoms Watercolor Sheets with my Zig Clean Color Real Brush Markers.  When it was dry, I diecut the panel with the Avery Elle Wonky Stitches dies.  For my sentiment, I diecut a My Favorite Things die from black card stock and teal card stock.  I glued them together, slightly offset, so that the teal with show as a shadow.  I added a few accents to the diecut with a white gel pen and popped it up with foam tape.  Then I added a scattering of iridescent sequins from Pretty Pink Posh.


Floral Hello

Be sure to visit the blog for lots more inspiration and all of the challenge details!

Thanks so much for stopping by! :)

Supplies:
Paper: PTI Bold Blossoms Watercolor Sheets, Hawaiian Shores, True Black
Dies: Avery Elle Wonky Stitches, MFT Hello
Other: Zig Clean Color Real Brush Markers, Pretty Pink Posh sequins, foam tape

BLOG TEMPLATE BY DESIGNER BLOGS