Thursday, July 14, 2022

Countdown to Confetti - Dog Days & Dog Days Sentiments


Hello there!  Welcome to day 3 of the Countdown to Confetti with Reverse Confetti!  Today, I am featuring what may be one of my  most favorite RC sets ever, Dog Days.  It will be available tomorrow, July 15th in the Reverse Confetti store, along with the rest of the July release, which is pretty darn awesome!

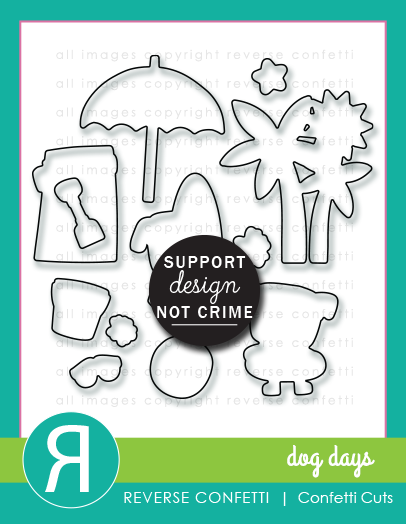
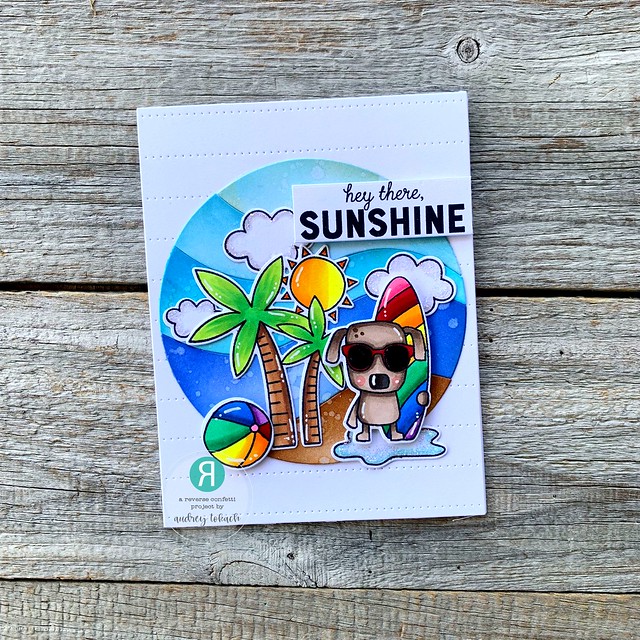
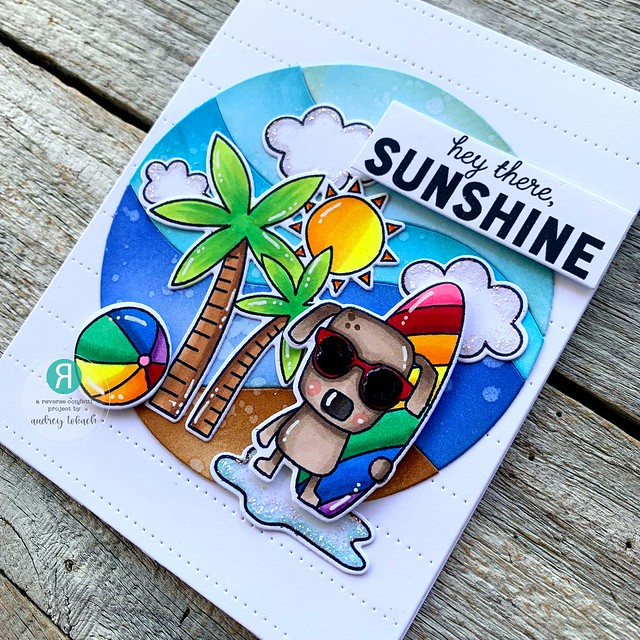
To create my first card, I started off by diecutting the Along the  Dotted Lines Cover Panel from white cardstock.  Then, I used the Circle of Waves Confetti Cuts die to set my scene.  I diecut the circle from white cardstock and used Distress ink in shades of Tumbled Glass, Broken China, Mermaid Lagoon, Blueprint Sketch and Vintage Photo to color each wave.  I stamped the adorable little dog with his surf board and the palm tree image and the beach ball from the new Dog Days stamp set, and colored them with my Copic markers before diecutting them with the coordinating Dog Days Confetti Cuts dies.  I also pulled out my Rainy Day Fun stamp set, and stamped and colored a few clouds and the water puddle.

Reverse Confetti Dog Days

I arranged my images to create the scene and once I was happy with the arrangement, I glue some down flat with a glue pen and popped others up with foam tape.  I stamped a sentiment from the new Dog Days Sentiments stamp set in black ink on white cardstock and popped that up in the top right of the scene.  To finish off the card, I added some white gel pen accents and some Diamond Stickles to the clouds and puddle.  I also used Glossy Accents on his sunglasses for some added fun.
Reverse Confetti Dog Days

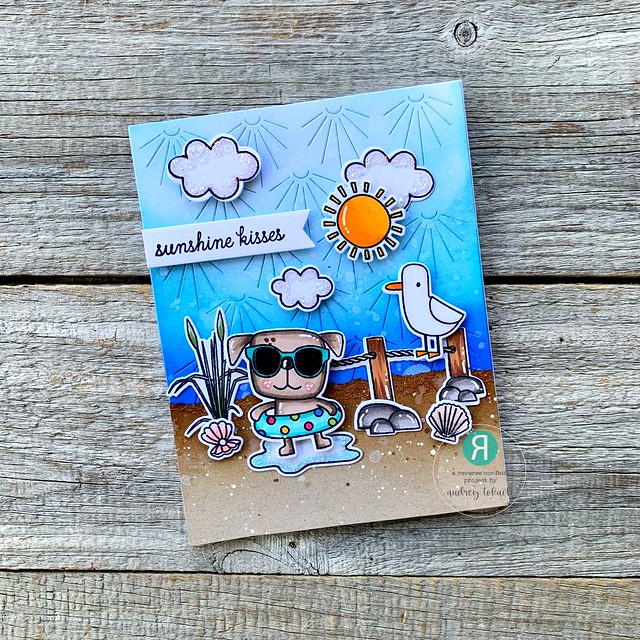
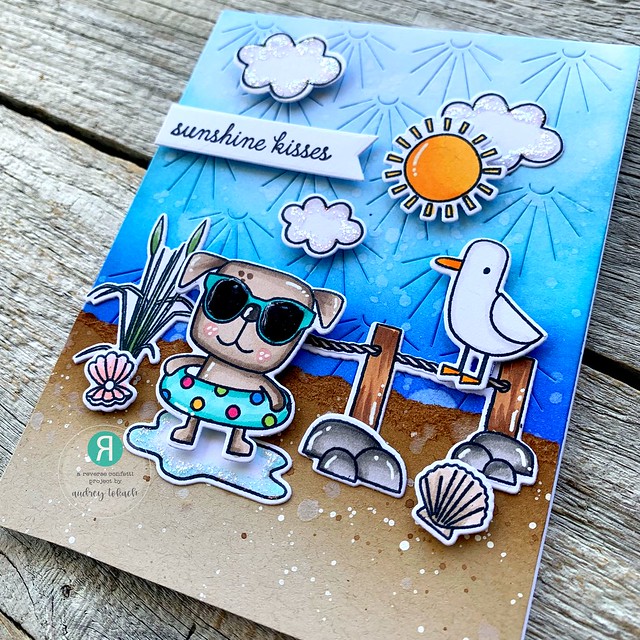
To create my second card, I stated of by diecutting the new Deco Cover Panel from white cardstock. I used the same shades of Distress ink to add color to the sky.  For the sand, I tore a piece of kraft cardstock, added some Vintage Photo ink to the top, then splattered it with more Vintage Photo and some white acrylic paint to create the look of sand.  I stamped the adorable little dog with his innertube from Dog Days, the clouds, sun  and water puddle from Rainy Day Fun, and then, I pulled out the Let's Shellabrate stamp set.  The sea grass, ropes and seagull are a perfect compliment to the Dog Days stamp set!  There are so many scene building possibilities with them!
Reverse Confetti Dog Days

I arranged the scene adhering some pieces down with glue and others with foam tape.  A sentiment from Dog Days Sentiments was stamped on a diecut banner and added to the left side of the panel.  To finish off this card, I added white gel pen accents, Diamond Stickles and Glossy Accents to his glasses.

I truly had SO much fun creating this pair of cards! :)
Reverse Confetti Dog Days


That's all for me today, but be sure to hop along to see what the rest of the crew has to share with you! Comment along the way for a chance to win a RC gift certificate!  See you tomorrow for the hop! :)


Reverse Confetti

Sandhya Iyer

Lisa Henke

Angela Simpson

Amy Kolling

Audrey Tokach - **you are here**

Dana Kirby

Jeanne Jachna

Amy Tsuruta

Colleen Beamish


Friday, July 8, 2022

Sunny Studio Stamps - Wonky Windows


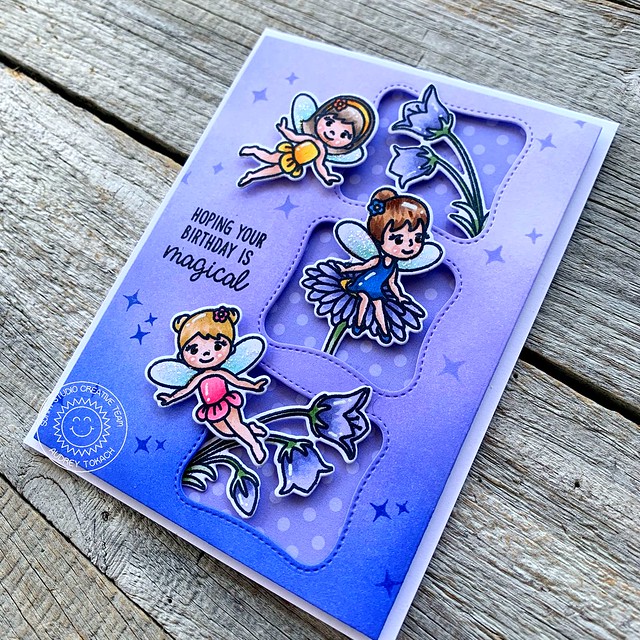
Hello friends!  Today, I have a card to share with you that mixes old and new.  I used the Wonky Windows die from the summer release, and paired it with one of my older Sunny Studio Stamps favorites, Garden Fairy.  To create this card, I started of by diecutting a piece of white cardstock cut to 4" x 5.25" with the Wonky Windows die, which I placed closer to the right side of the panel.  I used distress ink in Shaded Lilac and Blueprint Sketch to ink blend a light to dark ombre going down the front of the panel.  Then, I stamped and colored three fairies and the flowers from the Garden Fairy stamp set, and diecut them with the coordinating Garden Fairy dies.  I backed the panel with a piece of polka dot paper from the Dots and Stripes Pastels 6x6 paper pad. 

Sunny Studio Stamps

I adhered the two together with foam tape to leave a little room to tuck in my images.  To the left of the center opening, I stamped a sentiment from Garden Fairy in black ink, and used Shaded Lilac and Blueprint Sketch Distress Oxide ink to stamp the tiny stars scattered about the card front.  Once everything was adhered to the window panel, I added the panel to a white A2 card base.  To finish off the card, I added some white gel pen accents and Diamond Stickles to the fairies' wings.

Sunny Studio Stamps

That's all for me today!  Thanks so much for stopping by! :)

Friday, July 1, 2022

Sunny Studio Stamps - Baby Elephants


Hello friends!  Today, I have a girly baby card to share with you using one of my favorites from the Sunny Studio Stamps summer release, Baby Elephants.  To create this card, I used a background that I created awhile back.  When I am feeling uninspired to create a card, I often create watercolor or stenciled backgrounds to use later when my crafty mojo returns!  I used my Zig Clean Color Read Brush markers to watercolor a very pastel background.  It's hard to capture how soft and magical it is.  I used markers in shades of pale pink, peach and light blue, and then I splattered on gold and silver metallic watercolor when the first layer dried.   I stamped and colored my favorite image from Baby Elephants, the elephant on the moon, with copic markers.  Two polka dot clouds were stamped with Spun Sugar Distress Oxide.  

Sunny Studio Baby Elephants

I diecut the images with the coordinating Baby Elephants dies, and popped everything up with foam tape.  I stamped a sentiment from the set on a white banner and tucked that in along the bottom of the focal point.  I popped the panel up on a pale pink card base, and to finish off the card, I added some white gel pen accents, Diamond Stickles on the moon and a scattering of tiny pink clay hearts.

Sunny Studio Baby Elephants

That's all for me today! Thanks for stopping by! :)

Friday, June 24, 2022

Sunny Studio Stamps - Designer's Choice


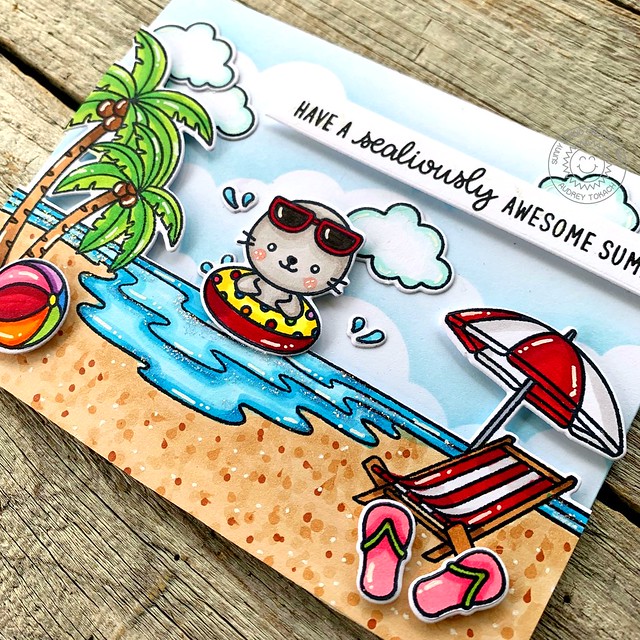
Hello friends! Today, I have a fun summer themed card which mixes older and new stamp sets from Sunny Studio Stamps!  One of my favorite things about Sunny Studio is that all of the products coordinate so well together!  To create this card, I started with a piece of white cardstock cut to 4.25" x 5.5".  I used a cloud stencil from my stash and Tumbled Glass Distress ink to create a cloudy sky.  I stamped a colored the sea and sand image and some clouds from the Ocean View stamp set, then diecut them with the coordinating Ocean View dies.  

Sunny Studio Stamps

Then, I stamped a colored one of the cute seals from the Sealiously Sweet stamp set, along with some additional beach accessories.  The beach ball and flipflops work so well with the Ocean View images!  Those were diecut with the coordinating Sealiously Sweet dies and popped up with foam tape.  I stamped a sentiment from Sealiously Sweet on a diecut banner and popped it up at the to of the scene, and to finish off my card, I added some white gel pen accents to all of the images and Diamond Stickles to the ocean water.

Sunny Studio Stamps

That's all for me today!  Thanks for stopping by! :)

Friday, June 17, 2022

Sunny Studio Stamps - Inside Greetings Congrats


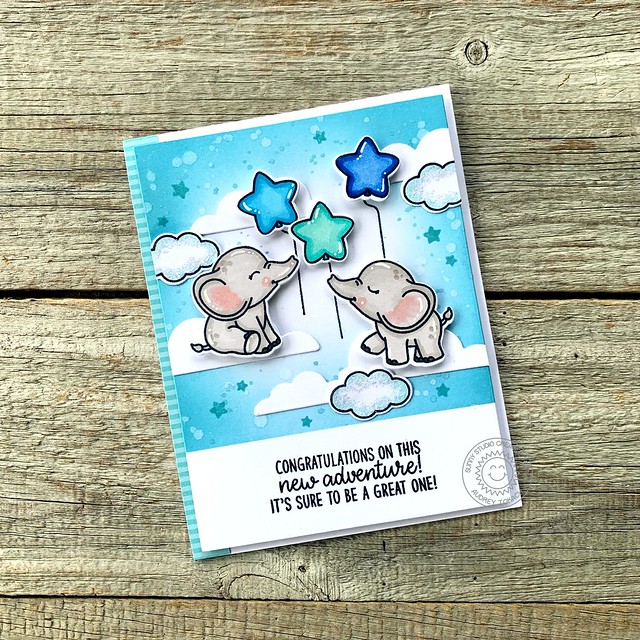
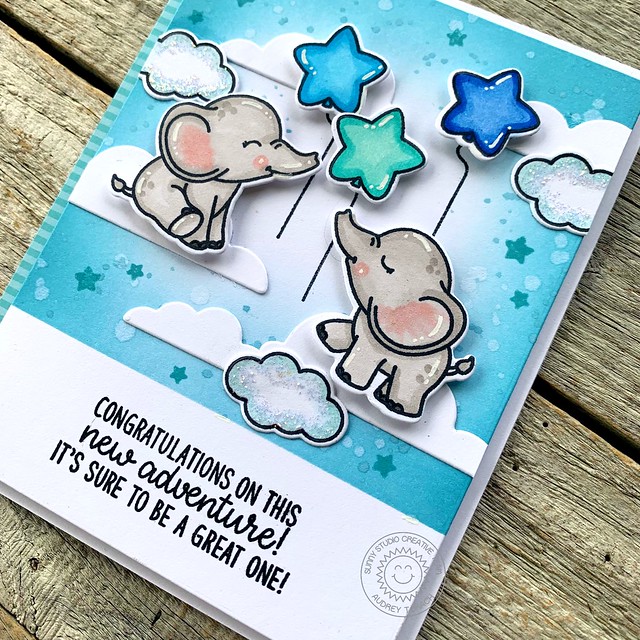
Hello friends!  Today, I have a card to share with you using the Inside Greetings Congrats stamp set, paired with one of my favorites from the Sunny Studio Stamps summer release, Baby Elephants.  My cousin and his wife just welcomed twin boys this week, and I created this card to send to them.  I started off with a piece of white cardstock cut to 4" x 5.25".  I masked off the bottom part of the panel an ink blended the top part with Broken China Distress ink.  I stamped and colored several images from the Baby Elephants stamp set, and diecut them with the coordinating Baby Elephants dies.  I diecut several white clouds using the Tropical Trees Backdrop die set.  They are a great size to use with the elephants. 

Sunny Studio Inside Greetings Congrats

 I glued the clouds down flat with a glue pen, then popped the elephants up with foam tape.  A trio of stamped star balloons add some interest to the background.  I also stamped several tiny stars scattered around the background.  In the masked area, I stamped a sentiment from the Inside Greetings Congrats stamp set in black ink.  Before mounting panel up with foam tape, I added a strip of patterned paper from the Dots and Stripes Pastel paper pad.  To finish off the card, I added some white gel pen accents and some Diamond Stickles to the stamped clouds.


Sunny Studio Inside Greetings Congrats

That's all for me today!  Thanks for stopping by! :)

Friday, June 10, 2022

Sunny Studio Stamps - Wedded Bliss


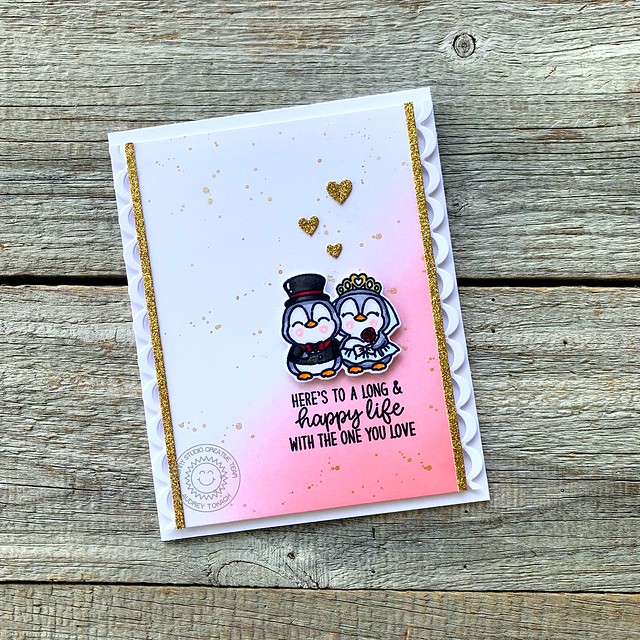
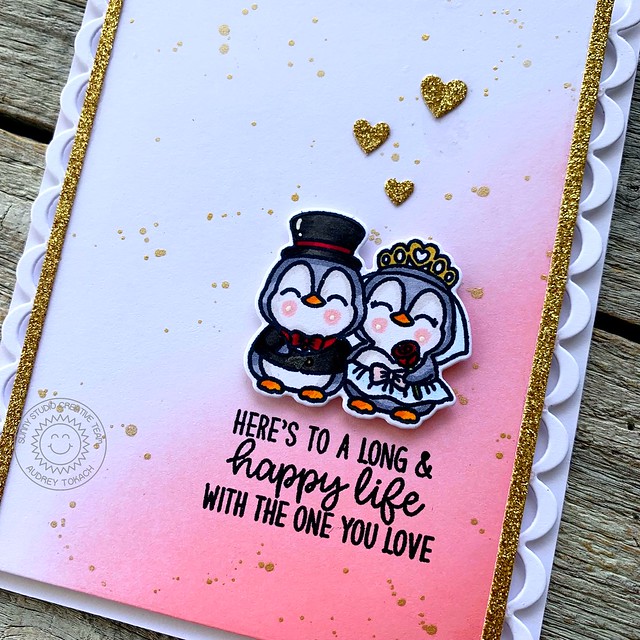
Hello friends! Today I have a fun wedding card for you using products from Sunny Studio Stamps!  To create this card, I started off with a piece of white cardstock cut slightly smaller than an A2 size.  I ink blended some Saltwater Taffy Distress ink in the bottom right corner on an angle and faded it out as I move up the panel.  Then, I splattered it with some gold watercolor.  I stamped and colored the adorable penguin pair from Wedded Bliss and diecut them with the coordinating Wedded Bliss dies. 

Sunny Studio Stamps

 To ground the bride and groom, I used a sentiment from the Inside Greetings Congrats sentiment set.  I stamped that in black ink, and popped them up just above it.  To add some more interest to the panel, I used the Icing Borders to add some scallops to both the left and right side of the panel, then added a tiny strip of gold glitter cardstock to each edge to finish it off nicely.  For another touch of gold, I added a trio of tiny hearts using the Basic Mini Shapes Dies 2 die set.  To finish off the card, I added some white gel pen accents and popped the panel up with foam tape on an A2 card base.


Sunny Studio Stamps

That's all for me today!  Thanks for stopping by! :)

Friday, June 3, 2022

Sunny Studio Stamps - Watering Can

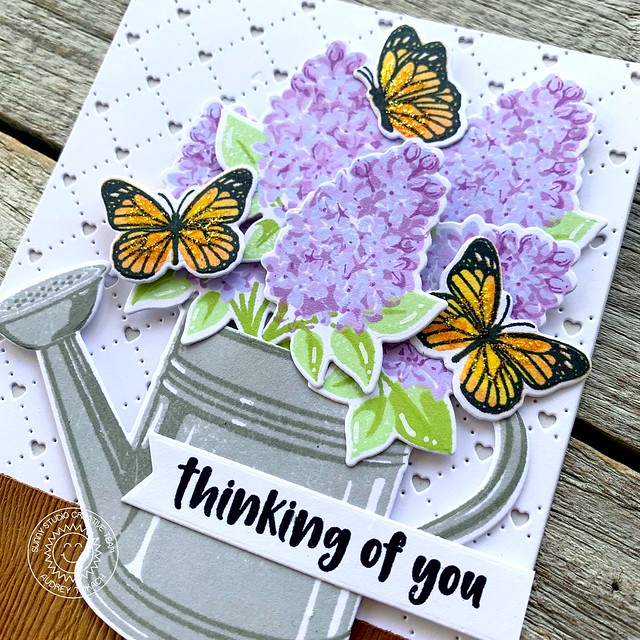
Hello Friends! I am here with a fun floral card for you using products from Sunny Studio Stamps!  To create this card, I started off by diecutting the Quilted Hearts Portrait background from white cardstock and mounted it to a light grey card base.  I stamped the Watering Can with a light and medium shade of grey ink and diecut it with the coordinating Watering Can dies.  To fill the watering can, I stamped the Lovely Lilacs florals in several shades of purple and green ink, and diecut them with the coordinating Lovely Lilacs dies.  I arranged the flowers, popping some foam tape for added dimension.  

Sunny Studio Stamps

To ground the focal point, I added a strip of woodgrain cardstock to the bottom of the panel which I ink blended with Vintage Photo distress ink to add some different tones to the wood look.  I popped the watering can up with foam tape, and added a trio of butterflies which can be found in the Watering Can set.  Then, I stamped a sentiment from Watering Can to a banner diecut and adhered it to the right side of the panel, overlapping the watering can.  To finish off the card, I added some white gel pen accents and some Stickles glitter to the butterfly wings.


Sunny Studio Stamps

That's all for me today!  Thanks so much for stopping by! :)
BLOG TEMPLATE BY DESIGNER BLOGS