Friday, May 6, 2022

Countdown to Confetti - Day 2


Hello there!  It's day 2 of the Countdown to Confetti with Reverse Confetti!  All of the new goodies that we will be showcasing over the next few days will be available in the Reverse Confetti store and at your favorite retailers on May 8th!  This month, we are celebrating RC's 9th birthday and have lots of special guests for the party, AND a FREE gift with purchase stamp set, All You Need.


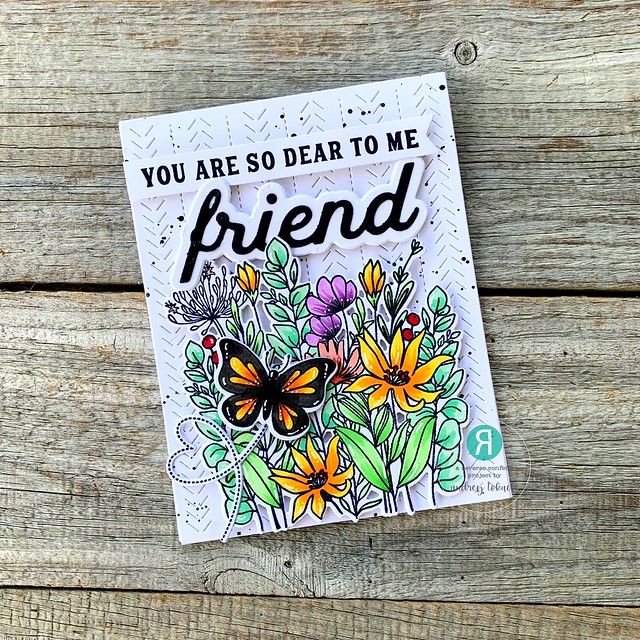
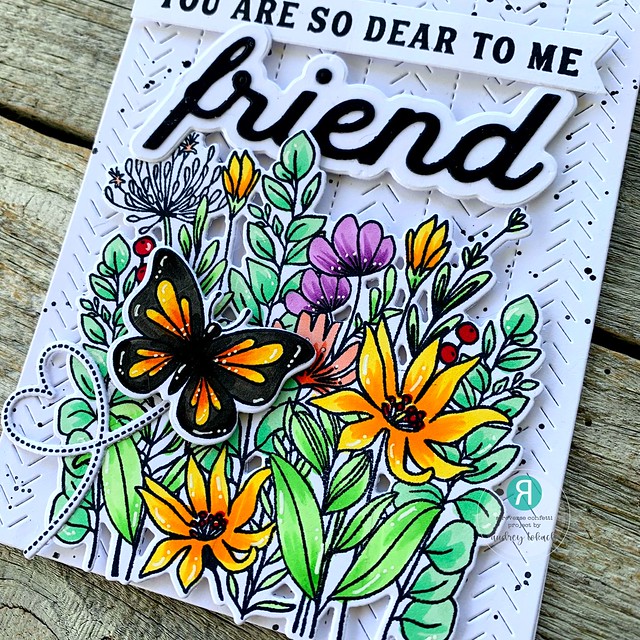
First up, I have a card using the new Wildflowers stamp set.  To create this card, I started out by diecutting a piece of white cardstock with the new Folklore Cover Panel Confetti Cuts die.  I splattered it with black watercolor and let it aside to dry.  I stamped the large floral arrangement from the Wildflowers stamp set, colored it with copic markers, and diecut it with the coordinating Wildflowers Confetti Cuts dies.  I popped the flowers up on the Folklore panel with foam tape.  Then, I stamped and  colored the smaller butterfly from the new A Beautiful Day stamp set, diecut it with the coordinating A Beautiful Day Confetti Cuts dies, and popped that up with foam tape too.  I used a heart shaped flight trail from the previously released Love Bugs stamp set as well. 


Reverse Confetti May 2022

The sentiment is a combination of a sentiment from the new Roses stamp set, along with the new Layered Friend Confetti Cuts.  I stamped the sentiment in black on a white banner diecut, and diecut the word Friend from black, which I layered with a white shadow.  Everything was popped up with foam tape, and white gel pen accents were added before I adhered the panel to an A2 card base.

Reverse Confetti May 2022

My next card features the floral cluster and another sentiment from the new Roses stamp set.  To create this card, I used the Folklore Cover Panel again, cut from white. This time, I splattered it with gold watercolor.  I added a tiny strip of gold glitter paper to the left edge.  The large cluster of roses were colored with peach and coral shades of copic markers, and diecut with the coordinating Roses Confetti Cuts dies.

Reverse Confetti May 2022

I popped the roses up with foam tape, and heat embossed a sentiment from the set in gold embossing powder on a white banner diecut.   To finish off the card, I added white gel pen accents and a scattering of gold metallic sequins before adhering it to an A2 card base.

Reverse Confetti May 2022

That's all for me today, but be sure to hop along to see what everyone else has to share with you today!  Comment along the way for your chance to win a Reverse Confetti gift certificate and stop back by tomorrow because I have lots more to share with you! :)


Sunny Studio Stamps -Ocean View


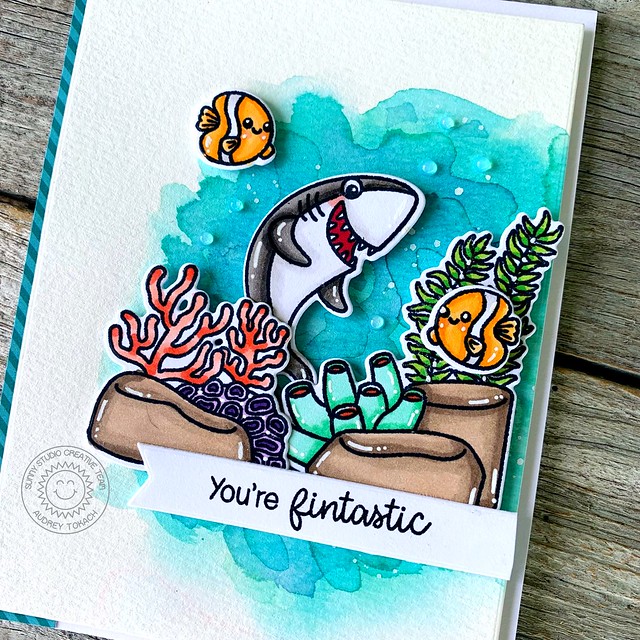
Hello friends! I am here with a fun ocean themed card to share with you using goodies from the new release at Sunny Studio Stamps!  This card showcases both the Fintastic Friends and Ocean View stamp sets.  They work beautifully together!  To create this card, I started off by watercoloring a 4" x 5.25" panel with Peacock Feathers Distress ink.  I concentrated the color to the right side of the panel.  I stamped the shark and two fish from the Fintastic Friends stamp set along with the coral and ocean pants from the Ocean View stamp set.  Everything with colored with Copic markers and diecut with the coordinating Fintastic Friends dies and Ocean View dies.  


Sunny Studio Fintastic Friends

I arranged my scene and popped everything up with foam tape.  A sentiment from the Fintastic Friends stamp set was stamped in black on a white banner diecut and placed under the images to ground the scene.  The panel was popped up on an A2 card base, with a strip of Dots & Stripes Jewel Tones patterned paper along the left edge to draw the eye across the entire card front.  To finish off the card, I added some white gel pen accents and used some Morning Dew Nuvo Drops to add some bubbles.

Sunny Studio Fintastic Friends

That's all for me today!  Thanks for stopping by! :)

Thursday, May 5, 2022

Countdown to Confetti - Day 1


Hello there!  It's day 1 of the Countdown to Confetti with Reverse Confetti!  All of the new goodies that we will be showcasing over the next few days will be available in the Reverse Confetti store and at your favorite retailers on May 8th!  This month, we are celebrating RC's 9th birthday and have lots of special guests for the party, AND a FREE gift with purchase stamp set!

Today, my projects showcase the new Birthday Buddies and Birthday Buddies Banter stamp sets, and a few fun new dies.

Here is my card and coordinating tag.  Read on to see how I made each one! :) 

Reverse Confetti May 2022

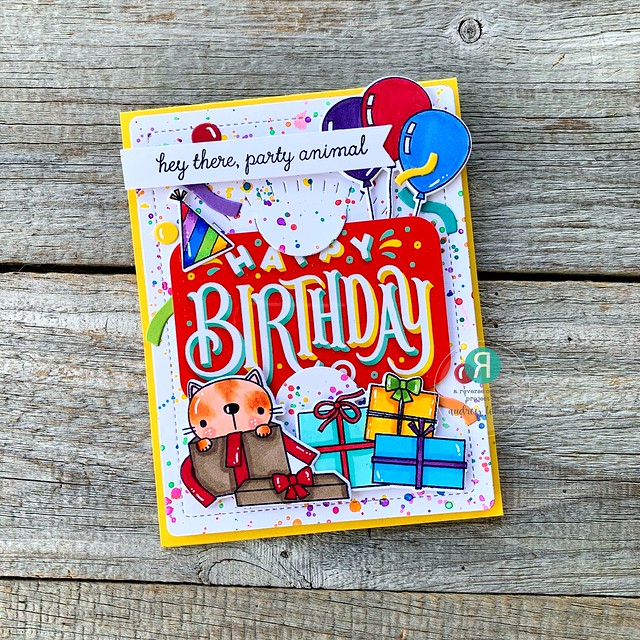
To create the card, I started of by splattering a bunch of different rainbow watercolors onto a piece of white cardstock, then I diecut it with the new Circle Gift Card Holder Confetti Cuts die.  I tucked a gift card in the slot, and decorated around it with images from the new Birthday Buddies stamp set.  They were diecut using the coordinating Birthday Buddies Confetti Cuts dies, and popped up with foam tape.  I added a sentiment from the Birthday Buddies Banter stamp set on a diecut banner, and added some diecut confetti and streamers using the Big Confetti Tag Confetti Cuts die.  Then, I mounted it onto a bright yellow A2 card base, and added some white gel pen accents to finish it off.
Reverse Confetti May 2022

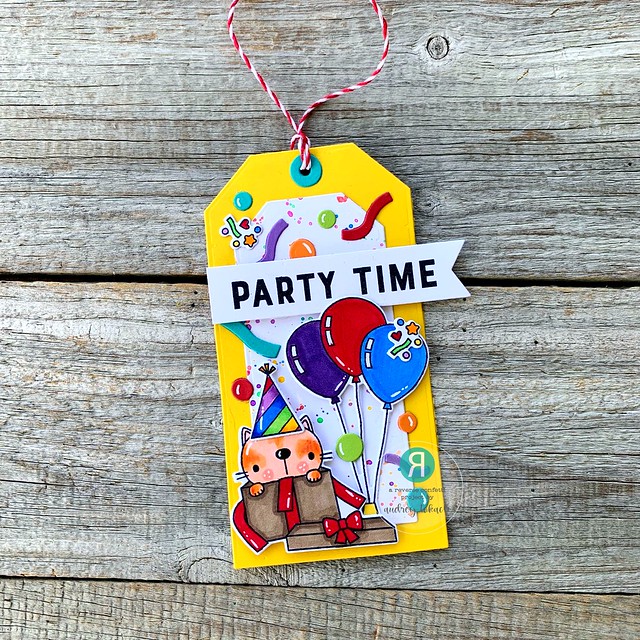
For the coordinating Tag, I diecut the large tag shape from the Big Confetti Tag die set from the same yellow cardstock, and the smaller tag from the set from the watercolor splatter paper I created.  I glued them together with a glue pen, then added images from Birthday Buddies popped up with foam tape.  The sentiment on this tag is also from the Birthday Buddies Banter stamp set.  More diecut confetti and some white gel pen accents finish off the tag.


Reverse Confetti May 2022

That's all for me today, but be sure to hop along to see what everyone else has to share with you today!  Comment along the way for your chance to win a Reverse Confetti gift certificate and stop back by tomorrow because I have lots more to share with you! :)








Friday, April 15, 2022

Sunny Studio Stamps - Fabulous Flamingos


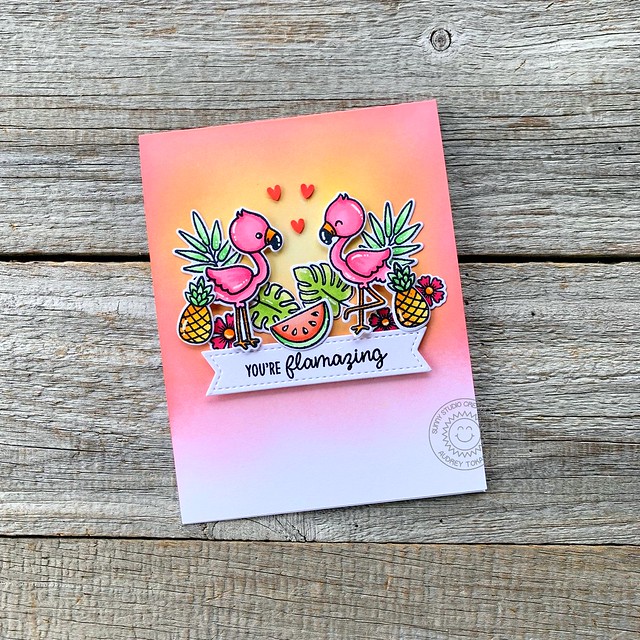
Hello friends!  Today, I have a card to share with you using one of my favorite Sunny Studio stamp sets, Fabulous Flamingos!  I love the images in this set so much.  Flamingos are one of my favorite animals, and although I've had this set for awhile, this is the first time I am getting to use it!  To create this card, I started off by ink blending a tropical sky background directly onto an A2 white card base using Distress ink in Salt Water Taffy and Squeezed Lemonade.  I concentrated the yellow in the center, then overlapped the Saltwater Taffy and blended the ink softer as I worked down the panel, eventually fading into white.  Then, I stamped and colored several images from the Fabulous Flamingos stamp set with copic markers and diecut them with the coordinating Fabulous Flamingos Dies.  


SS Fabulous Flamingos


I arranged my scene, gluing some image down with glue pen and popping some up with foam tape for extra dimension.  Underneath the scene, I placed a white banner diecut stamped with a sentiment from the set.  To finish off my card, I added some white gel pen accents and a trio of tiny clay hearts.


SS Fabulous Flamingos

That's all for me today!  Thanks so much for stopping by! :)
Friday, April 8, 2022

Reverse Confetti April Creative Hop!


Hello there!  It's the the 8th of the month, and that means a Reverse Confetti Blog Hop!  Today, we have a special surprise for you!  It's time for our spring sale!  From April 8-10th, 2022, get 20% off of your order in the Reverse Confetti Store using code SPRING.  Shop early for the best selection! ;)


My project today is extra spring-y!  I pulled out my new Reverse Confetti favorite, Hello Daisy to create a bright pastel bouquet.  To create this card, I started off by watercoloring a piece of watercolor paper cut to 4" x 5.25".  I added a wash of color using Saltwater Taffy Distress Ink.  Then, I stamped and colored the large bouquet from Hello Daisy with copic markers in shades of coral, yellow, periwinkle and spring green.  I diecut it with the coordinating Hello Daisy Confetti Cuts dies, and before adding it to the watercolor panel, I added a strip of polka dot patterned paper from the Darling Dots 6x6 paper pad.

Reverse Confetti April Blog Hop

I stamped the large "hello" from the Hello Daisy stamp set in black ink and diecut it with the coordinating die, then diecut twice more from white cardstock.  I glued all of the diecuts together with a glue pen for some added dimension without having to use foam tape.  Then, before popping it up on an A2 card base, I added a strip of black and white washi tape to the left edge of the card base to pull in just a little bit more black.  To finish off this card, I added some white gel pen accents.

Reverse Confetti April Blog Hop

Be sure to hop along to see what the rest of the team and our special guests have to share with you and don't forget to take advantage of the great spring sale! :)

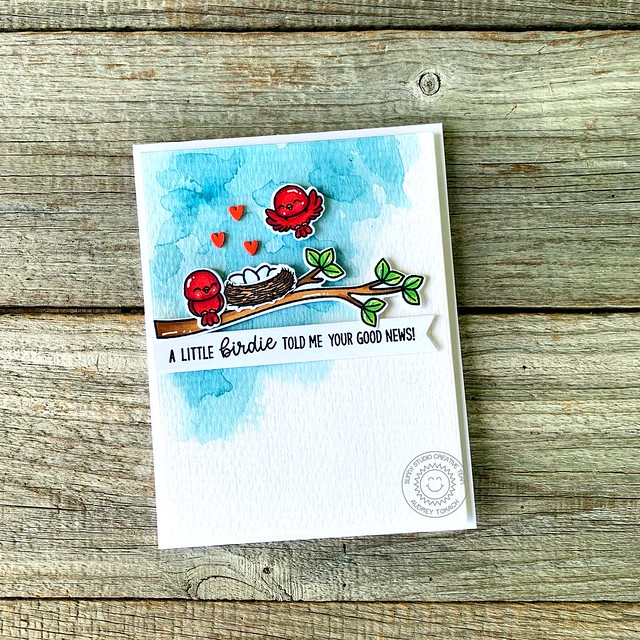
Sunny Studio Stamps - Little Birdie


Hello friends! I am here with a sweet card using the adorable Little Birdie stamp set from Sunny Studio Stamps!  To create this card, I started off by watercoloring a piece of watercolor paper cut to 4" x 5.25" with Broken China Distress ink.  I added several layers of color, drying each layer with a heat tool before adding the next.  I concentrated the color to the top left of the panel knowing that I wanted to keep my scene in that space.  I stamped and colored several images from the Little Birdie stamp set, and diecut them with the coordinating Little Birdie dies

Sunny Studio Little Birdie

Then, I stamped a sentiment from the set on a diecut banner and popped everything up with foam tape.  The panel was popped up on an A2 card base.  To finish off this card, I added a few tiny clay hearts and some white gel pen accents.

Sunny Studio Little Birdie

That's all for me today!  Thanks for stopping by! :)

Friday, April 1, 2022

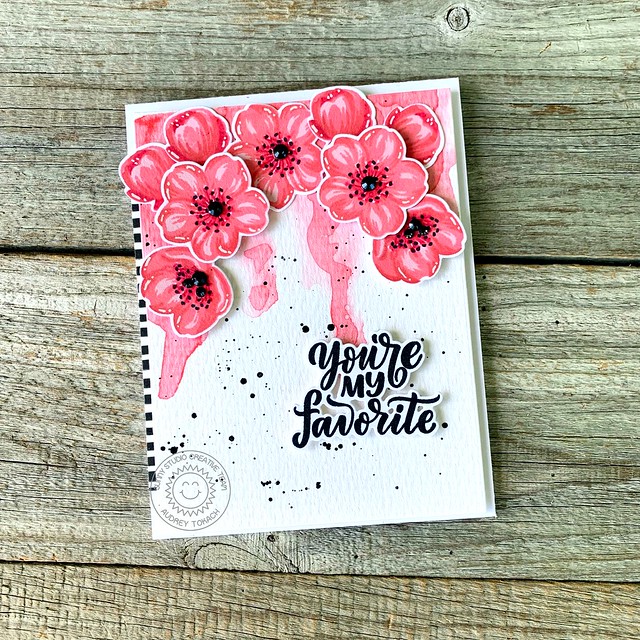
Sunny Studio Stamps - Cherry Blossoms


Hello friends!  Today, I have a card to share with you using the Cherry Blossoms stamp set from Sunny Studio Stamps.  To create this card, I started off with a piece of watercolor paper cut to 4" x 5.25".  I used Worn Lipstick Distress ink to watercolor a drippy background on the panel, concentrating most of the color at the top, then I tipped the panel on end and allowed the color to run down the panel a bit.  When I was happy with the placement, I hit it with my heat tool to dry the watercolor and leave hard edges.  Then, I added a splattering of black watercolor.  I stamped several of the Cherry Blossoms in shades of pink and coral and diecut them with the coordinating Cherry Blossoms dies.  

Sunny Studio Cherry Blossoms

I arranged them at the top of the panel and glued some down with a glue pen and popped others up with foam tape.  I stamped a sentiment from the Lovey Dovey stamp set in black ink and diecut it with the coordinating Lovey Dovey dies. I popped the sentiment up with foam tape, then popped the panel up on an A2 card base.  I added a strip of black and white washi tape to the left edge of the card base, and added Onyx Black Crystals to the front most flower centers.  Finally, I added some white gel pen accents to each of the blooms.

Sunny Studio Cherry Blossoms

That's all for me today!  Thanks for stopping by! :)
BLOG TEMPLATE BY DESIGNER BLOGS