Thursday, September 7, 2017

Countdown to Confetti - Day 3


Hello there!  It's time for another awesome Reverse Confetti release!  Today is day 3 of the countdown to Confetti!  All of the new release items that you will see over the next few days will be available in the Reverse Confetti store and at your favorite retailers on September 8th!


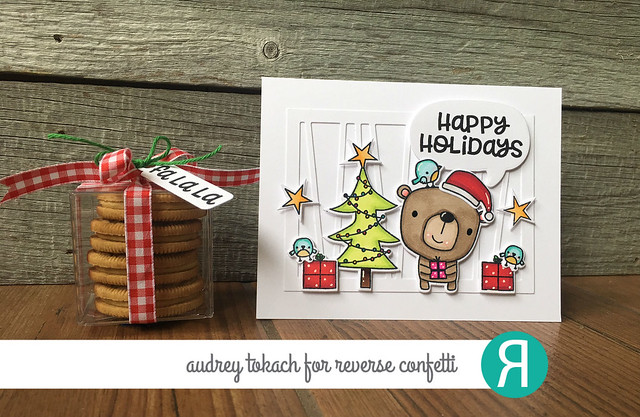
I have another ensemble to share with you today!  Another adorable critter, a Christmas Bear, and a tiny clear cube make for a perfect pair!  Keep reading to find out how I created this card and coordinating treat box!

Christmas Bear Ensemble

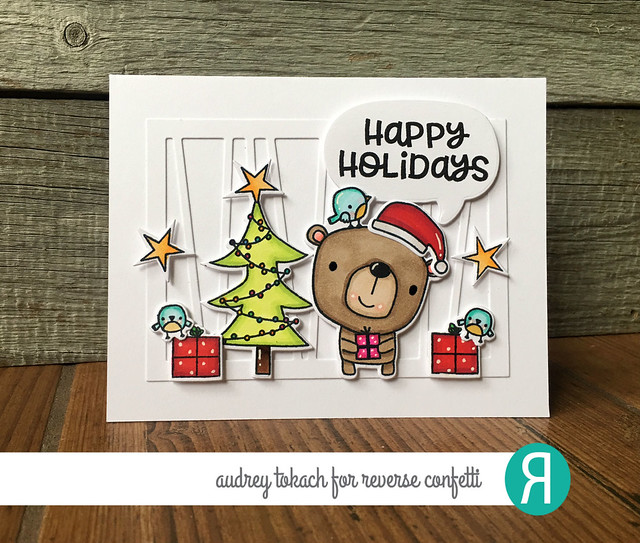
You all know how much I love the Reverse Confetti Critters, but the new Christmas Bear might be at the top of my list this release as my favorite addition to the lineup!  He, and his cute little bird friends have my heart!  To create this card, I started off with a horizontal card base cut from Premier Polar White cardstock.  I used the new Wonky Stripe Panel Confetti Cuts, cut from Premier Polar White to add some interest to the background.  I really love tone on tone patterns.  I stamped and colored a bunch of images from the Christmas Bear stamp set and diecut them with the coordinating Christmas Bear Confetti Cuts.  I arranged them on the card base, and popped them up with foam tape.  I stamped a sentiment from the new Sentimental Christmas stamp set on to a speech bubble, the previously released Figure of Speech Confetti Cuts.

Christmas Bear

I used the new Mini Clear Box to create a coordinating treat box.  The box is a cube, small enough to be oh-so-cute, but big enough to hold a bunch of little goodies!  These would make adorable place favors on your  holiday table.  Four Oreo cookies fit nicely in the box.  I tied a bow with some checkered ribbon from my stash, and used the little tag from the new Clear Treat Box and Box Wrap Combo to add a tag. I cut it from Premier Polar White cardstock and stamped a sentiment from the Sentimental Christmas stamp set.  I attached it to the box with some Peapod twine.

Christmas Bear Cube

Be sure to visit the Reverse Confetti blog for lots  more inspiration from the design team, and comment as you visit the design team blogs for your chance to win one of two $15 Reverse Confetti gift certificates!

Stop back by tomorrow for the September blog hop!

Thanks for stopping by! :)


Wednesday, September 6, 2017

Countdown to Confetti - Day 2


Hello there!  It's time for another awesome Reverse Confetti release!  Today is day 2 of the countdown to Confetti!  All of the new release items that you will see over the next few days will be available in the Reverse Confetti store and at your favorite retailers on September 8th!


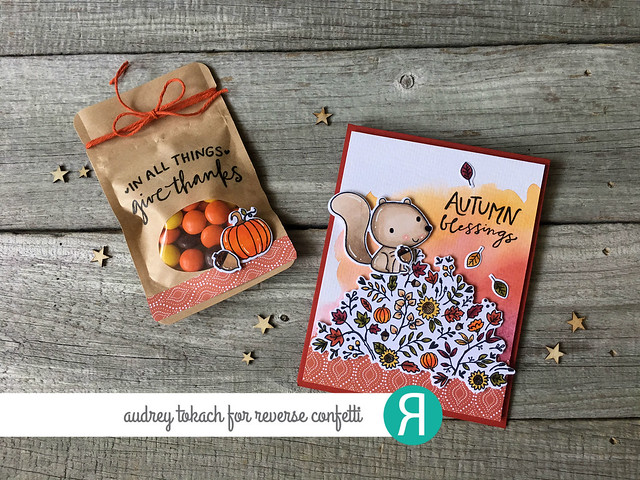
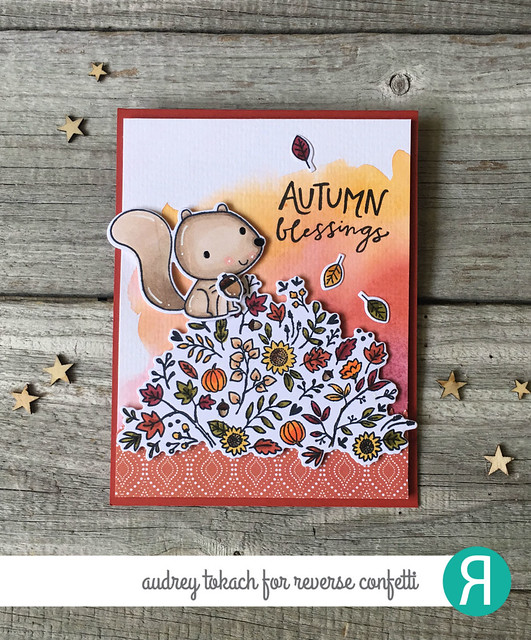
Today, I have an ensemble to share with you that features several new products from the September release!  There is not one product in this release that I don't love! It's such a good one!!  This card and coordinating treat bag features the new Nuts About You stamp set, the Autumn Blessings stamp set, and the adorable little Bitty Window Bags!  Keep reading for  more details on how I created this little pair!

Nuts About You Ensemble

I started off by watercoloring a piece of watercolor paper with my Artist Loft watercolors from Michaels.  I cut it to size, then added a strip of patterned paper from the new Every Little Bit patterned paper pad at the bottom.  I stamped and colored the large leaf pile image from the new Autumn Blessings stamp set, diecut it with the coordinating Autumn Blessings Confetti Cuts, and popped that up with foam tape.  Then I stamped and colored the cute little squirrel from the new Nuts About You stamp set, and diecut him and his little acorn with the coordinating Nuts About You Confetti Cuts.  I perched him on top of the leaf pile.  Then I stamped a sentiment from the Autumn Blessings stamp set, and framed it was a scattering of tiny leaves from the Nuts About You stamp set.  Finally, I mounted the panel on a Rust card base with foam tape.

Nuts About You Card

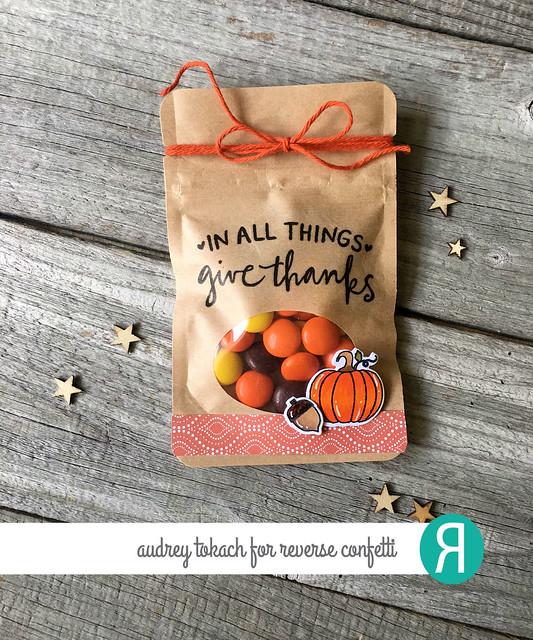
I created a coordinating treat bag with the cute little Bitty Window Bags, new to the Reverse Confetti store this month!  They are tiny kraft bags with a window and ziplock closure with is great because food items stay fresh longer!  I added a strip of the same patterned paper to the bottom, along with a pumpkin and acorn from the Nuts About You stamp set.  Above the window, I stamped a sentiment from the Autumn Blessings stamp set, and added bow with some Solid Mandarin twine.

Nuts About You Treat Bag

Be sure to visit the Reverse Confetti blog for lots  more inspiration from the design team, and comment as you visit the design team blogs for your chance to win one of two $15 Reverse Confetti gift certificates!

Stop back by tomorrow to see more of the Reverse Confetti September release!

Thanks for stopping by! :)


Tuesday, September 5, 2017

Countdown to Confetti - Day 1


Hello there!  It's time for another awesome Reverse Confetti release!  Today is day 1 of the countdown to Confetti!  All of the new release items that you will see over the next few days will be available in the Reverse Confetti store and at your favorite retailers on September 8th!


Let's get started, shall we?  This month is full of awesome products, perfect for all of your fall and winter holidays!  First up, halloween!

I created this little ensemble using the new Monsterous stamp set.  These little monsters are hardly spooky, and oh-so-adorable!  And how fun is that treat box!  It's a great size to hold so many things!  Keep reading for more details on how I created this card and coordinating box.

Monsterous Ensemble

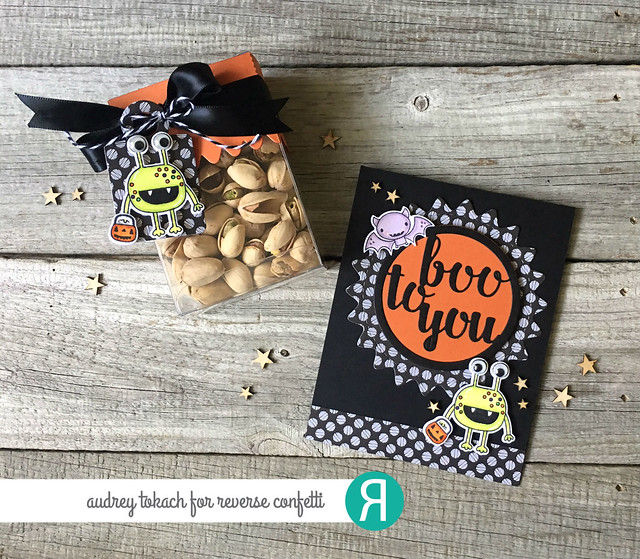
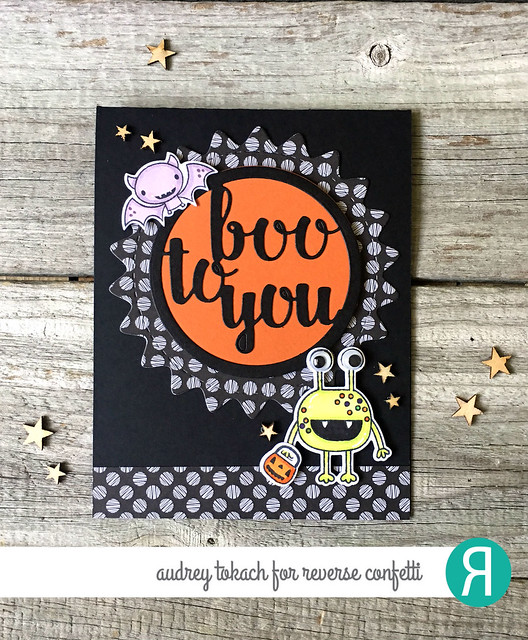
I started off with a black card base.  On top of that, I diecut the new Boo To You Circle Confetti Cuts.  This die is so cool because you can keep the dies all attached or cut them apart for a totally different look.  For this project, I cut them apart.  I diecut the pinked edge circle from a piece of patterned paper from a new paper pad called Every Little Bit.  I cut the solid circle from Tangerine cardstock, and then cut the text layer from black cardstock.  I added a strip of the same polka dot paper to the bottom of the card base, and popped the circle up in the center of the card base.  I stamped and colored one of the cute little monsters from the Monsterous stamp set, and diecut him with the coordinating Monsterous Confetti Cuts. I couldn't resist giving him some google eyes! He's holding a cute little pumpkin treat bucket from the same stamp set, and to balance the design a bit more, I added a bat from the previously released Best Witches stamp set.  A scattering of tiny wood stars from my stash finished off the card.

Monsterous Card

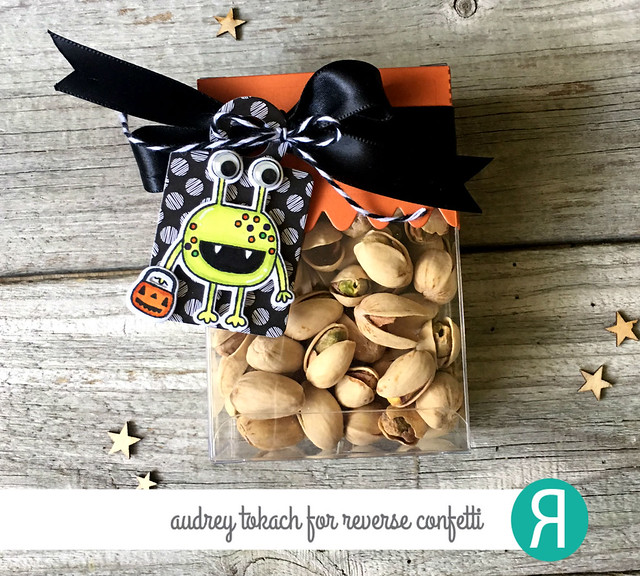
I created a coordinating treat box using the new Clear Treat Box and Box Wrap Combo.  This set comes with the scalloped die, a tiny tag (not pictured here) and 6 of the clear boxes.  The boxes are also sold separately.  I diecut the scalloped piece from Tangerine cardstock and added a black satin bow.  The little tag is from the new Tag Duo Confetti Cuts, cut from Every Little Bit patterned paper.  I colored another monster just like the one on my card and popped him up on the tag with foam tape.  Then I tied it to the box with Charcoal Twine, and filled my box with pistachios.

Monsterous Box

Be sure to visit the Reverse Confetti blog for lots  more inspiration from the design team, and comment as you visit the design team blogs for your chance to win one of two $15 Reverse Confetti gift certificates!

Stop back by tomorrow to see more of the Reverse Confetti September release!

Thanks for stopping by! :)


Monday, September 4, 2017

Stamptember with Lawn Fawn!


Hello hello!  It's the day so many have been waiting for!  The Lawn Fawn collaboration with Simon Says Stamp for Stamptember is available NOW!  Christmas Like No Otter is an adorable stamp set, great for the holidays, but also for every day cards!


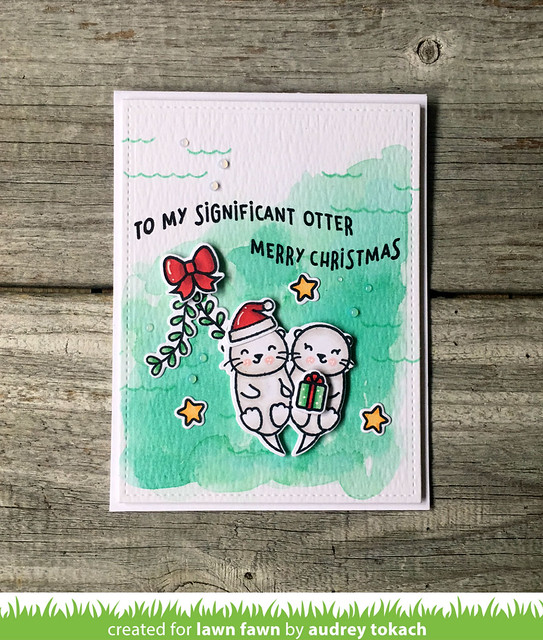
To create my card, I started off by watercoloring a background using Cracked Pistachio and Lucky Clover distress inks.  When it was dry, I diecut it with the largest die in the Small Stitched Rectangles Stackables dies.  I stamped and colored images from Christmas Like No Otter, and diecut them with the coordinating Christmas Like No Otter dies.  I popped everything up with foam tape.  I added some waves with the wave image from the set, stamped in Cracked Pistachio for a tone on tone look.  Then I added some bubbles using Morning Dew Nuvo Drops, added some white gel pen accents, and mounted the panel on a white card base with foam tape.


Christmas Like No Otter

If you want to get your hands on these adorable otters, don't delay!  This stamp set and its coordinating dies are exclusive to Simon Says Stamp, and ONLY available while supplies last!

Christmas Like No Otter

Be sure to visit the Lawn Fawn blog and the Simon Says Stamp blog for lots more inspiration using this adorable LIMITED EDITION stamp set! :)


Thanks for stopping by!!
BLOG TEMPLATE BY DESIGNER BLOGS