Friday, May 5, 2017

Reverse Confetti Countdown to Confetti - Day 1

Hello, hello!  I am so excited because today kicks off Reverse Confetti's 4th birthday celebration!  There are so many new and amazing products headed your way!  The design team will be showcasing all of the new goodies over the next few days, and everything will be available for purchase on May 8th in the Reverse Confetti store and at your favorite retailers!


Today, to kick off the festivities, we have the gang from CardMaker joining us to help get the party started!!


For my card today, I am using the adorable new Miso Happy stamp set!  These adorable pandas are one of two new critter sets being added to the lineup this month!

To create my card, I started off with a piece of watercolor paper cut to 4" x 5.25".  I used the new Leaf Lattice stencil and my Zig CleanColor Real Brush Pens to create this watercolor background.  I simply colored in the openings of the stencil with a green marker along the bottom edge of each leaf and then used a brush and clean water to pull the color to fill in each leaf completely.  I only colored in the openings along the right side of the stencil, leaving the top left corner white.  When it was dry, I used an ink blending tool and Cracked Pistachio distress ink to add a pale green hue to the right side of the piece for added interest.  I added a strip of yellow patterned paper from the new Pattern Play paper pad to ground my panda trio.  I stamped and colored the pandas, bamboo and rock pile from the set, diecut them with the coordinating Miso Happy Confetti Cuts, and adhered them to the watercolor panel to create my scene.  I stamped a sentiment from the previously released Tie-riffic stamp set, and finished things off with some white gel pen accents.  Finally, I popped the panel up on a white A2 card base with foam tape to complete the card.
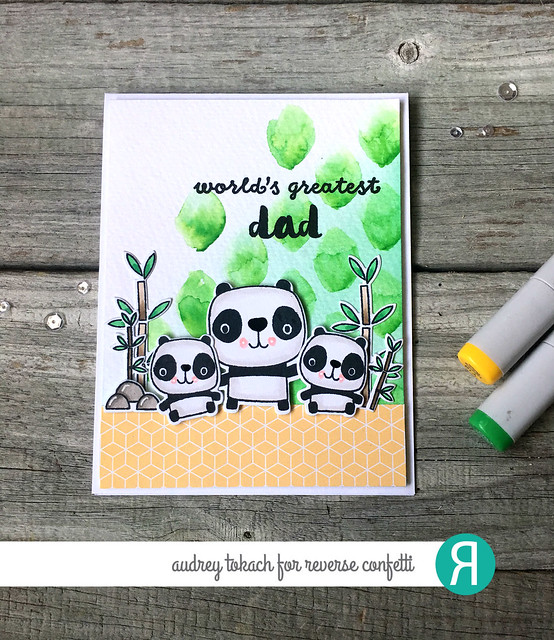
World's Greatest Dad

I just love these cute little guys!  I gave them shiny noses with a black glaze pen.  Sometimes, it's all in the details! :)
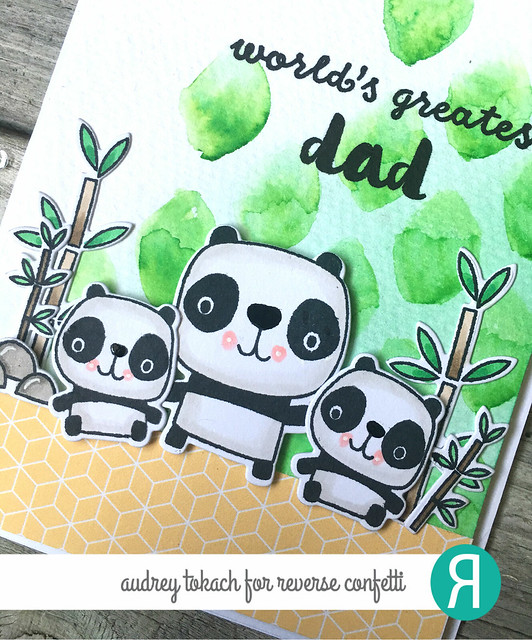
World's Greatest Dad

Be sure to hop along with the design team, and our special guests from CardMaker!  Here is the complete list of all of those participating today:

Audrey Tokach - **you are here**


Thursday, April 20, 2017

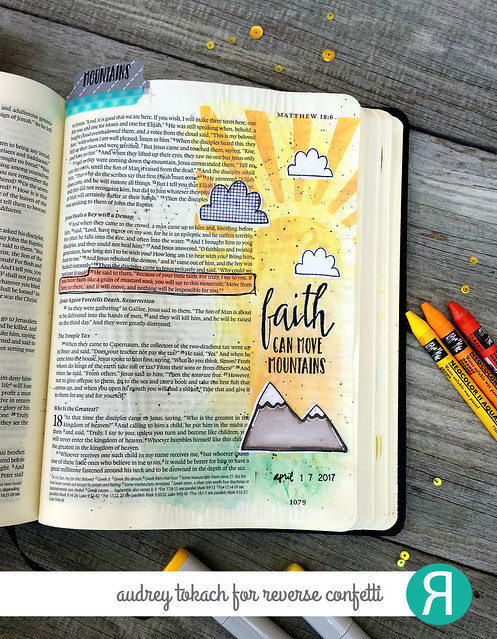
Bible Journaling: Matthew 17:20-21


Hello there!  I have a fun project to share with you today!  I am using some of my favorite Reverse Confetti products to do a little Bible Art Journaling!  Reverse Confetti has a line of faith based sentiments that are perfect, not only for card making, but also for bible journaling.

Today, I chose to journal Matthew, 17:20-21 which reads: He replied, “Because you have so little faith. Truly I tell you, if you have faith as small as a mustard seed, you can say to this mountain, ‘Move from here to there,’ and it will move. Nothing will be impossible for you.”

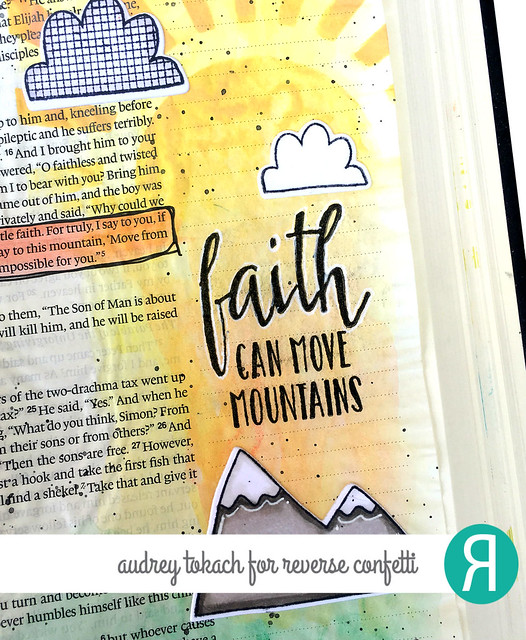
I started off my page by using my Neocolors II water reactive crayons to lay down a watercolor wash in the column of the page, and overlapping slightly onto the text.  I started with yellow at the top, then two shades of orange, and finally green at the bottom.  I used the darkest orange to also highlight the verse that I wanted to journal.  For the sun rays at the top, I used the Sunburst Cover Panel to cut a piece of clear acetate to use as a stencil.  I used my Distress Oxide inks in Spiced Marmalade and Fossilized Amber with an ink blending tool to give a good contrast to the watercolored sky behind.  Just below the sun, I stamped a sentiment from The Lord's Strength stamp set.  For the mountains, I used an image from the Bearing Gifts stamp set.  The little clouds in the sky are from the Weather it Together stamp set.  I outlined the watercolored verse with a black journaling pen, and to mark my page, I used some patterned paper from the Free Spirit paper pad to make a tab using a tab punch.  I selectively inked and stamped the word "mountains" from the same sentiment I used on the page.  To finish things off and add a bit more interest. I added some black spatter all over the page.

Mountains

I love stamps that are multipurpose, and digging through my stash to look for things to use in my bible is very relaxing and fun for me.  If you have never painted in the pages if your bible, I encourage you to give it a try!  I was so nervous at first, but I quickly realized how silly it was to be nervous!  I have a separate bible just for my art journaling, the ESV Single Column Journaling Bible by Crossway, but there are so many to choose from! :)

Bible Journaling

That's it for me today!  I hope you enjoyed a peek into my bible! :)

Thanks for stopping by!! :)


Wednesday, April 19, 2017

Lawn Fawn Inspiration Week - Zig Zag Stackables


Hello there!  Today, Lawn Fawn April Inspiration Week comes to a close. So sad!  But I have one more project to share with you using the Zig Zag Circles Stackables!  I think the zig zags are some of my most favorite stackables sets yet!  So fun!

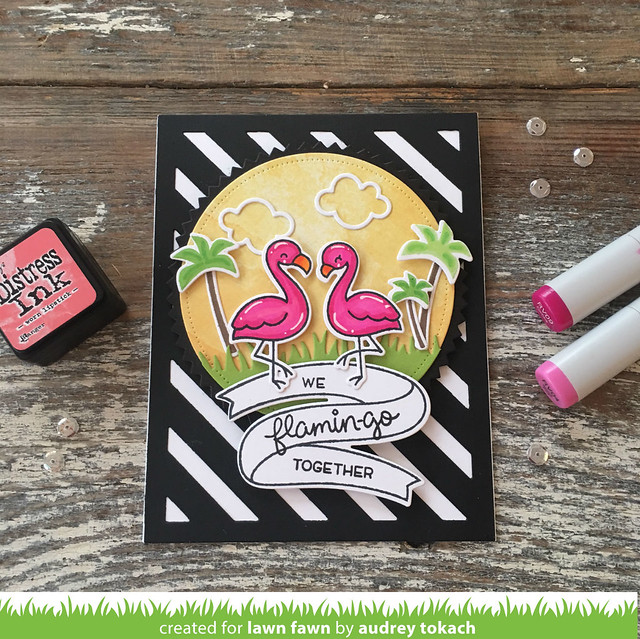
To create my card, I started off with a white card base.  I diecut the Stripey Backdrop from black cardstock and glued that on top.  For my focal point, I diecut the largest Zig Zag Circle from the set out of black cardstock, and then cut a Dotted Circle slightly smaller from Watercolor Wishes patterned paper.  I added a strip of grass to the bottom of the circle using the Simple Grassy Hillside borders cut from Cilantro cardstock.  I stamped and colored the cute flamingo pair from Flamingo Together along with a few little palm trees from the same set.  I popped everything up with foam tape, and added a few diecut clouds using the Simple Puffy Cloud Frames die set.  I adhered the circle to the card base with foam tape, and stamped a sentiment from Flamingo Together onto one of the banners from the new Bannertastic stamp set.  Finally, I few white gel pen accents to finish things off.

Zig Zag Circles

That's all for me today!  Be sure to visit the Lawn Fawn blog for lots more inspiration from the design team!

Thanks so  much for stopping by! :)

Monday, April 17, 2017

Lawn Fawn Inspiration Week - Embroidered Hello

Hello there!  Welcome to day 3 of Lawn Fawn Inspiration Week!  Today, the teal is showcasing the Embroidered Hello and Embroidered Thanks dies!

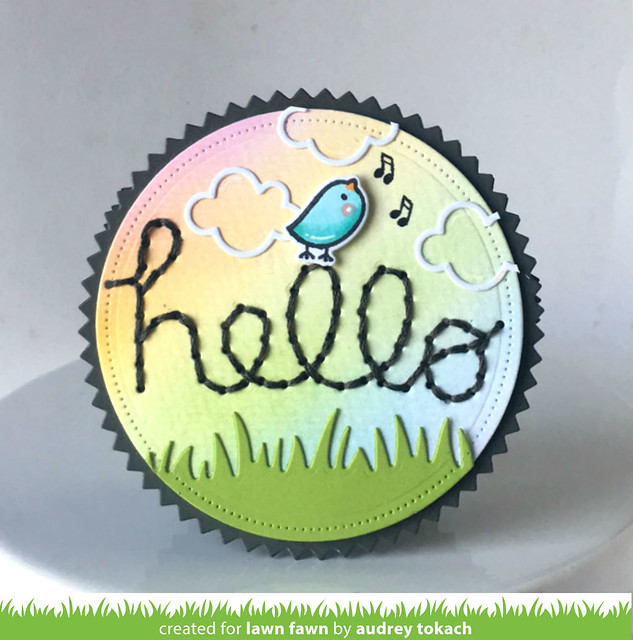
For my card, I used the Embroidered Hello die.  I ink blended a pastel rainbow on a piece of watercolor paper with distress inks, then diecut with the Dotted Circles dies.  I diecut the Embroidered Hello from the center and stitched it with dark grey thread.  I added a patch of grass underneath with the Grassy Border die cut from Cilantro cardstock, and a few clouds to the sky using the Simple Puffy Cloud Frame dies.  The cute little bird is from the Hello Sunshine stamp set, and his music notes are from the Year Four stamp set.  I adhered the dotted circle to a Zig Zag Circle diecut, and created a card by diecutting a second zig zag circle and scoring it to make it easy to open.

Embroidered Hello

That's all for me today!  Be sure to stop by the Lawn Fawn blog for lots more inspiration from the design team!

Thanks so much for stopping by!! :)

Sunday, April 16, 2017

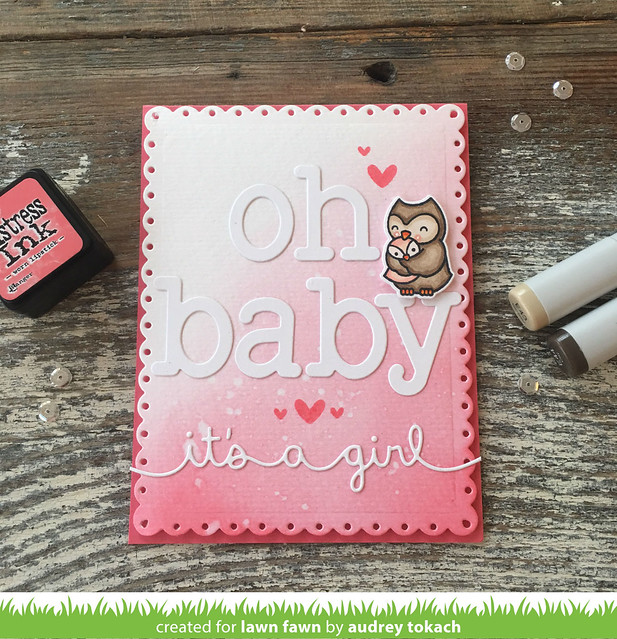
Lawn Fawn Inspiration Week - It's a Girl Border


Hello there!  Welcome to day 2 of Lawn Fawn Inspiration week!  Today, I have a card to share with you using the new It's a Girl Border die.

To create my card, I started off by ink blending a piece of watercolor paper with Spun Sugar and Worn Lipstick distress inks.  I added a splattering of clean clear water to bleach out some areas.  Then I ran it through my diecut machine using the Fancy Scalloped Rectangles stackables to give it a scalloped edge.  I stamped and colored the cute owl image from Mom+Me and popped it up on a sentiment I created with the Louie's ABCs dies.  Under that sentiment, I added the It's a Girl border, diecut from white cardstock.  I stamped a few hearts in Bubblegum ink, and popped the panel up on a Guava card base.

Its a Girl Border

That's all for me today!  Be sure to stop by the Lawn Fawn blog to see lots more inspiration from the design team!  I'll be back tomorrow with another project! :)

Thanks for stopping by! :)

Saturday, April 15, 2017

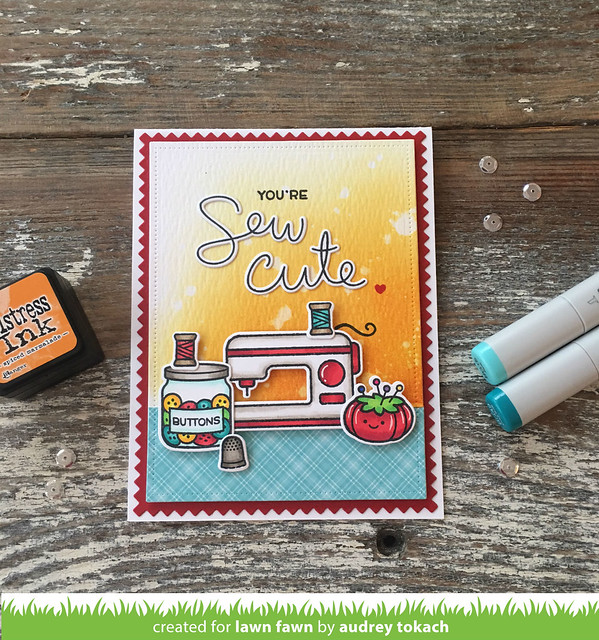
Lawn Fawn Inspiration Week - Sewn With Love


Hello there!  Today starts Lawn Fawn Inspiration Week!  Today, the team is showcasing the super cute set, Sewn With Love.

To create my card, I started off by ink blending Wild Honey and Spiced Marmalade distress ink on to a piece of Tim Holtz watercolor paper, then added splatters of clean water to bleach out a few areas.  When it was dry, I diecut with the Dotted Rectangles Stackables.  I stamped and colored images from the Sewn With Love stamp set and diecut with the coordinating Sewn With Love dies.  I grounded the images with a piece of patterned paper from the Perfectly Plaid Rainbow 6x6 paper pad, then popped the images up with foam tape.  I stamped part of the sentiment, and glued the diecut pieces of the sentiment down with a glue pen, then mounted the panel on a piece of red cardstock diecut with the Zig Zag Rectangles Stackables.  I mounted everything on a white card base, and added accents with a white gel pen.


Sew Cute

That's all for me today!  Be sure to visit the Lawn Fawn blog for lots more inspiration from the design team and join me again tomorrow when I will share another project with you! :)

Thanks for stopping by!! :)

Monday, April 10, 2017

Pineapple Crush {Paper Smooches}

Hello hello!  Happy Monday!

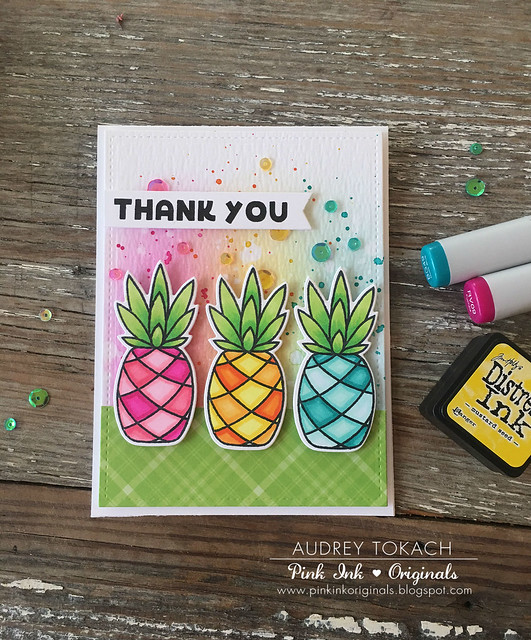
If you follow me on Instagram, you already know that I had the opportunity to visit the Whatever Craft House in Newton, Kansas this weekend for a girls weekend!  A bunch of stamping friends got together for 4 days of fun!  Today, I have a few cards to share with you using the ADORABLE new release from Paper Smooches!  Pineapples are a hot new trendy thing, and as soon as I saw them, I knew I had to have them!

My first card uses the Pineapple Crush and Pineapple Crush 2 stamp sets.  I started off by ink blending distress inks in Picked Raspberry, Mustard Seed and Broken China in vertical stripes on a piece of Tim Holtz Distress Watercolor paper.  I started blending at the bottom and working my way up so that it was darker at the bottom and gradually faded into a light wash of color.  I added some droplets of clean, clear water to bleach out some areas, and then ink splattered in the same colors.  I added a strip of Lawn Fawn Perfectly Plaid Rainbow paper to the bottom, and diecut the panel with the Lawn Fawn Stitched Rectangles dies.  I stamped and colored the large detailed pineapple from Pineapple Crush, one in pink, yellow and blue to coordinate with the distress inked background.  I popped those up with foam tape, then stamped a sentiment from Pineapple Crush 2 onto a hand cut banner, and popped that up.  Finally, I added a scattering of Pretty Pink Posh iridescent sequins in Strawberry Burst, Sunshine Glow and Peacock Feathers, and then popped it up on a white card base.

Pineapple Thank You

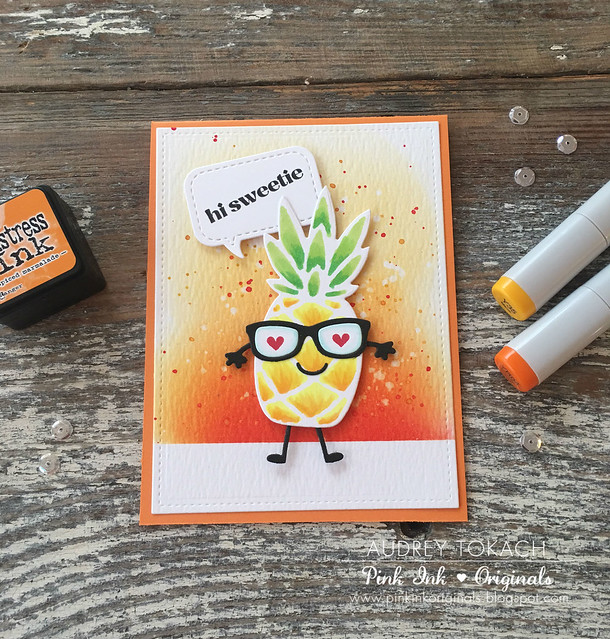
My second card uses the Pineapple 2 die set.  I started off by masking off the bottom of the paper and then ink blending a background on watercolor paper using Wild Honey, Spiced Marmalade and Candied Apple distress inks.  I bleached out some spots with a sprinkle of water, and then added ink splatters using the same ink colors.  I ran it through my diecut machine to add a stitched edge.  I diecut the solid pineapple from the set from white cardstock, and I cut the detail later from the die set as well.  I held the detailed layer over the top to serve as a mask, and colored in the holes with my copic markers, and then removed the detailed layer.  I added cute little arms and legs to him using the Fruit People dies.  His glasses were cut from black cardstock and I stamped the centers with the tiny heart from the Pineapple Crush 2 stamp set.  I stamped a sentiment from the Cute Fruit stamp set onto a speech bubble diecut by Pretty Pink Posh, and popped everything up with foam tape before adding it to an orange card base.

Hi Sweetie

That's all for me today!  Thanks so much for stopping by! :)
BLOG TEMPLATE BY DESIGNER BLOGS