Tuesday, May 15, 2018

Lawn Fawn Inspiration Week - Shadow Box Card Ocean Add-On


Hello there! Welcome to another day of Lawn Fawn Inspiration Week!  All of the Summer release will be available on May 17th!

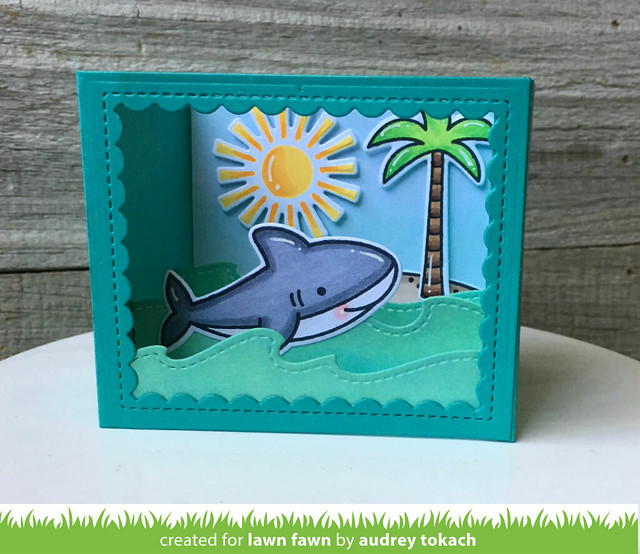
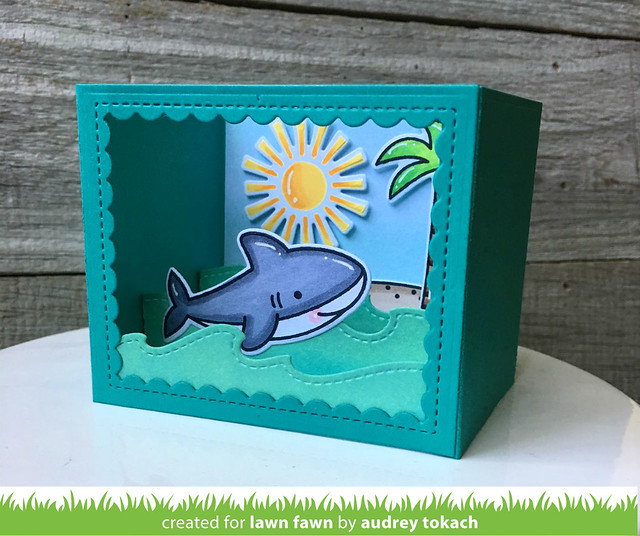
Today, the team is showcasing to new dies to coordinate with the Shadow Box Card die!  I chose to work with the Shadow Box Ocean Waves Add-On for my project.  I assembled my  Shadow Box Card which I cut from Peacock cardstock.  I inked the ocean waves with Cracked Pistachio and Peacock Feathers Distress Oxide inks, and to decorate my box, I pulled out the previously released Life Is Good and Duh-Nuh stamp sets.

Shadow Box Ocean Add On

How fun is that scalloped window opening?  That die is part of this new die set!  The possibilities are endless when you pair this die set with all of Lawn Fawn's underwater stamp sets!

Shadow Box Ocean Add On

That's all for me today!  But be sure to check out the Lawn Fawn blog to check out more fun projects these fun new dies, and the new dies!

Thanks for stopping by! :)

Monday, May 14, 2018

Lawn Fawn Inspiration Week - Manatee-rific & Stitched Wave Borders


Hello there!  Welcome to another day of Lawn Fawn Inspiration Week!  The summer 2018 release will be available for purchase on May 17th!

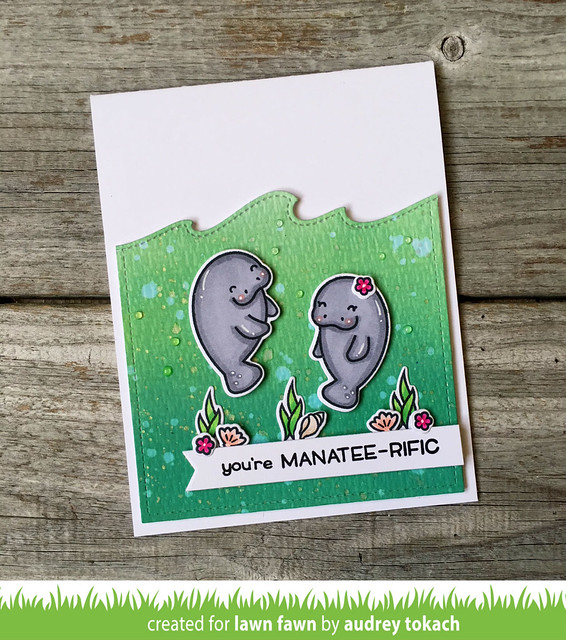
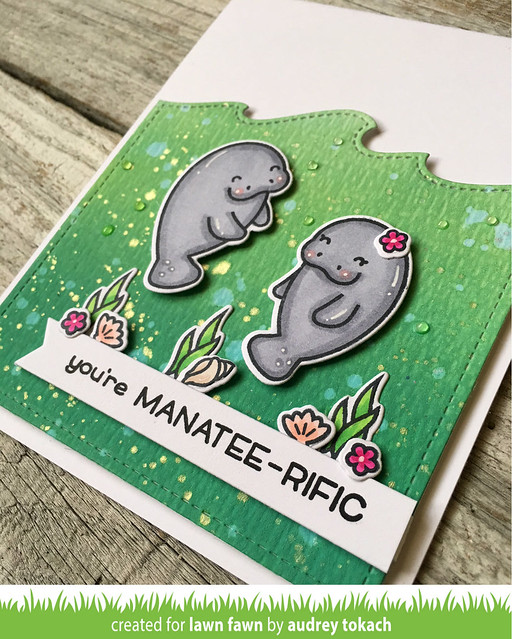
Today, the team is showcasing a new stamp set, Manatee-rific and  the Stitched Waves Borders!  To create my card, I started with an A2 card base.  I diecut a piece of watercolor paper with the largest die from the Outside In Stitched Rectangles.  I ink blended a background with Cracked Pistachio and Lucky Clover Distress Oxide inks, then splattered on some clean, clear water to bleach out some areas.  For some added shine, I splattered on some gold metallic watercolor.  When it was dry, I diecut the panel with one of the new Stitched Waves borders.  I stamped and colored the manatee pair, plus some seaweed, shells and flowers from the same set, and diecut them with the coodinating Manatee-rific dies. 

Manateerific

I stamped a sentiment from the Manatee-rific stamp set onto white cardstock and diecut it with the Everyday Sentiment Banners dies.  I popped everything up with foam tape, and added some white gel pen accents.  Finally, to finish things off, I added some bubbles with Nuvo Crystal Drops in Morning Dew.

Manateerific

That's all for me today!  Be sure to visit the Lawn Fawn blog for lots more inspiration from the design team! :)

Thanks so much for stopping by!!

Friday, May 11, 2018

Lawn Fawn Inspiration Week - Reveal Wheel & Sweetest Flavor


Hello there!  Welcome back to day 2 of  Lawn Fawn Inspiration Week!  We are showing off all of the new Summer 2018 release, which will be available for purchase on May 17th!  Today, the newest of the interactive dies that Lawn Fawn offers, the Reveal Wheel!  I've paired it up today with another new mini set, Sweetest Flavor!

No one does interactive like Lawn Fawn!  The Reveal Wheel is SO much fun and so EASY to assemble!  Along with the Reveal Wheel die set, they are also releasing a few other coordinating dies to change the shape of the window opening in the wheel, including one that coordinates with the new Sweetest Flavor mini set, which is appropriately named the Reveal Wheel Sweetest Flavor Add On.  You can visit the Lawn Fawn blog to see a video which shows you how easy it is to put this together, so I encourage you to pop on over there when you are done here :)

I decorated my Reveal Wheel panel with some white on white polka dots using one of my favorite things from the release, the Itsy Bitsy Polka Dot Backdrop die.  The patterned paper is from the Really Rainbow Petite Paper Pad.  The ice cream cone is from the new Sweetest Flavor stamp set, and the sentiment from the same set is stamped onto a Bannertastic banner.  If you scroll down, you can see how fun this die is!
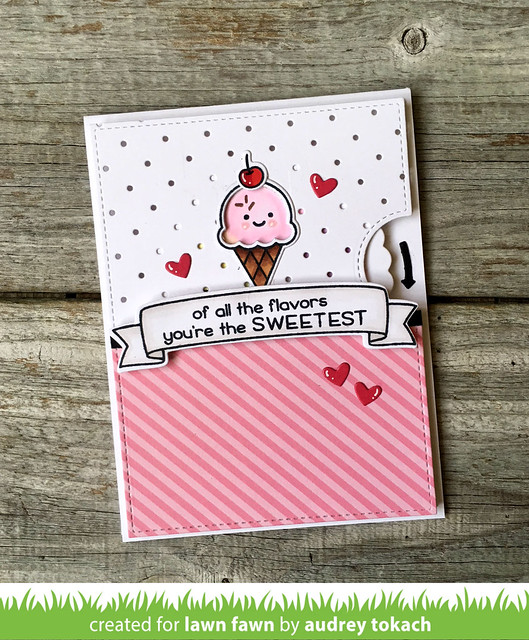

Sweetest Flavor Reveal Wheel

By turning the wheel on the right side of the card, you can change the ice cream flavor!  I used the tiny faces and the sprinkles from the previously released Sweet Friends stamp set, and colored in my wheel with Copic markers before putting it all together.  You can see a little video clip of this card on action on my Instagram page!  If you don't follow me on Instagram yet, please do.  Sometimes I share exclusive peeks there! :)
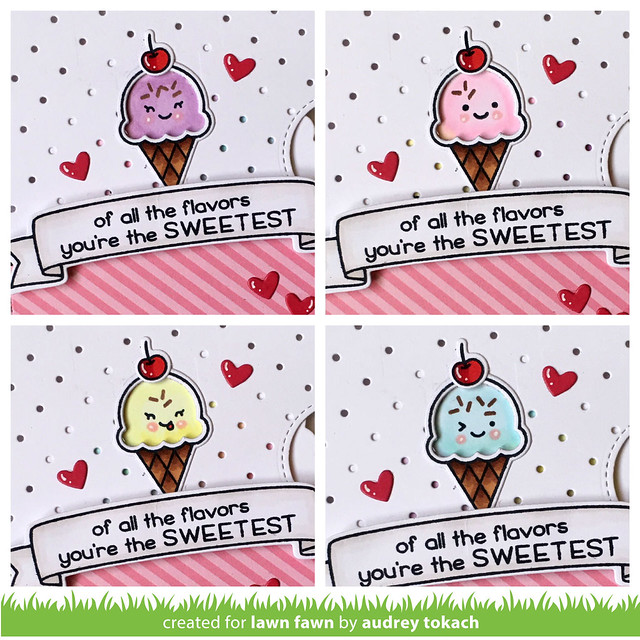
Sweetest Flavor Reveal Wheel

The possibilities with this die set are limitless!  Stop by the Lawn Fawn blog to see more!  Hope you'll come back tomorrow because I have another project to share with you!

Thanks for stopping by!

Thursday, May 10, 2018

Lawn Fawn Inspiration Week - Coaster Critters


Woohoo!  It's finally here!  The Lawn Fawn Summer 2018 release is just around the corner!  All of the products that we will be showing off over the next week will be available on May 17th in the Lawn Fawn store and at your favorite retailers!  So many adorable new products are on the way!

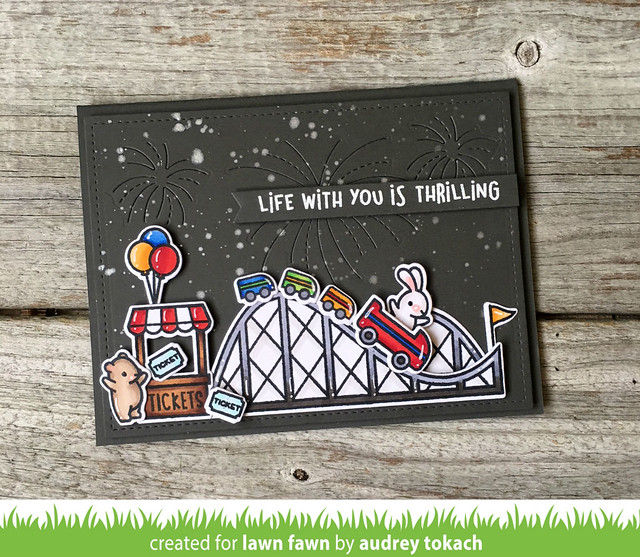
First up, Coaster Critters!  I will admit, I strongly dislike roller coasters.  Like, you couldn't pay me to ride one.  Ever.  But I do LOVE this cute little Lawn Fawn roller coaster!

To create my card, I started off with a horizontal A2 card base cut from Storm Cloud cardstock.  Then I used the largest die from the Outside In Stitched Rectangles die set to add a stitched edge to another piece of Storm Cloud cardstock.  At the top of that panel, I diecut a trio of fireworks to fill the night sky using the Stitched Fireworks dies, and spattered the panel with some iridescent silver watercolor.  I stamped and colored multiple images from the Coaster Critters stamp set to build my scene, and diecut them with the coordinating Coaster Critters dies.  After arranging my scene, I adhered some pieces flat with the Glue Tube, and popped other up using foam tape.  I stamped a sentiment from the set onto an Everyday Sentiment Banners diecut, and heat embossed it with white embossing powder.  To finish off my card, I added some white gel pen accents.


Critter Coaster

That's all for me today, but be sure to visit the Lawn Fawn blog to see lots more from the design team!  And stop back by tomorrow and every day until the 17th for more projects using the summer release! :)

Thanks for stopping by! :)

Tuesday, May 8, 2018

Reverse Confetti May Blog Hop


Hello there!  Woohoo!!  It's Reverse Confetti release day!  That means that all of the new release goodies are available NOW in the Reverse Confetti store and at all of your favorite retailers!
I have two cards to share with you today, and both use the new Pattern Blocks stamp set (and some other new goodies too!)

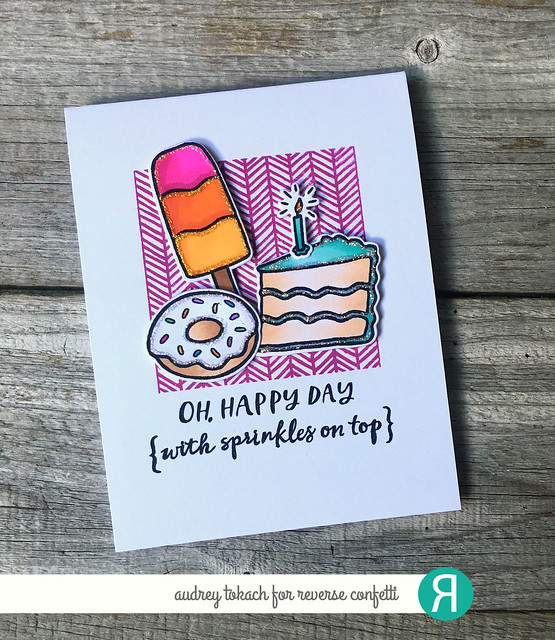
For my first card, I started off with a A2 card base of Premier Polar White cardstock.  I stamped the chevron block from Pattern Blocks in Magenta ink.  Then, I stamped and colored images from the Hey, Sugar stamp set, and diecut them with the coordinating Hey, Sugar Confetti Cuts dies.  I popped the trio of sweets up on the block using foam tape, and below the focal point, I stamped a sentiment from Hey, Sugar ink Midnight ink.

Sprinkles

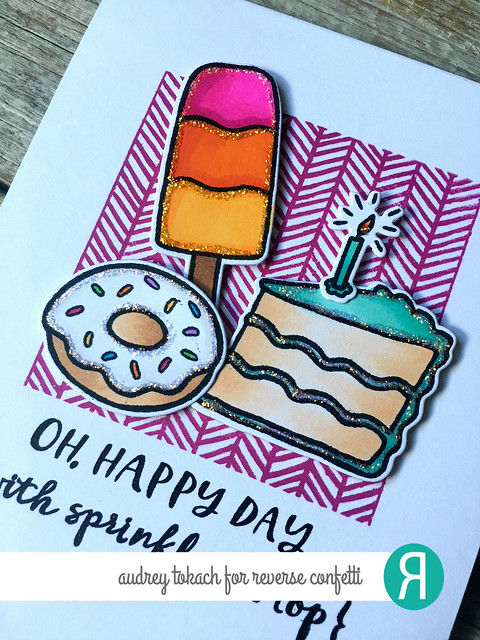
For some sparkle, I added some Icicle Stickles to each treat.  This little fun detail adds so much to an otherwise simple card.

Sprinkles

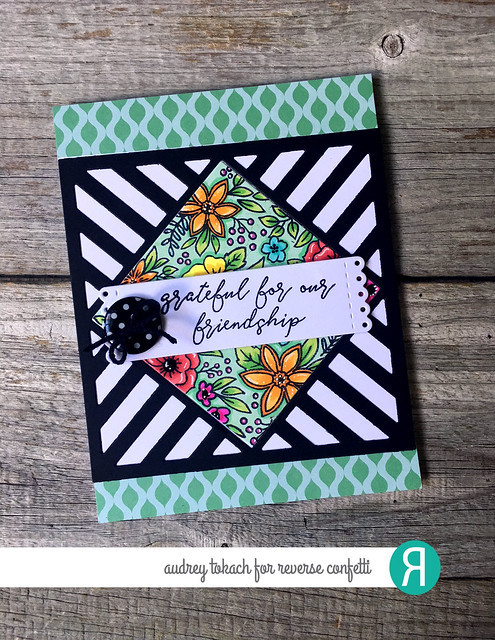
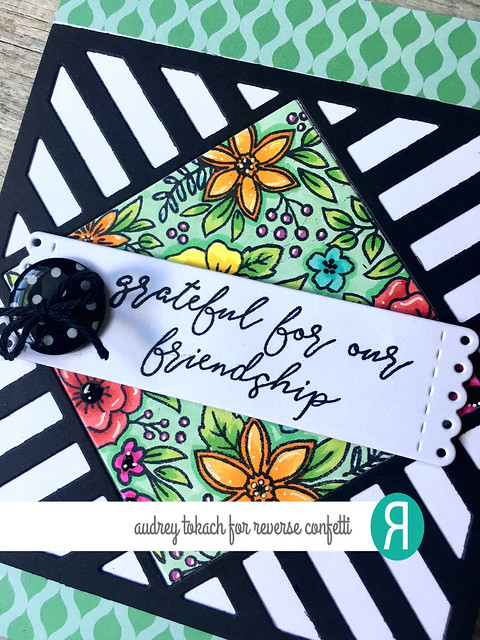
My second card uses the floral block from the Pattern Blocks stamp set.  I started off with an A2 card base which I covered with patterned paper from the new Paper Bliss paper pad.  Then, I diecut the Diamond Stripe Square Confetti Cuts from Midnight cardstock and backed it with Premier Polar White cardstock.  I stamped the floral block from Pattern Blocks onto a piece of white cardstock and colored it in with Copic markers.  I diecut one of the tags from the Tall Tag Trio Confetti Cuts from Premier Polar White cardstock and stamped a sentiment from Pattern Blocks in Midnight ink.  I popped the sentiment up with foam tape and added a polka dot button from my stash to finish off my card.

Pattern Blocks

This floral image is so fun to color!  There are so many possible color combos, or you could even emboss with metallic embossing powder for a totally different look!  So fun!

Pattern Blocks


Be sure to visit the rest of the design team, and comment along the way for your chance at a $15 Reverse Confetti gift certificate!  And stop by the Reverse Confetti blog too, because there is lots to see there too!!

Amy Kolling

Melissa Phillips

Tricia Barber

Kelly Lunceford

Lisa Henke

Amy Rohl

Carly Tee Miner

Laurie Schmidlin

Heather Hoffman

Amy Tsuruta

Kathy Schweinfurth

Audrey Tokach

Deanne Kuntz

Tatiana Trafimovich

Jeanne Jachna

Susan Liles


Monday, May 7, 2018

Countdown to Confetti - Day 3: Moon Men


Hello there! Welcome to day 3 of the  Countdown to Confetti at Reverse Confetti!  All of the new goodies we are showcasing will be available at Reverse Confetti and your favorite retailers on May 8th!  Today, the team is showcasing my favorite stamp set from this release, Moon Men!

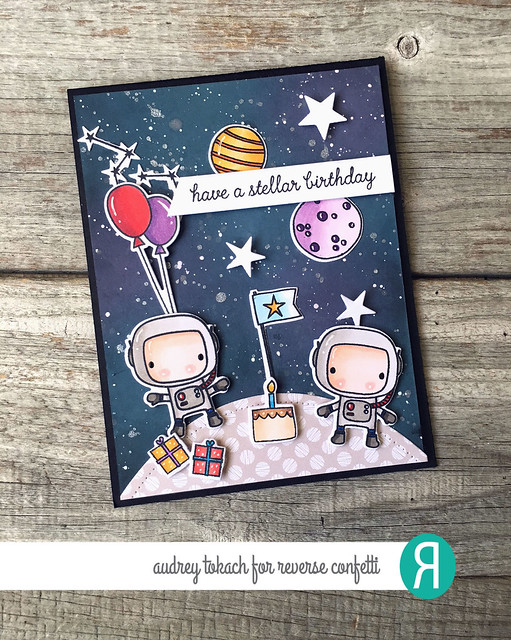
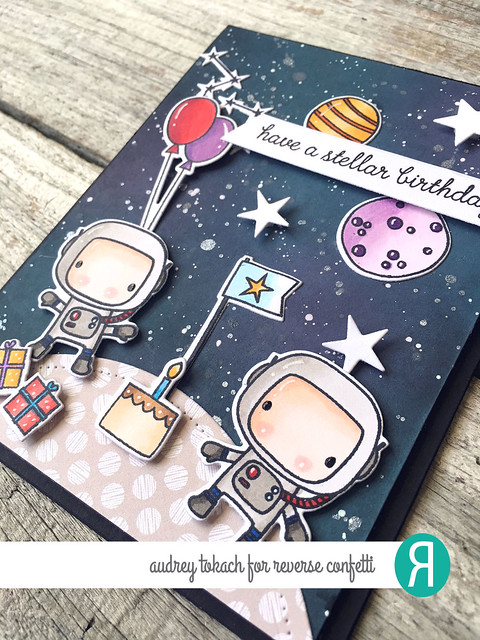
To create my card, I started off with a piece of Navy cardstock.  I  used Distress Oxide inks to add some purple shading to the panel, then splattered it with white paint and some iridescent silver watercolors to create a galaxy  background.  I used the Pierced Round Top Layers Confetti Cuts and some patterned paper from the  Every Little Bit paper pad to create a moon for my little astronauts to land on.  I stamped and colored the space men and some planets from the Moon Men stamp set.  Then, I pulled out the Monkey Business stamp set for the balloons, Later Alligator for the birthday cake, and Christmas Cheer for the little presents. I stamped a sentiment from the Moon Men  stamp set onto a white cardstock strip and cut it at an angle.  Then, I added a trio of stars that are included in the Moon Men Confetti Cuts die set.

Have a Stellar Birthday

To finish things off, I added some white gel pen accents and used a black glaze pen to brighten the astronauts eyes.  I love adding little details like this.  It really adds so much to the card.

At this angle, you can really see the fun that the iridescent watercolor adds to the scene!

Have a Stellar Birthday

Be sure to visit the rest of the design team, and comment along the way for your chance at a $15 Reverse Confetti gift certificate!  And stop by the Reverse Confetti blog too, because there is lots to see there too!!

Amy Kolling

Melissa Phillips

Tricia Barber

Kelly Lunceford

Lisa Henke

Amy Rohl

Carly Tee Miner

Laurie Schmidlin

Heather Hoffman

Amy Tsuruta

Kathy Schweinfurth

Audrey Tokach

Deanne Kuntz

Tatiana Trafimovich

Jeanne Jachna

Susan Liles


Sunday, May 6, 2018

Countdown to Confetti - Day 2: My Tribe


Hello there!  Welcome to day 2 of the Countdown to Confetti at Reverse Confetti!  We are celebrating Reverse Confetti's 5th birthday with so many fun new products!

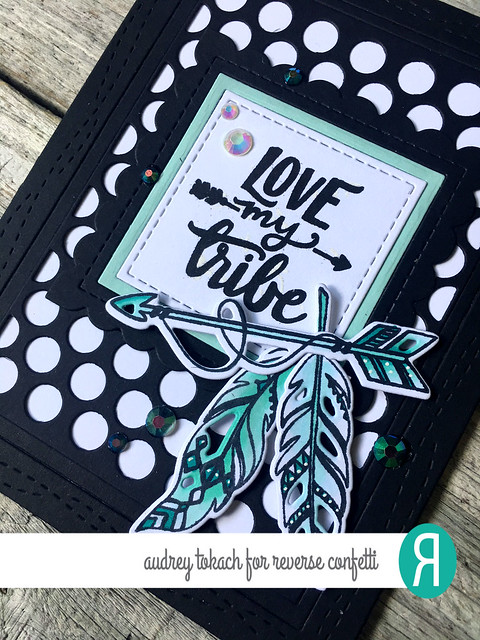
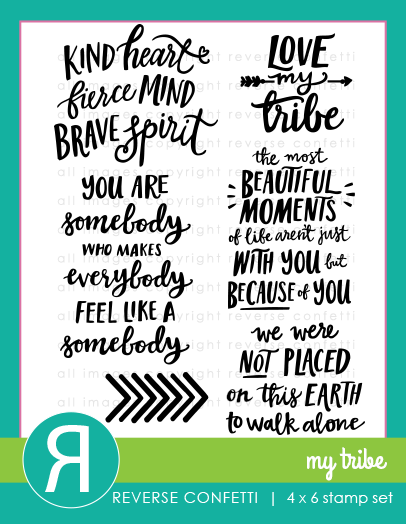
Today, my card uses the new My Tribe stamp set and the fun Polka Panel Confetti Cuts die!  Polka Dots are my favorite and I was so thrilled to see this die in my package!

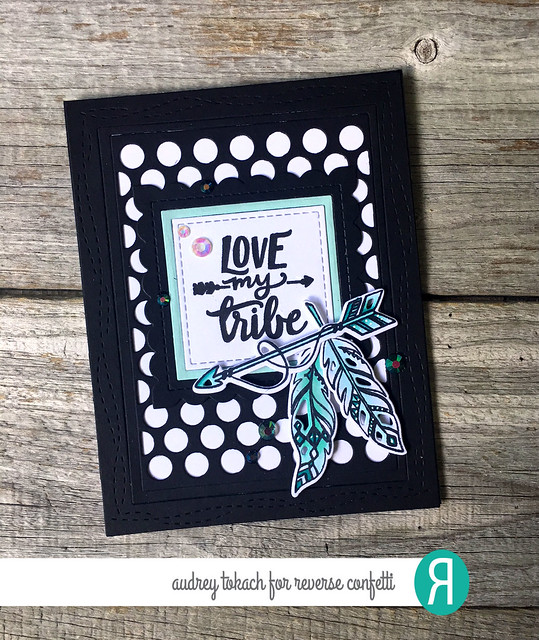
I started with a white A2 card base.  I used the All Framed Up Confetti Cuts die to cut two frames which I glued down around the edge of the card base.  The Polka Panel Confetti Cuts die fits perfectly inside the double frame.   I diecut the smaller square from the Scalloped Squares Confetti Cuts die set from Midnight cardstock, and cut the inner frame from the set from Iced Aqua cardstock.  Then, I stamped a sentiment from My Tribe in Midnight ink onto a white square to fit inside the square frame.  I stamped and colored a few feathers and an arrow from the Boho Vibes stamp set, and diecut then with the coordinating Boho Vibes Confetti Cuts dies.


My Tribe

My  Tribe and Boho Vibes are perfect compliments to each other.  I love how well they work together.  For an added little accent, I scattered some iridescent jewels about, and added some white gel pen details.

My Tribe

Be sure to visit the rest of the design team, and comment along the way for your chance at a $15 Reverse Confetti gift certificate!  And stop by the Reverse Confetti blog too, because there is lots to see there too!!

Amy Kolling

Melissa Phillips

Tricia Barber

Kelly Lunceford

Lisa Henke

Amy Rohl

Carly Tee Miner

Laurie Schmidlin

Heather Hoffman

Amy Tsuruta

Kathy Schweinfurth

Audrey Tokach

Deanne Kuntz

Tatiana Trafimovich

Jeanne Jachna

Susan Liles


BLOG TEMPLATE BY DESIGNER BLOGS