Tuesday, September 20, 2016

Lawn Fawn Inspiration Week - Cheery Christmas


Hello there!  Welcome to another day of Lawn Fawn Inspiration Week!  Today we are showcasing the Cheery Christmas stamp set and coordinating dies!

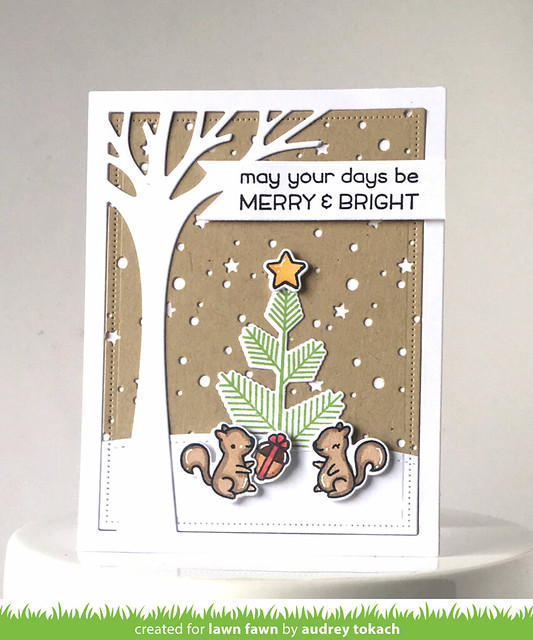
To create my card today, I started off by diecutting the Leafy Tree Backdrop Portrait from white cardstock.  Then I diecut some kraft cardstock with the largest die from the Small Dotted Rectangles Stackables.  This size rectangles nestles perfectly inside the opening of the Leafy Tree Backdrops diecut,  I ran the kraft cardstock through my diecut machine again using the Snowy Backdrop die, and then diecut a hill using the Simple Stitched Hillside borders dies.  I stamped the tree from Cheery Christmas in Freshly Cut Grass ink, and the squirrels, acorn and star in black ink, and then colored those with Copic Markers.  I adhered the tree flat to the card snowy backdrop, and popped the other pieces up with foam tape,  To finish off my card, I added some white gel pen accents, and stamped a sentiment from Merry Messages on a hand cut banner using Black Licorice ink.
Cheery Christmas

Be sure to visit the Lawn Fawn blog for lots more inspiration from the design team, and stop back by tomorrow as we wrap up inspiration week!

Thanks so much for stopping by! :)

Supplies:
Stamps: Cheery Christmas, Merry Messages
Dies: Cheery Christmas, Leafy Tree Backdrops Portrait, Small Dotted Rectangles Stackables, Snowy Backdrops
Ink: Black Licorice, Freshly Cut Grass
Other: Copic Markers, White Gel Pen, Foam Tape

Monday, September 19, 2016

Lawn Fawn Inspiration Week - Perfectly Plaid Christmas


Hello there!  Welcome to another day of Lawn Fawn Inspiration Week!  Today, we are showcasing the new Perfectly Plaid Christmas paper collection!!  These beautiful plaid papers are perfect to use with all of your favorite holiday stamp sets!  I pulled out one of my most favorite (and very first) Lawn Fawn stamp sets, Making Frosty Friends, to make my card today!

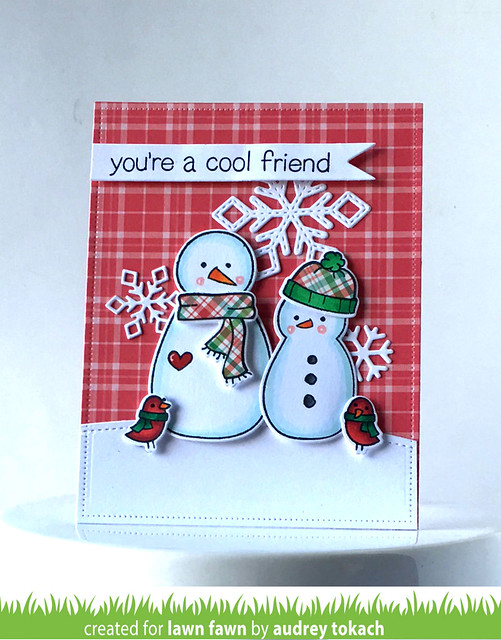
I started off by diecutting a piece of the 6x6 Perfectly Plaid Christmas papers with the largest die from the Large Dotted Rectangles Stackables dies.  I added a snowy hill with the Simple Stitched Hillside Borders, cut from white card stock.  Then, I stamped, colored and diecut a bunch of pieces from the Making Frosty Friends stamp set.  I paper pieced the scarf and hat using more papers from the Perfectly Plaid Christmas collection, and diecut some snowflakes using the Stitched Snowflakes dies.  Then I stamped a sentiment from the same stamp set on a hand cut banner, and popped it up with some foam tape.  I added a few white gel pen accents to finish things off.

Perectly Plaid Christmas

Be sure to visit the Lawn Fawn blog for lots more inspiration from the design team, and stop back by tomorrow for another inspiration week post!

Thanks for stopping by! :)

Supplies:
Stamps: Making Frosty Friends
Dies: Making Frosty Friends, Large Dotted Rectangles, Simple Stitched Hillside, Stitched Snowflakes
Paper: Perfectly Plaid Christmas
Other: Copic Markers, White Gel Pen, Foam Tape
Sunday, September 18, 2016

Lawn Fawn Inspiration Week - Narwhal and Friends and String of Lights

Hello there!  Welcome to day 4 of Lawn Fawn Inspiration Week!!  Today, we are showcasing some super fun stand alone dies!  As soon as I saw the String of Lights dies, I knew immediately that they would be a favorite!  They are so whimsical and fun!

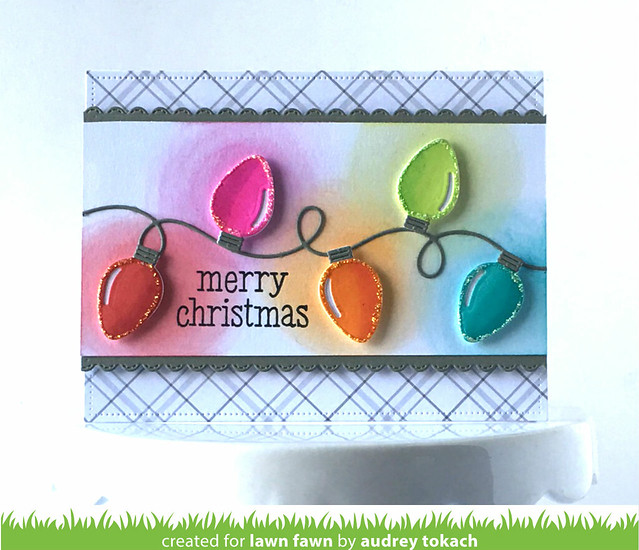
I wanted the lights to be in the spotlight on my card, so I used neutral colors for the background.  I started out my card by diecutting a piece of the Perfectly Plaid Winter paper with the largest die from the Large Dotted Rectangles dies, and adhering that to a white card base.  I trimmed a piece of white cardstock, and diecut the smallest size light from the String of Lights dies five times from white cardstock.  There are three sizes of lights in the set, each size has two pieces that make up the bulb - the solid light, and the light with the shine mark diecut out of it.  I colored the lights with copic markers, and backed each light with a white diecut bulb so that the shine mark would really show on the brightly colored bulbs,  I diecut the string and light sockets from Narwhal cardstock.  I set up the lights how I wanted them on the white cardstock, then made tiny pencil markers at the tip of each bulb.  I used Distress inks and an ink blending tool to add faint color halos to make the lights look like they are glowing.  Then I glued the light string down with a glue pen, and popped up each light with foam tape.  I added a sentiment from the Winter Gifts stamp set, and added some Icicle Stickles to each bulb for some glitter and shine.  I used the Stitched Scalloped Borders dies to cut a scalloped edge for each side of the panel from Narwhal cardstock, and then popped the panel up on the plaid card base.

String of Lights

Be sure to visit the Lawn Fawn blog for lots more inspiration from the design team, and stop back by tomorrow for another project using the newest products from Lawn Fawn!

Thanks for stopping by! :)

Supplies:
Stamps: Winter Gifts
Dies: String of Lights, Stitched Scalloped Borders, Large Dotted Rectangles
Paper: Perfectly Plaid Winter, Narwhal cardstock
Ink: Black Licorice, Distress inks in Picked Raspberry, Carved Pumpkin, Candied Apple, Twisted Citron, Peacock Feathers
Other: Copic Markers, Icicle Stickles, Foam Tape, Ink Blending Tool

Saturday, September 17, 2016

Lawn Fawn Inspiration Week - Snow Cool

Hello there!  It's day 3 of Lawn Fawn Inspiration Week, and we are showcasing the Snow Cool stamp set and coordinating dies!!

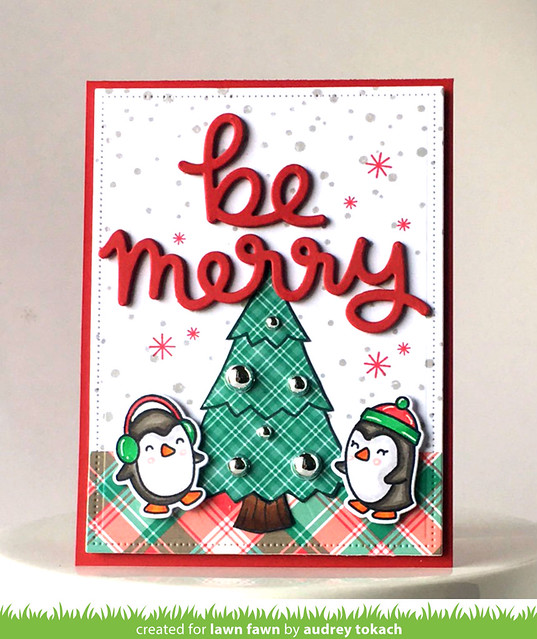
To create my card, I started off by diecutting a piece of white cardstock using the largest die from the Small Dotted Rectangles Stackables.  I stamped the falling snow from Snow Cool in Manatee ink.  I added a strip of Perfectly Plaid Christmas to the bottom of the panel.  I stamped, colored and diecut the two penguins from Snow Cool, and then stamped the tree from Critters in the Forest on some more Perfectly Plaid Christmas paper.  I glued the tree with a glue pen, and popped the penguins up with foam tape.  I decorated the tree with some silver pearls.  For my sentiment, I diecut the Scripty Be and Scripty Merry dies out of Chili Pepper cardstock, four times each.  I glued one on top of the other to make a dimensional sentiment without having to use foam tape.  I added a few stars from  the Snow Day stamp set in Lobster ink, and popped the panel up on a red card base,

Snow Cool

Be sure to visit the Lawn Fawn Blog for lots more inspiration from the design team, and stop back by again tomorrow for more Lawn Fawn fun!! :)

Thanks so much for stopping  by :)

Supplies:
Stamps:Snow Cool, Critters in the Forest, Snow Day
Dies: Snow Cool, Small Dotted Rectangles Stackables, Scripty Be, Scripty Merry
Paper: Chili Pepper, Perfectly Plaid Christmas
Ink: Black Licorice, Lobster, Manatee
Other: Copic Markers, White Gel Pen, Foam Tape, Silver Pearls

Friday, September 16, 2016

Lawn Fawn Inspiration Week - Sprinkled with Joy

Hello there!!  It's day 2 of Lawn Fawn inspiration week, and today we are showcasing the Sprinkled with Joy stamp set and coordinating dies, along with the Sprinkled with Joy add-on die set!

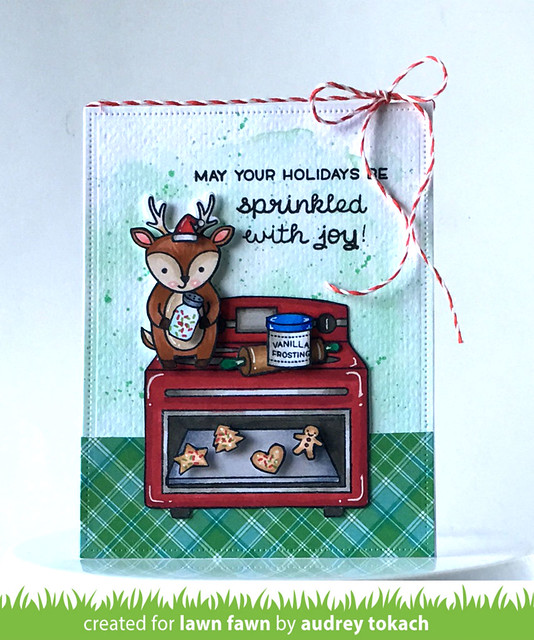
I started off my card by watercoloring a piece of watercolor paper with Cracked Pistachio Distress Ink.  I painted a watercolor wash, then added some splatters of more concentrated color.  When it was dry, I diecut it with the Large Dotted Rectangles dies, and added a strip of Perfectly Plaid Christmas paper to the bottom of the panel.  I stamped and colored a few bits and pieces from the Sprinkled With Joy stamp set, and the reindeer from the Party Animal stamp set, and fussy cut everything (it would have been much faster to diecut everything with the coordinating dies, but I find fussy cutting very relaxing, and sometimes, I just feel like breaking out those scissors!  I adhered everything to the panel, some things with a glue pen, and others with foam tape.  Then, I stamped a sentiment from the same stamp set.  I added the panel to a white card base, and added some white gel pen accents, and a bow with Peppermint Lawn Trimmings.

Sprinkled with Joy

Be sure to visit the Lawn Fawn Blog for lots more inspiration from the design team!!  And be sure to stop back by tomorrow for another project using new release goodies! :)

Thanks for stopping by! :)

Supplies:
Stamps: Sprinkled with Joy, Party Animal
Dies: Large Dotted Rectangles
Paper: Perfectly Plaid Christmas 6x6 paper pad
Ink: Black Licorice, Cracked Pistachio Distress Ink
Other: Copic Markers, white gel pen, foam tape, Peppermint Lawn Trimmings

Thursday, September 15, 2016

Lawn Fawn Inspiration Week - Frosty Fairy Friends

Hello there!!  It's Lawn Fawn inspiration week!  WOOHOO!  This month, we are showcasing lots more of the new release!  Today, it's all about Frosty Fairy Frends!!

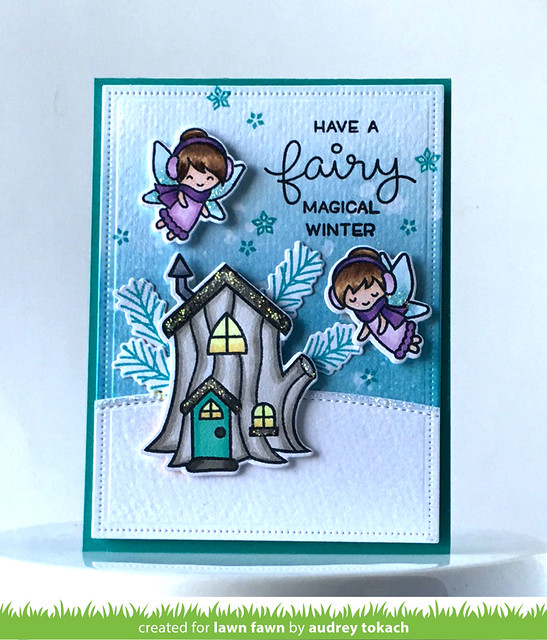
To create my card, I first diecut a piece of watercolor paper using the Small Dotted Stitched Rectangles dies.  I used Peacock Feathers Distress ink and an ink blending tool to create an ombre background, darker at the bottom, and fading to white as you reach the top.  I splattered it with some clean clear water to add some "snowy" bleached out dots.  I diecut another piece of watercolor paper with the Simple Stitched Hillside Borders.  I love the added texture of the watercolor paper!  I adhered the hill to the bottom of the ombre panel.  Then I stamped, colored and diecut some fairies, and the fairy house from Frosty Fairy Friends.  I used Peacock ink to stamp the tree branches, and a scattering of snowflakes in the sky.  I added a sentiment, also from the stamp set, in black ink, and then popped everything up with foam tape.  I added some white gel pen accents and some Icicle Stickles to finish things off, and then popped up the panel on a Peacock cardstock base.


Frosty Fairy Friends

Be sure to visit the Lawn Fawn Blog for lots more inspiration from the design team and stop back by again tomorrow! :)

Have a great day!! :)

Supplies:
Stamps: Frosty Fairy Friends
Dies: Frosty Fairy Friends, Small Dotted Rectangles Stackables, Simple Stitched Hillside
Paper: Peacock cardstock, watercolor paper, white cardstock
Ink: Peacock, Black Licorice, Memento Tuxedo Black, Peacock Feathers Distress
Other: Copic Markers, white gel pen, Icicle Stickles, Foam Tape


Wednesday, September 14, 2016

Grateful Thankful Blessed {Reverse Confetti}


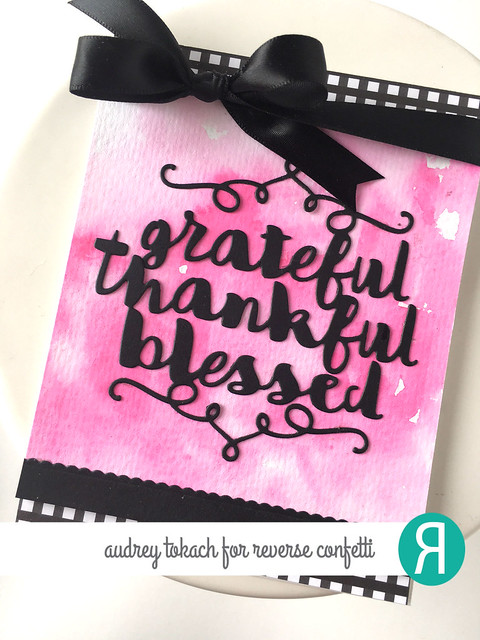
Hello there!  Today I have a card to share with you using a few goodies from the new Reverse Confetti release!  The new Grateful Thankful Blessed Confetti Cuts die is gorgeous.  The font is so beautiful, and it's perfect for Thanksgiving as well as every day thank you cards!

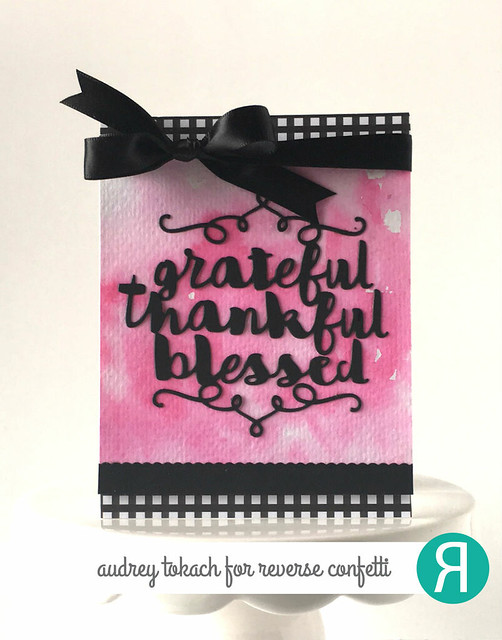
For my card today, I started off by watercoloring a piece of watercolor paper with Picked Raspeberry Distress Ink.  While it was drying, I diecut Grateful Thankful Blessed from black cardstock.  I added strips of patterned paper from the new Fright Night paper pad onto the top and bottom of a white card base.  When the watercolor was dry, I glued the diecut on top of it with a glue pen.  I added a scalloped border to the bottom of the panel with one of the Edge Essentials Confetti Cuts, and popped the whole panel up on the card base with foam tape.  To finish things off, I added a bow with some black satin ribbon.


Grateful Thankful Blessed

I love how this die takes center stage.  You don't need a lot of other fancy details to make a beautiful card with this die.  I can't get enough of that beautiful script lettering!!


Grateful Thankful Blessed

Thanks so much for stopping by! :)


BLOG TEMPLATE BY DESIGNER BLOGS