Thursday, September 8, 2016

Reverse Confetti September Blog Hop!


Hello there!!  It's Reverse Confetti release day!!  The entire September release is available NOW in the Reverse Confetti store!!


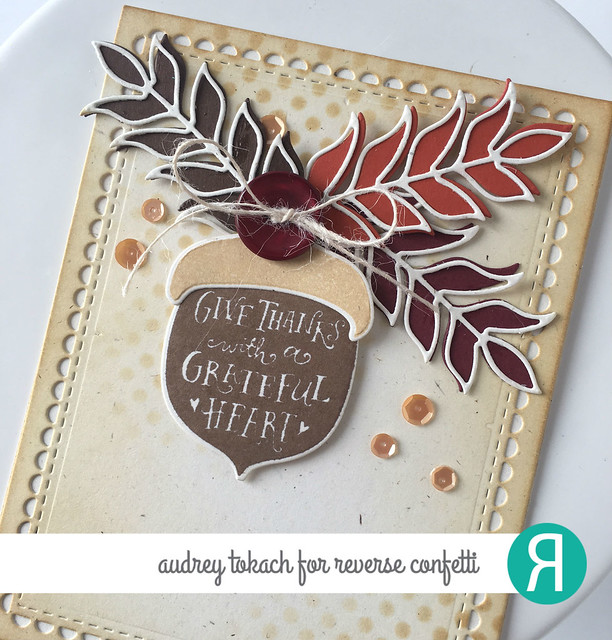
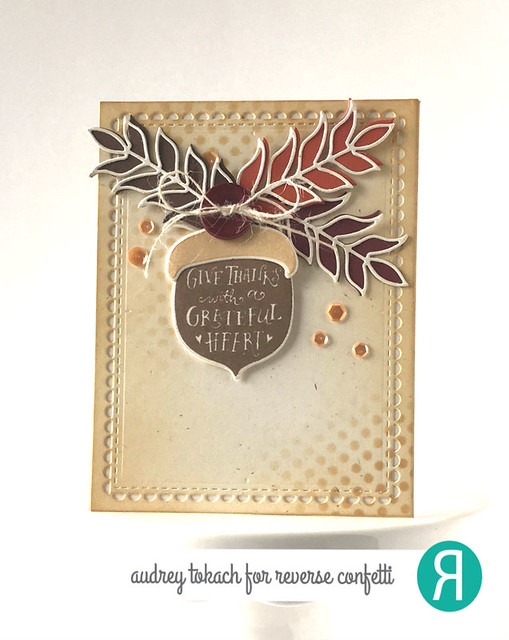
For my card today, I used a few product that I have not had a chance to showcase yet.  I went for  a more earth tone color palette as opposed to my normal brights and it was a nice change of pace.  I started off by diecutting the largest die from the Lacy Scallop Frames Confetti Cuts from a cream colored cardstock, then I inked the edges with Antique Linen Distress ink.  I used the Lotsa Dots stencil with more Antique Linen ink to add a subtle pattern to the background ink a few places.  I stamped one of the acorn bottoms from Happy Harvest in brown ink, and the acorn "lid" in Antique Linen.  Then I diecut the Wheat Confetti Cuts leaves from brown, burgundy and terracotta colored cardstocks, and the diecut the outline wheat from the same cream cardstock I used for the background.  I glued the outline diecut on top of the solid diecuts, and slightly skewed them so they weren't perfectly on top of eachother.  I popped the acorn up with foam tape, and tucked the leaves behind it, and added a jute twine threaded button to the top.  Finally, I added a scattering of coordinating sequins, before gluing the panel to a card base.

Happy Harvest

This card went together very easily, and I am thinking it would be a great design to mass produce for the fall and Thanksgiving season!!
Happy Harvest

Be sure to hop along with the entire team today!! :)

Reverse Confetti blog http://reverseconfetti.com/blog/ Amy Kolling http://stamp-n-paradise.blogspot.com/... Fetti Friend—Ruby Naz http://www.arareruby.com/ Heather Pulvirenti http://heatherpulvirenti.blogspot.com/... Diane Jaquay http://dmjaquay.blogspot.com/search... Lisa Henke http://mylittlecreativeescape.blogspot.com/... Amy Rohl http://inkaboutme.blogspot.com/sear... Heather Hoffman http://housesbuiltofcards.blogspot.com/ Amy Tsuruta http://tsurutadesigns.blogspot.com/... Audrey Tokach http://pinkinkoriginals.blogspot.com/... Amy Sheffer http://pickledpaperdesigns.blogspot.com/... Leigh Penner http://leighpenner.blogspot.com/...... Jeanne Jachna http://akeptlife.blogspot.com/searc... Laurie Schmidlin http://justgivemestamps.typepad.com/... Susan Liles http://www.susiestampalot.com/searc...

Thanks so much for stopping by! :)


Wednesday, September 7, 2016

Countdown to Confetti - Day 3


Hello there!!  Today is Day 3 of the Countdown to Confetti over at Reverse Confetti!!  All of the products showcased today will be available in the Reverse Confetti store on September 8th, just a few short days away!!


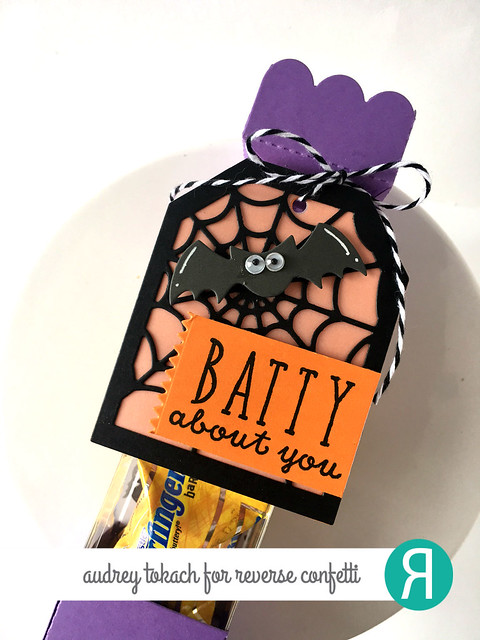
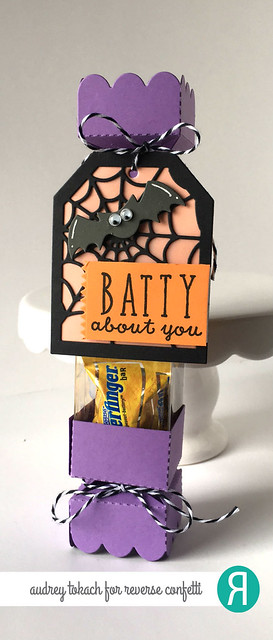
Today, the team is showcasing a fun set of products... the new Treat Tubes and Treat Tube Topper Confetti Cuts!  You can make adorable treats in no time at all! Perfect for so many occasions!!  The awesome thing about the Treat Tube Topper is that you can assemble them and they slide on and off the tube very easily.  There is no need to tear them to get to the treats, so they can be used over and over again!  For my project today, I cut the Treat Tubes Topper twice from Grape Soda cardstock, one for each side of the tube.  It looks just as cute with the topper on only one end too!!  I slide them on each side of the tube, and tied with a piece of the new Charcoal twine.  For my tag, I diecut the Topped Off Tag from the new Tangerine cardstock, and again from vellum.  Then I diecut the new Web Tag Layer - which I LOOOOOVE - from black cardstock, and adhered them all together.  I stamped a sentiment from the new Treat Yo' Self stamp set on a piece of Tangerine cardstock, then added a pinked edge with the Edge Essentials dies, and popped that up on the bottom right side of the tag.  I diecut the cute little bat from the new Halloween Bits Confetti Cuts, and added some googly eyes and white gel pen accents, and popped him up with foam tape too.  


Treat Yo Self

I just think these little tubes are SO fun!  I already plan to make some for the special kiddos in my life for Halloween, and I can't wait to make some for Christmas and birthdays too!


Treat Tube

For a full list of ladies sharing projects today, be sure to visit the Reverse Confetti blog!  And stop back by tomorrow for the blog hop!  Be sure to leave comments along the way for your chance to win a Reverse Confetti gift certificate! :)

Thanks for stopping by!!


Tuesday, September 6, 2016

Countdown to Confetti - Day 2


Hello there!  Welcome back to day #2 of Countdown to Confetti over at the Reverse Confetti blog!!  You are in for lots of tricks and treats this month!  Four new product lines are being introduced, along with several new stamp sets and dies!  All of the new products being showcased this week will be available on September 8th in the Reverse Confetti Store!


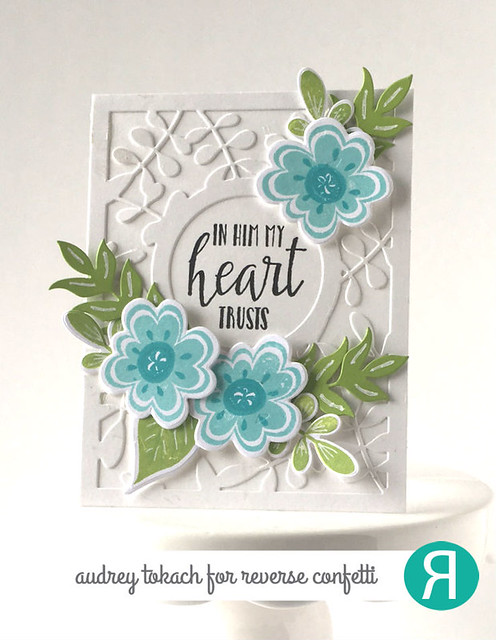
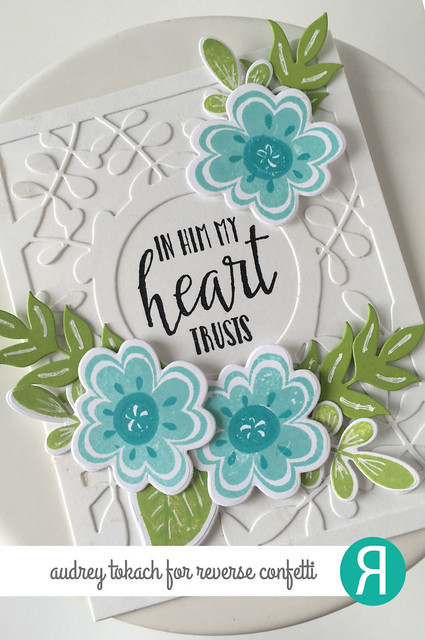
Today, my card features the new Blooms 'n Buds stamp set!  This fun multi step stamp set is full of whimsical floral images.  There is a solid later for each flower, and a detail layer that is optional.  This set is perfect for showing off the brand new Reverse Confetti inks!  You can see that I used Iced Aqua and Lime Green on my card.  I started out by diecutting the new Leaves Cover Panel from the new Cloud White cardstock, and then I adhered it to a Cloud White card base.  I stamped a sentiment from the My Heart Trusts stamp set in the center of the circle opening.  Then, I stamped some of the blooms from Blooms 'n Buds in Iced Aqua ink an added the detail later in darker teal ink before diecutting them with the coordinating Blooms 'n Buds Confetti Cuts.  I stamped the leaves in Lime Green ink, and then diecut some extra leaves from Lime Green cardstock using the new Wheat Confetti Cuts.  I popped everything up with foam tape, and added some accents to the leaves with a white gel pen.

Blooms n Buds


I really love all of the mix and match possibilities with this fun new stamp set!  Different color combinations give things a totally different look!  The sky is the limit!!


Blooms n Buds 2

Be sure to visit these amazingly talented ladies for lots more inspiration:


Monday, September 5, 2016

Countdown to Confetti - Day 1


Hello there!  Today starts the Countdown to Confetti over at the Reverse Confetti blog!!  You are in for lots of tricks and treats this month!  Four new product lines are being introduced, along with several new stamp sets and dies!  All of the new products being showcased this week will be available on September 8th in the Reverse Confetti Store!


When I opened my box this month to check out the September goodies, I let out a squeal when I saw inks, cardstock, patterned paper and a stencil!  Of course, I had to use them all right away!!  I jumped right in with the Best Witches stamp set, the newest stamp set illustrated by Dawn Machel!  It is so, so cute!!

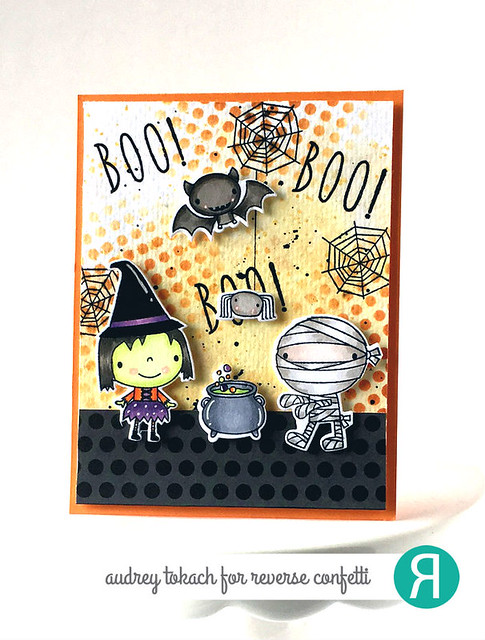
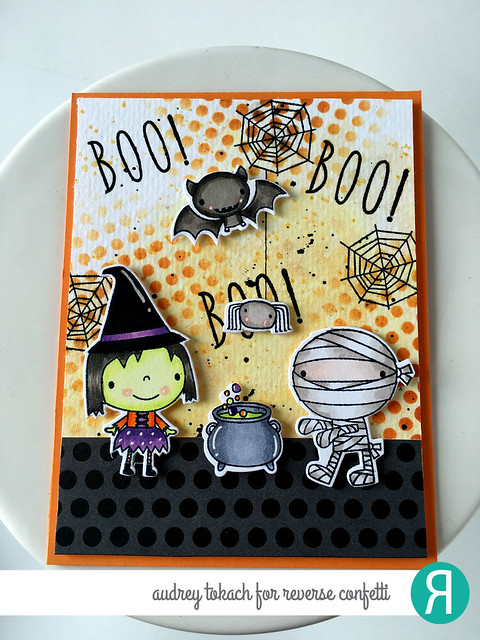
To create my card, I started off by watercoloring a pale orange background using the new Tangerine ink.  I tapped the pad on my acrylic block and added some water and then painted my cardstock.  When it was dry, I added some polkadots to the background in random areas using more Tangerine ink and the new Lotsa Dots stencil.  I then stamped the word "boo!" from the new Treat Yo' Self stamp set, and added a few spiderwebs from the previously released Too Cute to Spook stamp set.   I stamped, colored and diecut the witch, mummy, bat, and cauldron from the Best Witches stamp set, and then diecut them with the coordinating Best Witches Confetti Cuts.  I added a strip of patterned paper from the new Fright Night patterned paper pad as a ground to set my scene.  I popped everything up with foam tape, and added a spider from the Too Cute to Spook stamp set.  Finally, I  mounted the panel on a piece of the new Tangerine cardstock.


Best Witches

I love that all of the stamp sets illustrated by Dawn Machel work perfectly together.  Best Witches and the older Too Cute to Spook stamp set are a match made in stampy heaven.  The halloween scene building possibilities are endless and oh so cute!

Best Witches

Be sure to visit these awesome ladies for lots more inspiration:


Friday, September 2, 2016

Simon Says Stamp and Lawn Fawn Stamptember Exclusive


Hello there!  Today I have a fun surprise for you!!  Today, Simon Says Stamp and Lawn Fawn are sharing an exclusive STAMPTEMBER collaboration stamp set and die collection, called Happy Howlidays!  This stamp set and coordinating die set will only be available for a limited time, while supplies last, and is exclusive to the Simon Says Stamp Store.

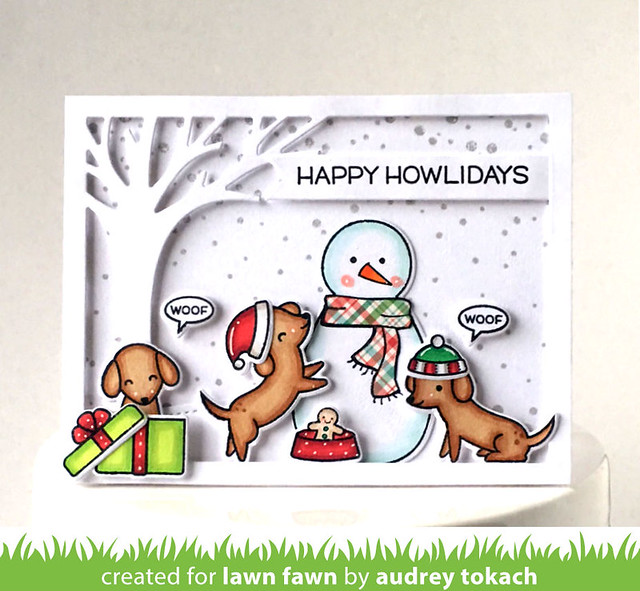
For my card today, I paired Happy Howlidays with some of my other Lawn Fawn favorites!  I started off by stamping some falling snow using the Snow Cool stamp set from Lawn Fawn, and some Manatee ink.  I added a white hill using the Simple Hillside Borders dies.  Then I diecut the Leafy Tree Backdrops Landscape from white card stock, and popped that up on top of the falling snow background using foam tape.  I stamped my favorite snowman from the Making  Frosty Friends stamp set, and paper pieced his scarf using the new Perfectly Plaid Christmas paper pad.  Then I stamped and colored the cute little dogs from Happy Howlidays, along with a bunch of other images from the same set.  I added white gel pen accents, and popped the pieces up with foam tape to build my scene.  Finally, I stamped a sentiment from the same set on a hand cut banner, and popped that up with foam tape as well. 


LF Stamptember

I just love this stamp set and all of the possibilities!!  If you love it too, be sure to hurry up and get your order in!  Once this stamp and die sets are sold out, that's it.  Once again, they are limited edition, and available only while supplies last.  Get yours here!

That's all for me today!!  Thanks so much for stopping by!!

Supplies:
Stamps: SSS/LF Stamptember Exclusive - Happy Howlidays, Making Frosty Friends, Snow Cool
Dies: Happy Howlidays, Making Frosty Friends, Leafy Tree Backdrop Landscape
Paper: Lawn Fawn Perfectly Plaid Christmas
Ink: Black Licorice, Manatee
Other: Copic Markers, White Gel Pen, Foam Tape
BLOG TEMPLATE BY DESIGNER BLOGS