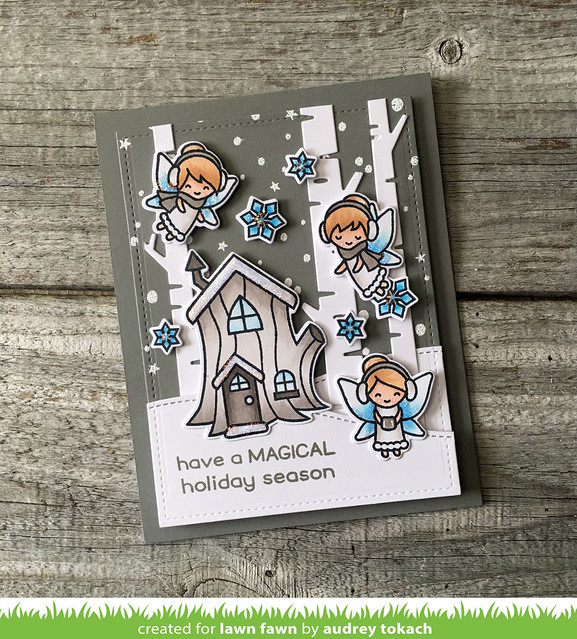
Hello there! Today, I have a card to share with you for Lawn Fawn holiday week! My card features the super cute Frosty Fairy Friends stamp set. Read on the find out how I created my card. :)
I started off with a Narwhal A2 card base. I also used the Stitched Rectangles Stackables to diecut a stitched panel slightly smaller than the card base. I heat embossed the Snowy Backdrops on the panel with white embossing powder, and diecut some snowy hills with the Stitched Hillside Borders dies. Then, I cut some Birch Trees out of white cardstock, and adhered them to the panel with a glue pen. The front hill is popped up with foam tape for some fun added dimension, but before I adhered it, I stamped my sentiment in Narwhal ink. I stamped and colored images from Frosty Fairy Friends, and diecut them with the coordinating Frosty Fairy Friends dies. I popped everything up with foam tape, and added some white gel pen accents and some glittery Stickles.
I started off with a Narwhal A2 card base. I also used the Stitched Rectangles Stackables to diecut a stitched panel slightly smaller than the card base. I heat embossed the Snowy Backdrops on the panel with white embossing powder, and diecut some snowy hills with the Stitched Hillside Borders dies. Then, I cut some Birch Trees out of white cardstock, and adhered them to the panel with a glue pen. The front hill is popped up with foam tape for some fun added dimension, but before I adhered it, I stamped my sentiment in Narwhal ink. I stamped and colored images from Frosty Fairy Friends, and diecut them with the coordinating Frosty Fairy Friends dies. I popped everything up with foam tape, and added some white gel pen accents and some glittery Stickles.


3 comments:
Beautiful card Audrey!! Did you use markers or colored pencils to color the stamped images?
I really like the color pallet that you used on this beautiful card.
That's a super cute card !
Post a Comment