Showing posts with label Sparkle and Shine Challenge. Show all posts

Sunday, May 1, 2016

Sparkle and Shine Challenge #29 - Floral

Hello there!  It's time for another Sparkle and Shine Challenge
Here is our photo inspiration:


We are sponsored this week by our friends at Create a Smile Stamps.

For my card today, I water colored one of the Papertrey Ink Bold Blossoms Watercolor Sheets with my Zig Clean Color Real Brush Markers.  When it was dry, I diecut the panel with the Avery Elle Wonky Stitches dies.  For my sentiment, I diecut a My Favorite Things die from black card stock and teal card stock.  I glued them together, slightly offset, so that the teal with show as a shadow.  I added a few accents to the diecut with a white gel pen and popped it up with foam tape.  Then I added a scattering of iridescent sequins from Pretty Pink Posh.
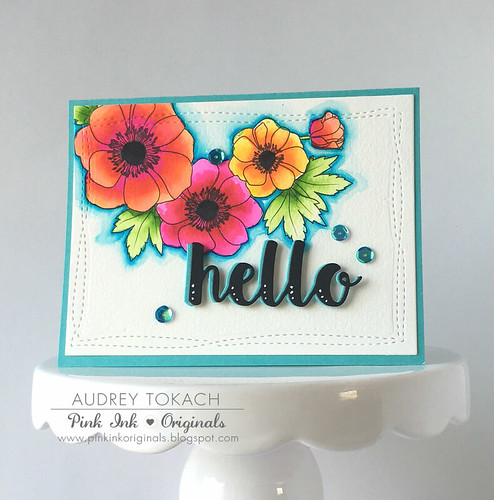

Floral Hello

Be sure to visit the blog for lots more inspiration and all of the challenge details!

Thanks so much for stopping by! :)

Supplies:
Paper: PTI Bold Blossoms Watercolor Sheets, Hawaiian Shores, True Black
Dies: Avery Elle Wonky Stitches, MFT Hello
Other: Zig Clean Color Real Brush Markers, Pretty Pink Posh sequins, foam tape

Friday, April 15, 2016

Sparkle and Shine Challenge #28 - Purple

Hello there!  It's time for another Sparkle and Shine Challenge!  This challenge is all about PURPLE!


We are sponsored by our friends at Right At Home!


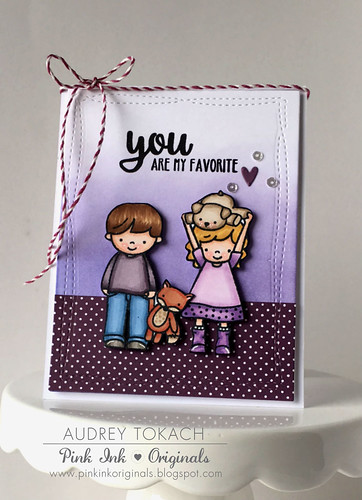
For my card today, I inked up a new set by my friend Elena for Neat and Tangled!  It's called Better Together and these little kiddos are just too adorable.  Pair them with an amazing font combination, and it's perfection!  I started off by diecutting a piece of white cardstock with the Avery Elle Wonky Stitches dies and then inked Dusty Concord distress ink to blend a purple ombre on that panel.  I adhered a piece of Lawn Fawn Let's Polka in the Dark patterned paper on the bottom of the panel to ground the images a bit.  Then I stamped, colored, and fussy cut out these sweet kiddos.  I popped them up with foam tape, and stamped a sentiment from the same set just above them.  I diecut a purple heart using the Simon Says Stamp Tiny Hearts die, and added a few 4mm Sparkling Clear sequins from Ptetty Pink Posh.  Then I popped the panel up on a white card base with foam tape, and added a twine bow with Lawn Fawn Orchid Lawn Trimmings.


You are my favorite

Be sure to visit the blog for lots more inspiration from the design team, and to get all of the challenge details.  I hope you'll join us!

Thanks for stopping by!

Supplies:
Stamps: Neat and Tangled Better Together
Dies: Avery Elle Wonky Stitches
Ink: Memento Tuxedo Black, Versafine Onyx Black, Dusty Concord Distress
Paper: PTI White, Lawn Fawn Let's Polka in the Dark
Other: Copic Markers, white gel pen, foam tape, PPP 4mm Sparkling Clear Sequins, Lawn Fawn Orchid Lawn Trimmings

Friday, April 1, 2016

Sparkle and Shine Challenge #27


Hello there!  It's time for a new Sparkle and Shine Challenge!  April Showers bring May flowers!! Here is our inspiration photo:


This challenge is sponsored by our friends at Create a Smile Stamps!


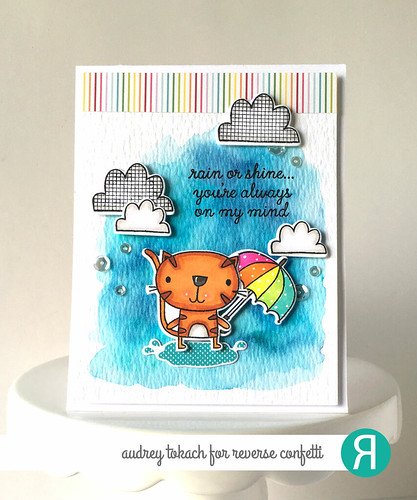
For my card, I pulled out my Reverse Confetti Weather it Together stamp set and the cute little cat from the Too Cute to Spook stamp set!  I just love how all of these sets coordinate!  I used my Zig Clean Color Real Brush Markers to watercolor a background on some watercolor paper.  Then I stamped, colored and diecut the images using the coordinating Weather it Together Confetti Cuts and Too Cute to Spook Confetti Cuts.  I added a few accents with a white gel pen and a fun strip of rainbow striped patterned paper across the top.  I added some Pretty Pink Posh Sparkling Clear sequins coming out of each cloud before popping the panel up on a white card base using foam tape.


Rain or Shine

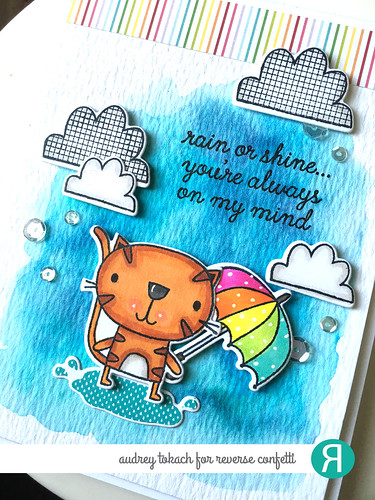
I love using foam tape for lots of dimension.  Doesn't look like he's jumping off the page?


Rain or Shine

Be sure to visit the blog for all of the challenge details and for lots more inspiration from the design team!  I hope you will join us! :)

Thanks for stopping by!!


Tuesday, March 15, 2016

Sparkle and Shine Challenge #26


Hello there!  It's time for another Sparkle and Shine Challenge!  This challenge is Easter themed!


We are sponsored this week by Right at Home Shop!


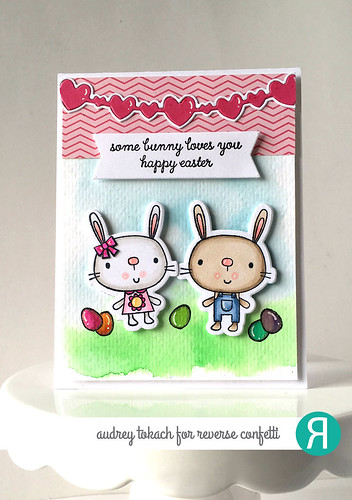
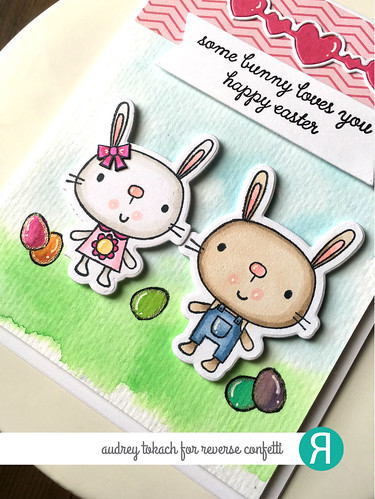
For my card, I used the super adorable Hippity Hoppity stamp set by Reverse Confetti!  I started off by watercolor a piece of watercolor paper with my Artist's Loft watercolors. Then I stamped and colored the little boy and girl bunnies from the Hippity Hoppity stamp set, and diecut them with the coordinating Hippity Hoppity Confetti Cuts.  I stamped a scattering of easter eggs, also included in the stamp set, masking off a few to stamp the eggs one behind the other.  I added a strip of patterned paper across the top of my watercolor panel, and then diecut the Double Heart Garland in but hot pink and white card stock to string across the patterned paper.  Then I stamped two sentiments from the stamp set on to a banner diecut from the Tag Me die set, and popped it up with foam tape just below the heart garland.


Happy Easter

It is it a bit hard to tell in the photo above, but I added some sparkle to the Easter eggs with a Sakura Stardust Pen.  It is so pretty in real life and adds such a fun touch!


Happy Easter

That's all for me for now, but be sure to check the Sparkle and Shine blog for lots more inspiration from the design team and to get all of the challenge details.  Hope you will play along with us!

Thanks so much for stopping by! :)


Tuesday, March 1, 2016

Sparkle and Shine Challenge #25

Hello there! It's time for another Sparkle and Shine Challenge!  Here is our inspiration photo for this challenge:


We are sponsored this week by our friends at Create A Smile Stamps!


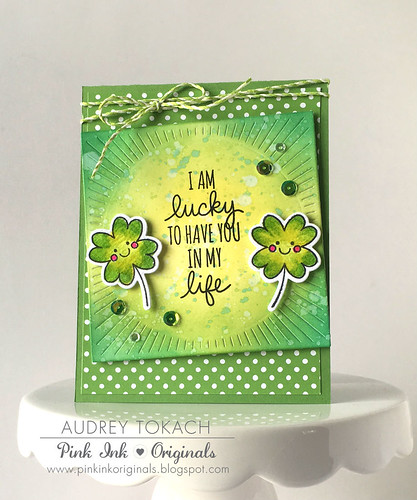
Here is my card!  I started out by diecutting the Avery Elle Burst die from white cardstock.  Then I used distress inks in Squeezed Lemonade, Twisted Citron and Lucky Clover to create a fun inked background.  I splattered some clean clear water on top, then mopped it up with a paper towel, then added some paint splatters with watered down Lucky Clover ink.  I stamped the cute little clovers from the My Favorite Things Lucky stamp set and colored them with my Zig Clean Color Real Brush markers before diecutting them with the coordinating dies. I stamped a sentiment from the same set in the center of the panel, popped the clovers  up on foam tape, and added a scattering of sequins.  Then I adhered some polka dot patterned paper to a green card base, popped the panel up with foam tape, and added a twine bow.


So lucky

Be sure to check out the blog for all of the challenge details and for lots more inpiration from the design team!  Thanks so much for stopping by! :)

Supplies:
Stamps: MFT Lucky
Dies: MFT Lucky, Avery Elle Burst
Paper: PTI White, New Leaf, Lawn Fawn Let's Polka 6x6
Ink: Versafine Onyx Black, Distress inks in Squeezed Lemonade, Twisted Citron and Lucky Clover
Other: Pretty Pink Posh sequins, Lawn Fawn Lime Lawn Trimmings, Foam tape, Zig Clean Color Real Brush Markers

Monday, February 15, 2016

Sparkle and Shine Challenge #24

**This is my second post for the day!  If you are looking for my Lawnscaping Challenge post, please scroll down**


Hello there! It's time for another Sparkle and Shine Challenge!!  The inspiration photo for this challenge is fun, colorful and graphic! I can't wait to see how you are inspired!


We are sponsored this week  by the Right at Home Shop!


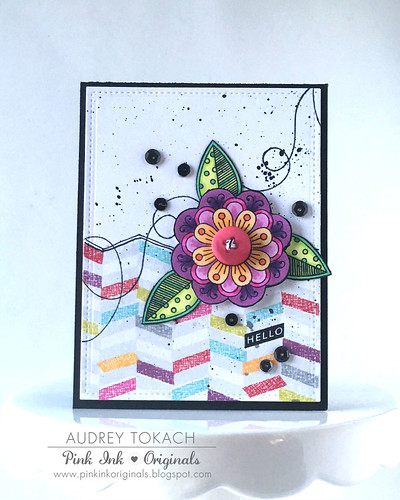
For my card today, I pulled out one of my most favorite stamp sets in my entire collection, Papertrey Ink's Doodlie Do stamp set.  I also used a set that had not seen ink yet, Background Basics: Diagonals and Diagonals Additions,  I started off my stamping the BB: Diagonals strip  on the  bottom of my card panel with a super pale grey ink, then I used the BB: Diagonals Additions to add in some colored block and the little "hello" sentiment.  I added a hand doodles zigzag on the top edge of the stripes.  Then I stamped, colored, and fussy cut one of the flowers and a few leaves from Doodlie Do.  Before adhering the flower, I added some paint splatters with black watercolor paint, and stamped a black loopy line, which is a flight trail from the Happy Trails stamp set.  I adhered the leaves flat, popped the flower up with foam tape, and added some black sequins before popping the panel up on a black card base.


Abstract Doodles

I had a lot of fun with this one!  Be sure to check out the blog for all of the challenge details and for lots more inspiration from the design team!

Thanks so much for stopping by!!

Supplies:
Stamps: PTI Doodlie Do, BB: Diagonals and Diagonals Additions, Happy Trails
Paper: PTI White, True Black
Ink: Memento Tuxedo Black, PTI Pure Poppy, Raspberry Fizz, Summer Sunrise, Limeade Ice, Hawaiian Shores, Lawn Fawn Juice Box, WPlus9 Pixie Dust
Other: Ganasai Tambi black watercolor, Copic Markers, Avery Elle Sequins, Foam Tape

Monday, February 1, 2016

Sparkle and Shine Challenge #23

Hello there!  Welcome to another Sparkle and Shine Challenge!!

Before I get into all of the new challenge details, I wanted to share some sad news with you.  Last week, the founder of Sparkle and Shine, Angel Johns, lost her husband, Chris, after a very short illness.  Chris not only leaves behind Angel, but their two young sons as well.  As you might imagine, they are facing some pretty heavy burdens financial and otherwise.  A Go Fund Me account has been set up to help the Johns family.  Please keep them in your thoughts and prayers as they adjust to the changes they have been faced with.  I know Angel appreciates each and every one of you.

Ok, now onto the challenge details!  Here is our inspiration photo for Challenge #23:


For my card, I wanted to play with my Paper Smooches Boom Bots stamp set.  I got it awhile back, and have been itching to color these adorable little guys!  To make my card, I started off by creating an inked backgound using Spun Sugar and Barn Door distress inks.  I added water droplets and then dabbed them off with a paper towel.  I was inspired by the polka dot background in the photo above.  I stamped, colored and diecut the robots and their little friend, and although it's  hard to see in the photo, I used the Shadows stamp set to add little shadows under them before popping them up with foam tape.  I add my sparkle, I used my Sakura Stardust pen on areas of the robots and the word bubble.  I apologize that it's so hard to see, but I promise it's there!  I stamped a sentiment from the same set, and some gears, also from the same set, on a diagonal to help the eye move from one side of the card to the other.


Love U Bots

Be sure to check out the blog for all of the challenge details and for lots more inspiration from the design team!

I am going to enter this card in the new Paper Smooches February Challenge - Fun & Cute!


Thanks so much for stopping by! :)

Supplies:

Stamps: Paper Smooches Boom Bots, Shadows
Dies: Paper Smooches Boom Bots, Lawn Fawn Small Stitched Rectangles Stackables
Paper: PTI White, Pure Poppy
Ink: Memento Tuxedo Black, London Fog, WPlus9 Fairy Dust, Lawn Fawn Lobster, Spun Sugar and Barn Door Distress Inks
Other: Copic Markers, Sakura Stardust Pen, White Gel Pen, foam tape

Friday, January 15, 2016

Sparkle and Shine Challenge #22

Hello there!  It's time for another Sparkle and Shine Challenge!  Here is our inspiration photo for Challenge #22:


We are sponsored this week by the Right At Home shop!


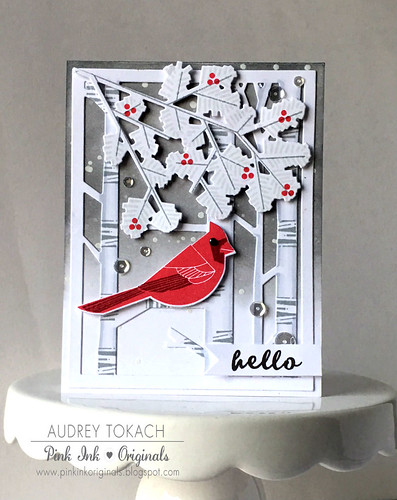
I am using some new-ish products from Papertrey Ink for my card today!  I started my card by ink blending an ombre pattern using an ink blending tool and Hickory Smoke Distress Ink.  I wanted the top of the card base to be dark, and the bottom to fade to white.  After I blending the ink, I used my Kuretake Gansai Tambi watercolors to add white paint splatters to the card base to look like snow.  Then I diecut a birch tree background is the Winter Woods Cover Plate from PTI.  I stamped lines on the birch trees using an image from the Winter Woods stamp set.  For some added dimension, I added some shadows to the diecut using a grey copic marker.  Then I stamped the cardinal and tree branch from the Winter Woods stamp set onto coordinating diecuts.  After adhering the birch tree diecut to the card base with a glue pen, I popped the tree branch and bird up using foam tape.  Then I stamped a sentiment from the same set on a banner diecut, and added some Sparkling Clear Sequins as a finishing touch.


Winter Cardinal

Be sure to check out the blog for all of the challenge details and to see lots more inspiration from the design team!

Thanks so much for stopping by! :)

Supplies:
Stamps: PTI Winter Woods
Dies: PTI Winter Woods,Winter Woods Coverplate, PTI Double Ended Banner
Paper: PTI White
Ink: Memento London Fog, Lawn Fawn Lobster, PTI Scarlet Jewel and Smokey Shadow, WPlus9 Pixie Dust, Hickory Smoke Distress
Other: Copic Markers (C3, C1), black rhinestone, Pretty Pink Posh Sparkling Clear Sequins, Foam Tape, Kuretake Gansai Tambi watercolor, ink blending tool

Friday, January 1, 2016

Sparkle and Shine Challenge #21

Hi there!  Can you believe that we are starting our first Sparkle and Shine Challenge of the new year already!  Today starts a new challenge with this inspiration photo:
 
 
We have a new sponsor for 2016, Create a Smile Stamps!


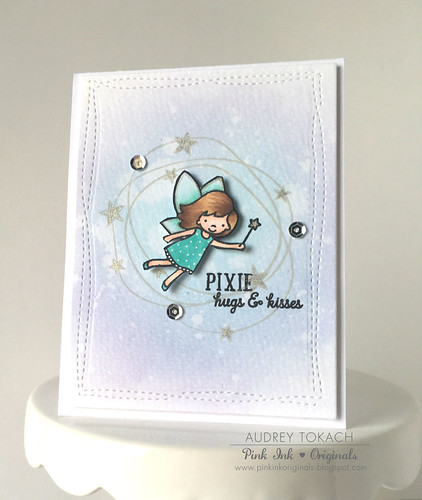
I think the color combination used in the inspiration photo lends itself very well to a magical glittery scene!  One thing I love to do is mix and match stamp sets, sometimes using sets from different companies, together.  The Avery Elle Pixie Dust stamp set and the Star Scribbles by Papertrey Ink are a match made in heaven!  To start my card, I added Tumbled Glass, Shaded Lilac and Dusty Concord Distress Ink in a circular shape to the center of a piece of watercolor paper.  Then I added a a few flicks of water to get the looks I was after and diecut the panel with the Avery Elle Wonky Stitches dies.  I took the large circle scribble from the Star Scribbles stamp set and stamped in the center of the panel using a light grey ink, and filled in the stars with a Sakura Stardust pen for some added sparkle.  Then I stamped, colored and fussy cut one of the adorable fairies from the Pixie dust stamp set and popped her up in the center of the circle with foam tape.  I stamped a sentiment, also from the Pixie Dust stamp set, next to her and added a few silver sequins to finish the scene.


Pixie Hugs and Kisses

Be sure to stop by the blog to get all of the challenge and to see lots more inspiration from the design team!  I hope you will join us!!

Thanks for stopping by! :)

Supplies:
Stamps: Avery Elle Pixie Dust, Papertrey Ink Star Scribbles
Dies: Avery Elle Wonky Stitches
Paper: PTI White, Tim Holtz Distress Watercolor Paper
Ink: Memento Tuxedo Black, Versafine Black Onyx, Mama Elephant Moonlight, Ranger Distress in Tumbled Glass, Shaded Lilac, Dusty Concord
Other: Copic Markers, White Gel Pen, Sakura Stardust Pen, Silver sequins, foam tape

Tuesday, December 15, 2015

Sparkle and Shine Challenge #20

Hi there!  It's time for our final Sparkle and Shine Challenge of 2015!  Where has the year gone?!  Here is the inspiration photo for this challenge:


We are sponsored by our friends at Winnie and Walter!


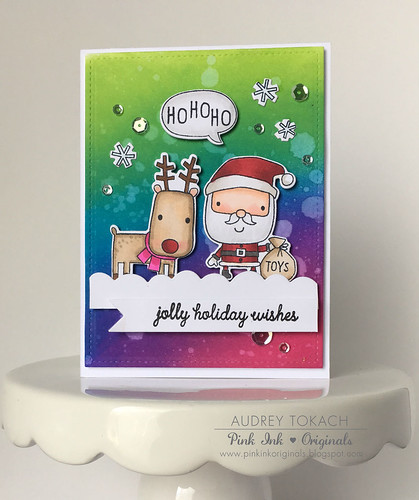
Here is my card!  I just love non-traditional colors for Christmas cards, and this inspiration photo is perfect for that (but there are also traditional colors in the trees if that's what you prefer!)  I started off by ink blending several colors of distress ink to create a rainbow background to mimic the pattern in the striped wrapping paper in the inspiration photo.  Then I dropped some water on the cardstock to bleach out color in some areas.  When it was dry, I diecut the panel with the Lawn Fawn Small Stitched Rectangles Stackables to add a stitched edge.  I used the Lawn Fawn Puffy Cloud borders cut from white cardstock to create puffy snow for Santa and Rudolph to stand on.  Aren't they just the cutest?  They are from the Reverse Confetti Jolly Holiday stamp set.  I stamped a sentiment from the same stamp set on white cardstock and then hand cut a banner end, and to finish things off, I added a scattering of 4mm, 6mm and 8mm Sparkling Clear sequins from Pretty Pink Posh before adhering the panel to a white card base using foam tape.


Jolly Holiday Wishes

That's all for me today!  Be sure to visit the blog to get all of the challenge details and see lots more inspiration from the design team!

Thanks for stopping by!

Supplies:
Stamps: Reverse Confetti Jolly Holiday
Dies: Reverse Confetti Jolly Holiday, Lawn Fawn Small Stitched Rectangles, Lawn Fawn Puffy Clouds borders
Paper: PTI White
Ink: Memento Tuxedo Black, Versafine Onyx Black, Distress Inks in Twisted Citron, Mermaid Lagoon, Wilted Violet, Picked Raspberry
Other: Copic Markers, Pretty Pink Posh Sparkling Clear sequins, Foam Tape
Tuesday, December 1, 2015

Sparkle and Shine Challenge #19

Hello there! It's time for another Sparkle and Shine Challenge!  Here is the inspiration photo for this challenge:


We are sponsored this week by our friends at Pretty Pink Posh!


Here is my card, inspired by the photo!  I love the warm grey, the pops of cool white, and that purple satin blanked!  So much so, that I pulled out my satin ribbon for this card, which I haven't done in ages!  I forgot how difficult tying a nice bow can be! LOL!

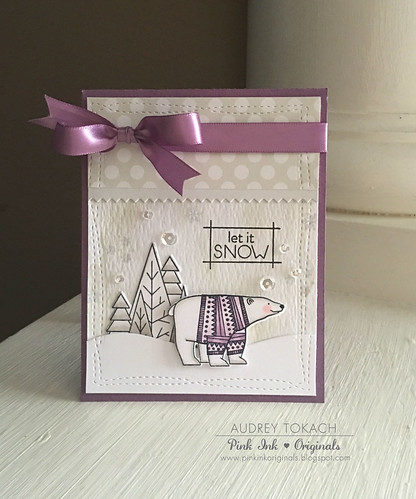
To create my winter wonderland scene, I first watercolored a piece of Tim Holtz Distress Watercolor paper with Pumice Stone distress ink.  I diecut, stamped and colored some images from the Papertrey Ink Warmest Wishes stamp set.  I used the In the Meadow Hills dies to create a bank for the polar  bear to stand on and adhered that to the watercolor piece with foam tape. Before doing that, I added a stitched edge to all of my pieces with the Avery Elle Wonky Stitches dies.  For a little extra interest I added some Soft Stone patterned paper to the top of the panel, and added a pinked border with the PTI Pinking Shears border die.  I stamped a sentiment from the same stamp set, added the bear foam tape, and then adhered the panel to a purple card base before tying my satin bow and adding a scattering of my favorite Sparkling Clear sequins from Pretty Pink Posh!


Let It Snow

Be sure to visit the blog to get all of the challenge details and to see lots more inspiration from the design team!  Thanks so much for stopping by! :)


Supplies:
Stamps: PTI Warmest Wishes
Dies: PTI Winter Wishes, In the Meadow Hills, Pinked Edge Border, Avery Elle Wonky Stitches
Paper: PTI White, Soft Stone, Plum Pudding, Soft Stone Pattern Pack, Tim Holtz Distress Watercolor Paper
Ink: Memento Tuxedo Black, Versafine Onyx Black, Ranger Pumice Stone Distress Ink, Mama Elephant Moonlight
Other: Pretty Pink Posh 4mm, 6mm, Sparkling Clear Sequins, PTI Plum Pudding Satin Ribbon, Copic Markers, Foam Tape

Sunday, November 15, 2015

Sparkle and Shine Challenge #18

Hey there!  It's time for another Sparkle and Shine Challenge!  Here is the inspiration photo for the next two weeks! :)


We are sponsored by our friends at Winnie and Walter!


As much as I love bright colors, I also love rustic.  The inspiration photo reminds me of how I'd decorate my front porch for fall.  So instead of using bright white like I normally would, I though a kraft card was perfect for this challenge!

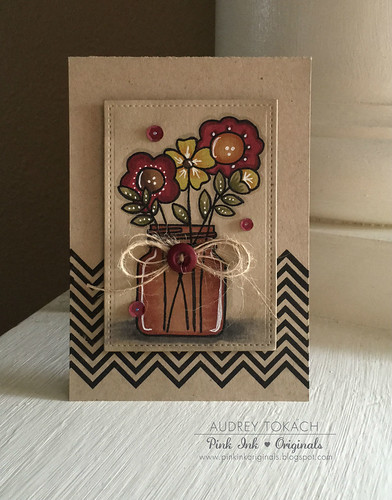
I started off by using my Paper Smooches Geo Graphic stamp set to stamp black chevrons on the bottom third of a kraft card base.  Then I used my Lawn Fawn Stitched Rectangles dies to diecut a panel for my focal point.  I stamped the jar image from the Paper Smooches Best Buds on the panel, and then used my copic markers to color it in.  I used a white gel pen to add accents to the image, and then popped the panel up on the card base using foam tape.  For another rustic touch, I added a button thread with jute twine, and a few wine colored sequins.


Rustic Flowers

Be sure to visit the blog for lots more inspiration from the design team, and to get all of the challenge details!  Hope you will play along!

Thanks for stopping by! :)

Supplies:

Stamps: Paper Smooches Geo Graphic, Bust Buds
Dies: Lawn Fawn Stitched Rectangles
Paper: PTI Classic Kraft
Ink: Memento Tuxedo Black, Versafine Black Onyx
Other: Copic Markers, White Gel Pen, Foam Tape, Avery Elle sequins, PTI Rustic Jute Twine, PTI Scarlet Jewel button
BLOG TEMPLATE BY DESIGNER BLOGS