Saturday, November 6, 2021

Countdown to Confetti - Day 2


Hello there!  Welcome to the countdown to Confetti Day #2 with Reverse Confetti!  All of the products that we will be showcasing over the next few days will be available on the Reverse Confetti website and at your favorite retailers on November 8th!  If you order from the Reverse Confetti store, this month we are offering a free gift with $60 purchase!  Snowy Sentiments pairs perfectly with all of your winter favorites!

Today, we are showcasing the new Retro Holiday stamp set and coordinating Retro Holiday Confetti Cuts dies.  To create my first card, I started off by putting a piece of Darling  Dots patterned paper to an A2 card base  On top of that, I layered the new Open Drop Cover Panel cut from white cardstock.  Then, I stamped and gold heat embossed the cluster of stars from the Retro Holiday stamp set two times on white cardstock.  I pulled out the previously released Joys of the Season stamp set, and stamped and diecut the candy cane from the set with the coordinating Joys of the Season Confetti Cuts dies.  

RC Retro Holiday

I adhered the stars to the right size of the panel with a glue pen, and popped the candy cane up with foam tape.  Then, I heat embossed a sentiment from the Retro Holiday on a strip of cardstock, which I rounded with a corner rounder.  To finish off my card, I added a scattering of gold sequins and and some glittery stickles to the candy cane.

RC Retro Holiday

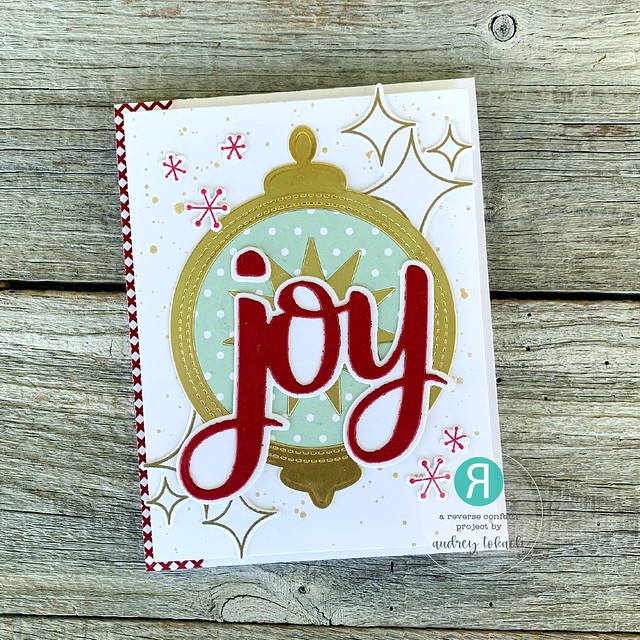
To create my second card, I started off with a piece of white cardstock cut to  4" x 5.25".  I splattered it with gold metallic watercolor.  Then, I heat embossed the open star cluster from Retro Holiday in gold embossing powder and stamped some of the smaller whimsical stars in red ink and diecut with the Retro Holiday Confetti Cuts dies.  For the focal point, I diecut the new Ornament Confetti Cuts die from gold metallic cardstock and more of the Darling Dots patterned paper.  I pieced them together and glued everything flat with a glue pen.
 

RC Retro Holiday

For the sentiment, I diecut the new Layered Joy Confetti Cuts die from white and red cardstock.  I layered the red text layer on the white shadow and centered that on the ornament.  Before popping the panel up on an A2 card base, I added a strip of red and white patterned paper from the Hello Holidays paper pad.

RC Retro Holiday

That's all for me today, but be sure to hop along and see what the rest of the team has to share with you!  Comment along the way for your chance to win a Reverse Confetti gift certificate!  Be sure to stop back by tomorrow to see what else I have to share with you!  Thanks for stopping by! :)

Reverse Confetti

Dilay Nacar

Audrey Tokach

Ashley Ebben

Lisa Henke

Amy Kolling

Andrea Shell

Kellianne Wilson

Dana Kirby

Amy Tsuruta

Stefanie Loh

Jeanne Jachna


Friday, November 5, 2021

Sunny Studio Stamps - Oval Dies


Hello friends! I am here with a fun and frosty card to share with you today using products from Sunny Studio Stamps!  To create this card, I started off by adhering a piece of polka dot paper from the All Is Bright 6x6 paper pad to the front of an A2 card base.  Then, using more patterned papers from the collection, I diecut the largest oval from both the Stitched Oval 2 Dies and the Scalloped Oval Mat 1 Dies.  I splattered on some watered down white paint to the stitched diecut and adhered them together with liquid glue.  Then, I ran the Stitched Oval die through my diecut machine twice more with white glitter paper and the Slimline Nature Border dies to create the snowy hills to ground my adorable snowmen.  I stamped and colored two snowmen and the tree from Feeling Frosty stamp set, and diecut them with the coordinating Feeling Frosty dies

Sunny Studio Oval Dies

 I arranged my scene, and popped the elements up with foam tape for added dimension.  Then, I stamped a sentiment from the set on a banner diecut, and tucked a few tiny snowflakes around it to fill the sky.  The snowflakes are from the Basic Mini Shapes II die set.  Finally, I adhered the oval focal point to the card base, and added some white gel pen accents and tiny clay hearts to finish off my card.

Sunny Studio Oval Dies

That's all for me today!  Thanks so much for stopping by! :)

Countdown to Confetti - Day 1


Hello there!  Welcome to the countdown to Confetti Day #1 with Reverse Confetti!  All of the products that we will be showcasing over the next few days will be available on the Reverse Confetti website and at your favorite retailers on November 8th!  If you order from the Reverse Confetti store, this month we are offering a free gift with $60 purchase!  Snowy Sentiments pairs perfectly with all of your winter favorites!

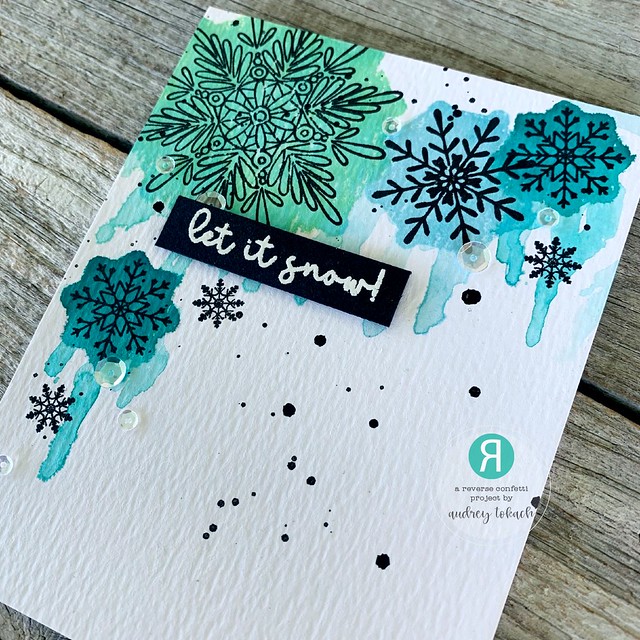
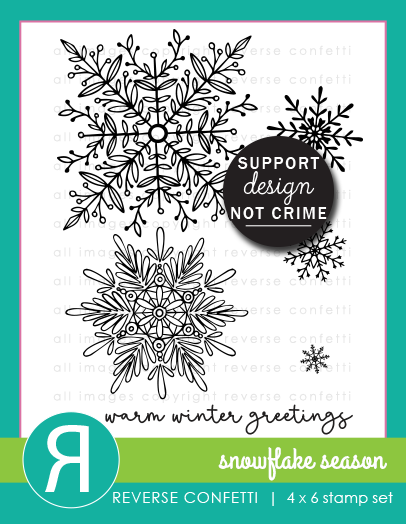
Today, we are showcasing the beautiful new Snowflake Season stamp set and coordinating Snowflake Season Confetti Cuts dies.  To create my first card, I started out with a piece of watercolor paper cut to 4.25" x 5.5".  I placed it in my Misti, and stamped the reverse of each snowflake image on the paper using Distress Inks.  I placed the snowflakes pretty side down, and inked the "back" part of each stamp.  Then I misted the panel with water and used a paint brush to help the color run a bit.  I dried that layer with a heat tool, then stamped the detail side of each snowflake over top in Black ink.

RC Snowflake Season

I splattered black watercolor over the entire panel, and then stamped one of the Snowy Sentiments on black cardstock and heat embossed it with white embossing powder.  I trimmed the sentiment with scissors and popped it up with foam tape.  Then, I added a scattering of clear sequins to the panel before adhering it to an A2 card base.

RC Snowflake Season

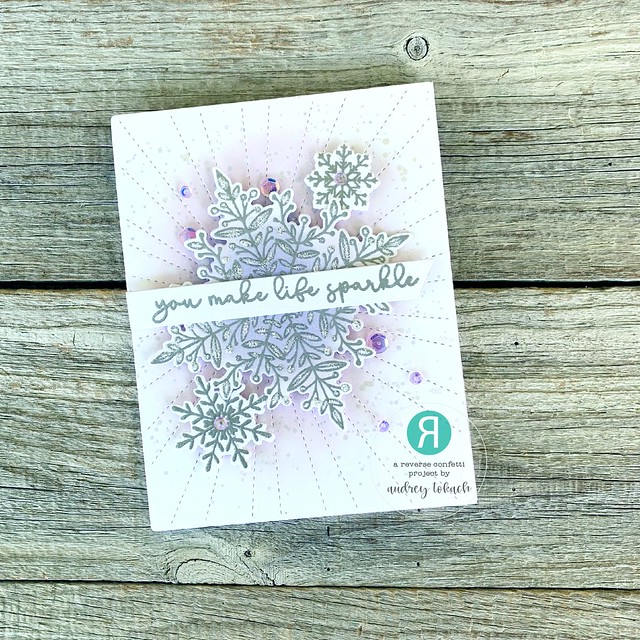
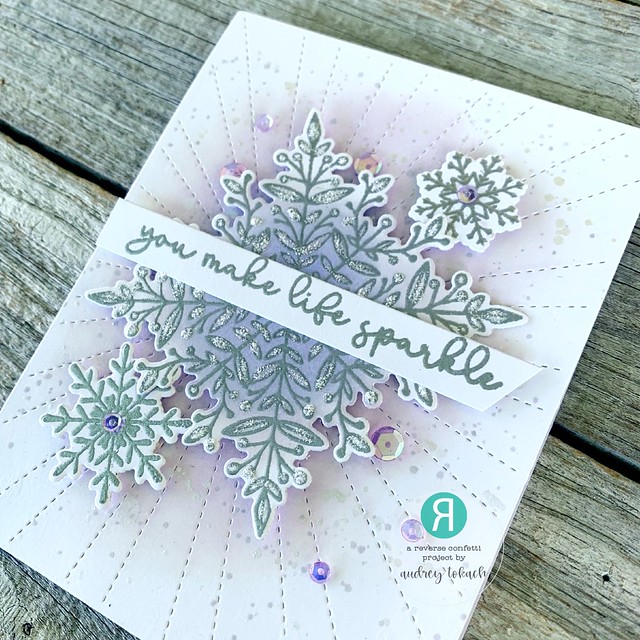
For my second card, I went a little more elegant and heat embossed the Snowflake Season snow flakes in silver embossing powder on white cardstock.  I placed them on a panel diecut with the Stitched Rays Cover Panel which I ink blended with Milled Lavender Distress Oxide ink.  Then, I splattered the panel with white pearl watercolor.  After I  diecut the snowflakes, I added some Shaded Lilac ink to the center of the largest snowflake for some contrast.  Each snowflake was popped up with foam tape.

RC Snowflake Season

I added some Frosted Lace Stickles to the largest snowflake.  I stamped and heat embossed another sentiment from Snowy Sentiments and popped that up with foam tape.  To finish off the card, I added a scattering of iridescent purple sequins.

RC Snowflake Season

That's all for me today, but be sure to hop along and see what the rest of the team has to share with you!  Comment along the way for your chance to win a Reverse Confetti gift certificate!  Be sure to stop back by tomorrow to see what else I have to share with you!  Thanks for stopping by! :)

Reverse Confetti

Dilay Nacar

Audrey Tokach

Ashley Ebben

Lisa Henke

Amy Kolling

Andrea Shell

Kellianne Wilson

Dana Kirby

Amy Tsuruta

Stefanie Loh

Jeanne Jachna


Friday, October 29, 2021

Sunny Studio Stamps - Holiday Express


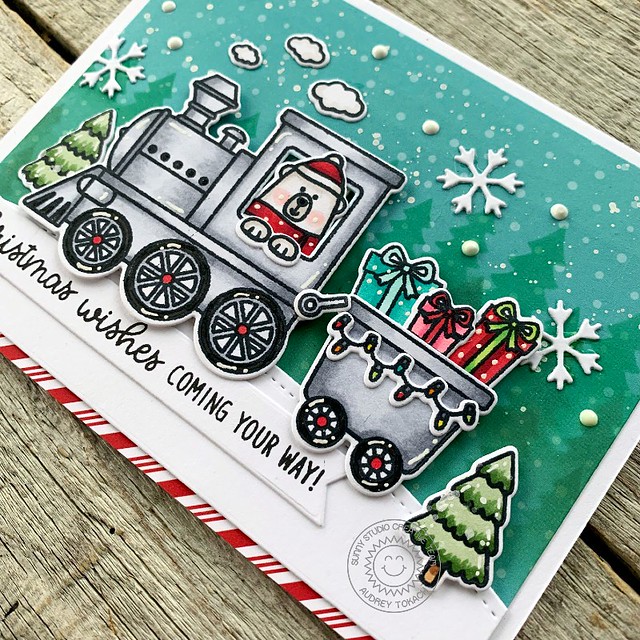
Hello friends!   I am here today with a fun holiday card to share with you!  To create my card, I started off with a piece of patterned paper from the All Is Bright 6x6 paper pad cut to 4" x 5.25".  I used the Forest Trees Stencil and teal and green shades of Distress Oxide ink to add a tree line near the top of the panel, when splattered the paper with watered down white paint to add more snowflakes to the background.  I added a snowy hill to the bottom of the panel using the Slimline Nature Borders dies and some white cardstock.  Then, I stamped and colored images from the Holiday Express stamp set with my Copic markers and diecut them with the coordinating Holiday Express dies.  I popped those images up with foam tape once I was happy with the arrangement.  

SS_HolidayExpress1

I stamped a sentiment from the set onto a diecut banner and adhered it under the train on the snow bank.  Next, I added some diecut snowflakes to the sky above the train using the Basic Mini Shapes II dies, along with some snowflakes made with white Nuvo Drops.  Before mounting the panel to an A2 cardbase with foam tape, I added a strip of candycane striped paper from the All is Bright paper pad.  I finished off my card with some white gel pen accents.

SS_HolidayExpress2

That's all for me today!  Thanks so much for stopping by! :)

Friday, October 22, 2021

Sunny Studio Stamps - Deck the Halls


Hello friends!   I'm decking the halls with Sunny Studio Stamps!  To create my card, I started off with a piece of watercolor paper cut 4" x 5.25".  I used Distress ink in the shades Twisted Citron, Mowed Lawn and Rustic Wilderness to watercolor a background on the top left of the card, leaving white space at the bottom and along the right edge.  I usually stamp the sentiment on my card last, but this time, I knew I wanted in to fit in the white area, so I stamped it first.  The sentiment and images com from the adorable Deck the Halls stamp set.  I colored three ornaments from the set, and diecut them with the coordinating Deck the Halls dies.  To hang then, I threaded some silver cord from my stash through the hole that the die creates in each ornament, and wrapped it over the top edge of the panel, securing it on the back side with Scotch tape.  I popped each ornament up with foam tape.  

Sunny Studio Deck the Halls

To fill in the area behind them, I diecut three of the Lacy Snowflakes from white cardstock and glued them to the background with a glue pen.  Before popping the panel up on an A2 card base, I added a strip of candy cane striped paper from the All is Bright 6x6 paper pad to the left edge of the card front.  To finish off the card, I added some white gel pen accents, Stardust Stickles and some extra snowflakes using white Nuvo Drops.

Sunny Studio Deck the Halls

That's all for me today!  Thanks so much for stopping by! :)

Friday, October 15, 2021

Sunny Studio Stamps - Christmas Critters


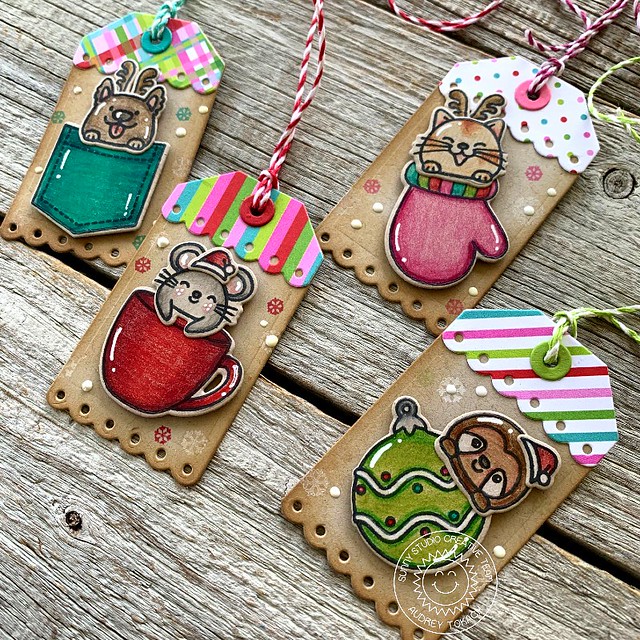
Hello there friends!  I am here today with a set of Christmas gift tags using products from Sunny Studio Stamps!  To create my tags, I started off by diecutting one of the tags from the Sliding Window Die set from kraft cardstock four times.  I inked the edges of each with Walnut Stain Distress Oxide ink.  Then, I diecut the tag topper from four different patterns from the All is Bright 6x6 paper pad, and adhered a topper to each tag along with a hole reinforcer cut from coordinating cardstock. 

Christmas Critters Tags

I stamped several images from the Christmas Critters stamp set, colored them with colored pencils, and diecut them with the coordinating Christmas Critters dies.  I popped up an image and critter onto each tag with foam tape, and stamped tiny snowflakes from the stamp set in both white pigment ink and colored dye inks.  To finish off the tags, I added some white Nuvo Drops, white gel pen accents and coordinating twine to each one.

Christmas Critters Tags

That's all for  me today!  Thanks so much for stopping by! :)


Friday, October 8, 2021

Sunny Studio Stamps - Words of Gratitude


Hello Friends!  I am  here today with a card to share with you using the new Words of Gratitude stamp set and Thank You Words dies from Sunny Studio Stamps.  To create my card, I started off with a piece of white cardstock cut to 4" x 5.25".  I used Shaded Lilac Distress Oxide ink and a cloud stencil from my stash to add a cloudy sky to the top part of the panel.  After it was dry, I splattered on some pearl white watercolor.  I stamped and colored the adorable fairy on the flower and one of the butterflies from the Garden Fairy stamp set, and diecut them with the coordinating Garden Fairy Dies.  

SS_WordsofGratitude1

Then, I diecut "thank you" from the Thank You Words die set three times from white cardstock and stacked them together with a glue pen.  I finished off the greeting using a sentiment from the Words of Gratitude stamp set, stamped in black ink on a white banner.  The fairy and butterfly were popped up with foam tape, and I added white gel pen accents and Diamond Stickles to them for added interest.  Before popping the panel up on an A2 card base, I added a strip of striped paper from the Subtle Grey Tones 6x6 Paper Padto the left edge of the card base.  Finally, I added some tiny stars from the Garden Fairy stamp set scattered about the scene, and a few tiny pink heart confetti.

SS_WordsofGratitude2

That's all for me today!  Thanks so much for stopping by! :)
BLOG TEMPLATE BY DESIGNER BLOGS