Thursday, February 26, 2015

The Sky's the Limit {Papertrey Ink}

Hello there!  Happy Thursday!  I got some time in my craft room yesterday and I have a bunch of new goodies that I've been meaning to dig into!  I got my release night order from Papertrey Ink. and I couldn't wait to try out the new Scene-It: Skyscapes dies along with the new Blue Skies stamp set.  A match made in heaven I tell ya!

For my card, I started out with a 4 x 5.25" card base.  I added patterned paper from the Pure Poppy pattern pack to the front of the card base, Then I cut a white panel 3.75 x 5.25" and did some ombre inking using Distress Ink.  I inked about 3/4 of the way down the panel.  Then, I cut the cloud Skyscapes die from white card stock and sponged some more with Distress Inks.  I mounted that diecut on a white Scene-it: Basic Backer diecut.  I stamped, colored and cut out the cute little plane from Tremendous Treats: Valentine and popped that, along with two tiny clouds, up on foam tape.  I stamped a sentiment from the Blue Skies stamp set on the bottom of the card front and the, popped the Skyscapes piece up on foam tape.


The Sky's the Limit

Before sticking down the airplane, I added the little flight trail from the Boy Basics: Frog Hop stamp set and the tiny hearts from the Love Lives Here stamp set, using Pure Poppy ink.

I have to say that I LOVE these new Skyscapes dies.  I think they will become a fast favorite!  I can't wait to play around some more with these stamps and dies... SO many ideas swirling around in my head!

Thanks so  much for stopping by! :)

Supplies (all PTI unless noted):
Stamps: Blue Skies, Tremendous Treats Valentine, Love Lives Here (hearts), Boy Basics: Frog Hop (flight trail)
Dies: Scene-it: Skyscapes, Scene-it: Basic Backer
Ink: Pure Poppy, Memento Tuxedo Black, Ranger Tumbled Glass and Shabby Shutters Distress
Paper: PTI Stampers Select White, Pure Poppy pattern pack
Other: Copic Markers, foam tape

Monday, February 16, 2015

100th Lawnscaping Challenge!


Good morning to you!  Today, I have an extra special Lawnscaping Challenge to share with you!! Since this is our 100th challenge, each of the design team members have invited a guest to play along with us!  The theme of this challenge is Birthday.


Our birthday challenge is sponsored by the super fabulous Lawn Fawn!


And I have invited Kay Miller, from My Joyful Moments, to be my guest!  I love Kay's whimsical style and she works absolute magic with Lawn Fawn stamps!  Here is the card that she made to share today:


I was very inspired by the soft colors that Kay used on her card.  I am usually a bright color kinda girl, but I am sorta digging the pastel color scheme of my card today.

Hippo Birdie to you!

I started off by watercoloring a piece of Tim Holtz Distress watercolor paper with my Kuretake watercolors.  I diecut the panel with the stitched rectangles dies, and added some patterned paper from the Let's Polka 6x6 paper pad at the top.  I combined Year Three and Year Four to create a little birthday celebration scene.

Be sure to stop by the blog for lots more birthday inspiration and to see who else was invited to our birthday party today! I hope you'll play along with us for your chance to win a great prize!

Thanks for stopping by!
\
Supplies:
Stamps: Lawn Fawn Year Three, Year Four
Ink: Memento Tuxedo Black
Paper: Lawn Fawn Let's Polka 6x6 paper pad, PTI Aqua Mist, White, Tim Holtz Distress Watercolor paper
Other: Copic Markers, Kurtake Gansai Watercolors, Foam Tape, Wink of Stella Clear Glitter Pen, Sakura Stardust pen

Saturday, February 14, 2015

Introducing Moments Inked Memory Planner System {Papertrey Ink}


Good Morning to you!  You may be wondering why the title of the post sounds a lot like one a design team member would use... Well, that's because I have some huge, HUGE exciting news to share with you today!  I've been asked to be part of the promotional design team for the a new product line by PAPERTREY INK!  What?!  Oh, Em. Gee. Did I just type that?  I'm still trying to convince myself that I am not dreaming!  I can not even begin to tell you how over-the-moon excited I am.  A dream come true for me!!


Ok, so now that I'm done jumping up and down (for the time being), it's time to share with you an AWESOME new product line that Papertrey Ink is introducing as part of their 8th anniversary celebration, called the Moments Inked Memory Planner System.  Prepare yourself for a bright and colorful, super fun, picture heavy post!

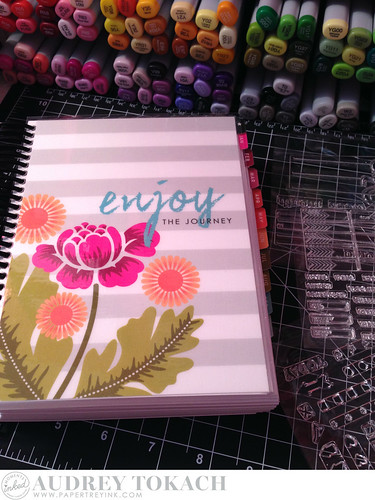
To start, you purchase your planner and you can choose from three different interchangeable covers.  The cover designs are all beautiful.  It was so hard to choose which I liked best.  But if you can't choose, that's ok... buy all three and switch them out.  So easy!  

Moments Inked

The real magic happens when you open that beautiful cover!  PTI has seriously thought of everything.  This planner is jam-packed with so much colorful, happy goodness.  If you are anything like me, you have several different binders and/or notebooks to help keep track of different areas in your life...  But with the Moments Inked Memory Planner System, you can keep track of everything from your daily schedule using the weekly and monthly calendar spreads, to your meal planning and fitness goals and water intake, to keeping track of memorable moments that you never want to forget,  It is a calendar, planner, journal and yearly scrapbook all in one!  ONE book and it's small enough to fit in your purse.

I will admit that when I first saw the planner, I was a bit surprised by the size of the spiral bound coil that comes with the planner.  It's large.  BUT, then I got to thinking...  One of the many reasons that I have tried several different planners but could never settle into one that I loved was the inability to really customize my planner.  As I started to really use my planners in the past, they would get over stuffed and then things would fall out.  Or I'd have to spend a fortune to buy a bunch of other "tools" to add iserts to my planner.  This planner has room to grow.  A whole year's worth of stuff in one place.  Coordinating dies (which you can ready more about on Nichole's blog), allow you to diecut anything you can imagine and put it in your planner.  Photos, concert tickets, school play programs, the card your grandma sent you for your birthday...  Add holes using the Moments Ink: Basic Pages dies and then add it to your planner and have all of your keepsakes in one place.

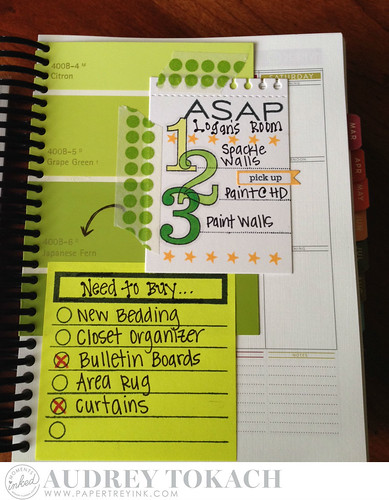
I am a list maker by nature.  I have post-its everywhere.  Recently we decided to re-do our son's bedroom and make it more "pre-teen".  Well I started making lists. One for things we need to do in the room, one for things we need to buy to decorate his room, etc.  There were several paint swatch cards too.  Once Logan decided on his paint color, I decided to make an insert for my planner and put it right with next week's weekly spread so I had everything in one place.  I used the Moments Inked: Basic Pages dies to put holes in the paint swatch card, then, on a Spiral Notebook Page die, I stamped an image from the new Remembered stamp set.  I wanted to note the most important projects for us to tackle next week.  Then, using the new Posted stamp set, I jotted down my "to-buy" list.  This stamp set is genius.  It has a lined image that is perfectly sized for 3x3 post-it notes.  There are a variety of bullets in the stamp set, and even stamps to check things off as you accomplish them!  So much cuter than my scribbled list!  The new insert is all one piece and flips easily so that I can see both sides of the weekly spread with no problem, and they are snug.  Nothing is going to fall out.  I love it.

Moments Inked

Now I will share with you some of my favorite parts of the planner, and some of my favorite products that are coming this month!  Planner Banners and the Moments Inked: Planner Banners die have to be my most favorite products apart from the actual planner.  Genius I tell you.  You can create your own little banner stickers that fit perfectly inside each of the calendar squares.  The Planner Banners stamp set has a set of solid banners and a set of framed banners, and a ton of words and images to fit inside those banners.  You can make banners in any color you like to coordinate with each month's color scheme.  I love that every month has a different color scheme.  So fun!

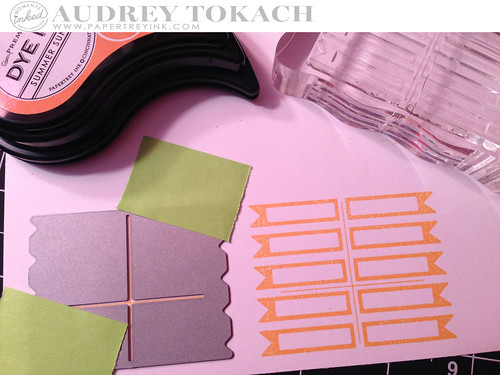
Here you can see  how easy it is to make your banners.  First you stamp your banner image on cardstock or adhesive sheets, then you use the coordinating die to cut them out.  10 tiny banner stickers with one pass of your diecut machine.  The stamped image has a cross in the center of the banners, and the die has a cross cut out.  You line up the cross in the die over the cross in the stamp and you get perfect cuts every time! 


Moments Inked

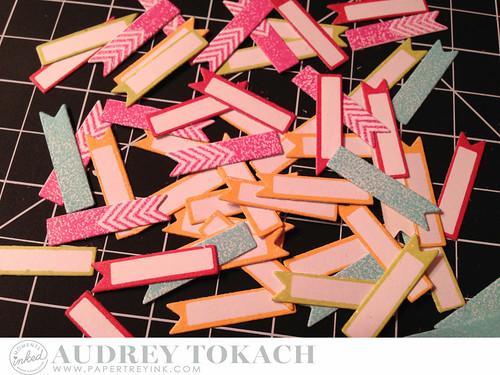
I was able to make all of these stickers in about 5 minutes, for a fraction of the cost of buying them at an office supple store, and completely color coordinated. LOVE.

Moments Inked


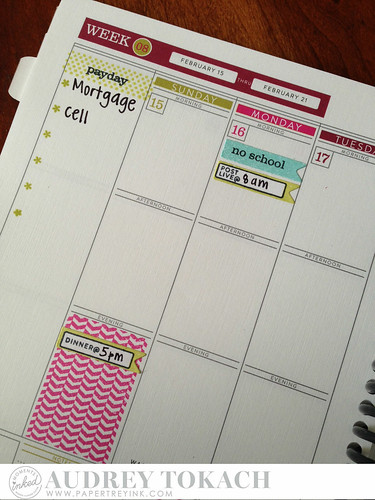
I find that in my planners, I tend to use the month calendar only for reference, and I keep all of my notes and info and special dates on the weekly spread.  I've found a few fun ways to decorate my weekly view that I'd like to share with you.

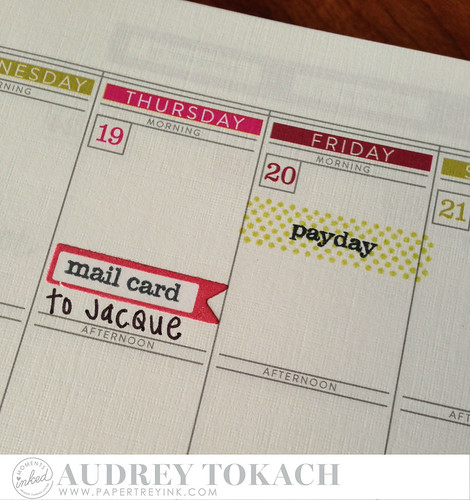
Here you can see those adorable banners  in action!  The red banner is a sticker, and the green polka dot banner is a stamp from the  Planner Banners stamp set that is stamped directly on the page.  By the way, do you see the texture of that beautiful linen paper?  Yum.

Moments Inked

Another thing I love about this planner is the area on the left side of each weekly spread for list keeping.  Here is stamped the same banner as is on the opposite page for payday, and I will keep a list of everything that needs to be paid on payday.  And see that patterned square there?  You know those patterned squares in several of the Background Basics stamps sets?  Well, they fit perfectly inside the weekly calendar spread boxes!

Moments Inked

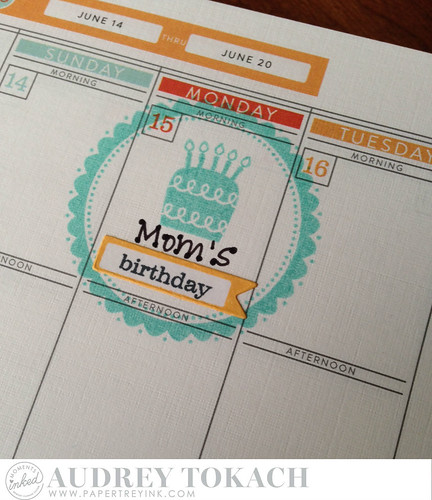
The first thing I do when I get a new calendar is add everyone's birthday.  I am a card maker after all, so it's necessary that I know these things.  Now all I have to do is remember to put the mail in the mail in time (btw, there is a stamp for that in the Planner Banners stamp set!) Did you know that the frames from all of the Tag Its stamp sets are the perfect size for calendar decorating?  And the little images in these sets adds just the right amount of cuteness!

Moments Inked

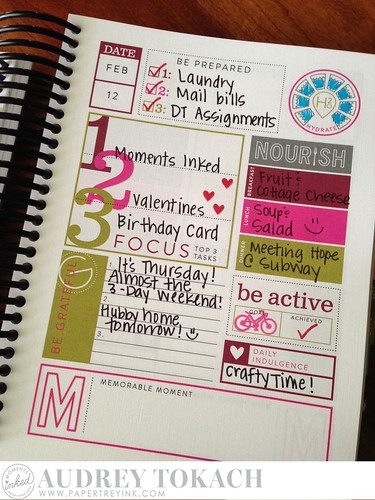
Now for my favorite part of the planner,.. the daily view.  I love that there is a daily view.  A lot of planners do not offer that, especially when they also offer a monthly and weekly view.  This page gives you space for daily to-do's, priorities for the day, your meal plan, fitness goals and water intake, a gratitude journaling area, and a spot for the day's memorable  moments.  If you are anything like me, you truly WANT to remember the little things (and the big things too, of course), but the thought of taking on a scrapbook or Project Life is a little too much to add to an already full plate.  I don't have hours to devote to a separate book, but I do have a few minutes each day to jot down important things that happened every day, and I can page back through any time.  I can add pictures right there in the daily pages too, using the Basic Pages dies.


Moments Inked

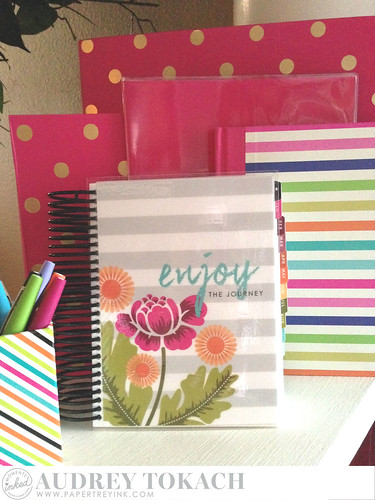
Here is my current planner/binder/journal collection.  As you can see, the color scheme in the Moments Inked Memory Planner System is right up my alley.  See that big polka dot binder the back?  That's my household binder... The small polka dot binder?  That's my budget/bill paying binder.  The shiny one is my calendar and blog scheduler, and the striped one is my gratitude journal.  See that pretty little floral one in the front?  That one now takes the place of them all! :)

Moments Inked

I hope you are as excited about my news and this new products line as I am!  All of the  new products featured today will be available at 10pm EST, tomorrow, February 15th on the Papertrey Ink website.  Be sure to stop by Nichole's blog for all of the product details!

Thanks so much for stopping by! :)

Supplies (all PTI):

Available 2/15: Moments  Inked Memory Planner System, Planner Banners Stamp set, Blog Banners stamp set, Family Banners stamp set, Posted stamp set, Remembered stamp set, Moments Inked: Basic Pages dies, Moments Inked: Planner Banner dies

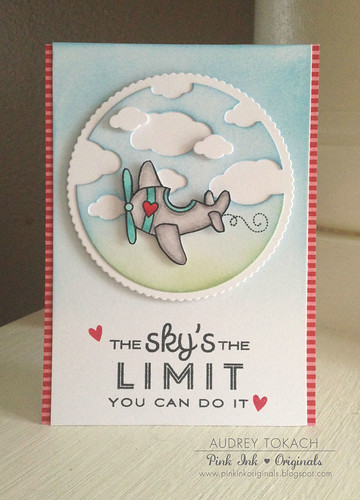
Stamps:  Background Basics: Diagonals, Tag-Its #1, Way to go Kiddo
Dies: Spiral Notebook Page
Ink: Hawaiian Shores, Limeade Ice, Pure Poppy, Summer Sunrise, Raspberry Fizz
Other: Washi Tape (Target), Copic Markers, Adhesive Sheets, Papermate Flair Pens


Sunday, February 8, 2015

Papertrey Ink - Anniversary Challenge - Inspired by Maile

Hi there!

Today I am playing along with PTI's Anniversary Challenge for Day 2 - Inspired by Maile!

I pinned this card that Maile made during the January release count down. and I recreated something similar using the Baker's Dozen stamp set and Maile's Watercolor Wonder stamp set.


Inspired by Maile

I started off with a soft stone card base and then used the largest die from the Tipped Tops die set and cut it from stamper's select white cardstock.  I stamped the large frame from Baker's Dozen on the right side of the panel, and then using Watercolor Wonder, I stamped some watercolor splashes on the card using Raspberry Fizz, Hawaiian Shores and Orange Zest. I stamped off once on scratch paper first to make the images appear more muted.  Then I colored in the cupcake with copic markers.  I added a strip of true black cardstock along the bottom and some Pretty Pink Posh Sparkling Clear sequins to finish things off.

That's all for now!  Thanks for stopping by!!

Supplies:
Stamps: PTI Bakers Dozen, Watercolor Wonder
Ink: Raspberry Fizz, Orange Zest, Hawaiian Shores, Memento Tuxedo Black
Paper: PTI White, Soft Stone, True Black
Dies: PTI Tipped Tops
Other: Pretty Pink Posh 4mm and 6mm Sparkling Clear sequins, Copic Markers, Foam Tape

Saturday, February 7, 2015

Papertrey Ink - Anniversary Day 3 Challenge

Hi there!  I have a fun tag to share with  you  for the PTI Anniversary Day #3 contest.  The challenge was to create a tag.  I love tags because they can be as simple or complex as you like, and I love working on a smaller canvas sometimes.  For my tag, I pulled it my most favorite PTI stamp set, Doodle Do.  I started by watercoloring on some Distress Watercolor Paper using my new Kurtake Gansai Watercolors that I got for Christmas,  Then I diecut my tag using the Tag Sale #6 die and stamped, colored and fussy cut my favorite flower from Doodlie Do.  I stamped a sentiment from the same set on the tag and again on watercolor paper.  Then I cut out the boxed in part of the sentiment and adhered it to the tag.  It gives the look of masking without having to actually do so.  Then I decided where I wanted my flower to go, and stamped the leaves underneath, stamping one, masking, and stamping the second.  I adhere the flower over top of them using foam tape and finished things off with a scattering of Pretty Pink Posh 4mm and 6mm sequins.


PTI Anniversary - Day 3 Challenge


PTI Annivery Challenge - Day 3

I hope to be back with some more anniversary challenge projects in the next little while.  Thanks for stopping by! :)

Supplies:
Stamps: PTI Doodle Do
Ink: Memento Tuxedo Black
Paper: Distress Watercolor Paper, PTI White, Berry Sorbet
Other: Copic Markers, Kuretake Gansai Watercolors, Pretty Pink Posh sequins, True Black Twine, Foam Tape

Tuesday, February 3, 2015

Paper Smooches turns FOUR!

Hi there!  Today I am going to take a bit of a walk down memory lane...  You see, Paper Smooches, one of my long time favorite stamp companies, is celebrating their 4th anniversary this month, and I want to help them celebrate!  


I thought it would be fun to share some of my favorite projects using Paper Smooches products!  I will link to the blog post below each photo.


You're My Universe


It has been so fun to see Paper Smooches grow and grow over the past few years!  Kim is a seriously amazing one-woman-show!  She does it all and does it so well.  I have had the honor of being a design team member on the SPARKS challenge team, and I look forward every month, to seeing what Kim has up her sleeve!  I wish you many more years of success, Paper Smooches!

Be sure to check out their website and blog to see all of the fun products and inspiration they offer! :)


Monday, February 2, 2015

Lawnscaping Challenge #99 - Clean and Simple {Lawn Fawn}


Hello there! It's time for another Lawncaping Challenge!  Can you believe we are already at #99?  This challenge is a Clean and Simple challenge.  We are sponsored this week by the wonderful folks at Ellen Hutson.


For my card, I chose to use only dies.  No images on this card, and it sort of feels funny to me.  I masked of the bottom third of a piece of white cardstock and then inked with Worn Lipstick and Picked Raspberry distress inks. I diecut Scripty Love die and hearts right out of that panel when I was finished inking.  The I cut several more layers from white cardstock and adhered them all together before putting them back into the diecut openings like puzzle pieces.  Then I gave the popped up diecuts a layer of Glossy Accents and finished things off with some sequins.  That panel is then popped up on a A2 card base.


CAS Love

Be sure to visit the blog for all of the challenge details and lots more inspiration from the design team.  I hope you'll join us for your chance to win an awesome prize!

Thanks for stopping by! 

Supplies:
Dies: Lawn Fawn Scripty Love, Hearts
Ink: Ranger Distress Worn Lipstick, Picked Raspberry
Paper: PTI White
Other: Glossy Accents, Sequins
BLOG TEMPLATE BY DESIGNER BLOGS