Pages

Thursday, April 30, 2015

Light It Up Blue for Autism Awareness Mini Blog Hop


Hello there!  Today I am excited to be part of an Autism Awareness blog hop called Light It Up Blue for Autism.  This hop was arranged by my friend Veronica.  You can start hopping here.

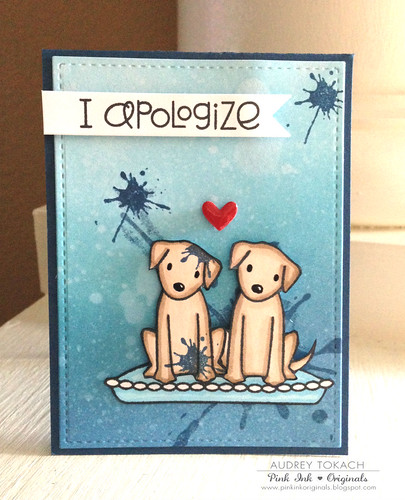
For my blue themed card today, I used a few different blue Distress Inks to create an ombre background, then I used the Neat and Tangled Ink Splash stamp set, some Furry Friends from Avery Elle and a sentiment from the Paper Smooches Good Gab stamp set.

I appologize

That's all for now... thanks for stopping by! :)

Supplies:
Stamps: Avery Elle Furry Friends, Neat and Tangled Ink Splash, Paper Smooches Good Gab
Ink: Tumbled Glass, Broken China and Faded Jeans Distress Ink, PTI Enchanted Evening, Memento Tuxedo Black
Dies: Mama Elephant Femme Frames, PTI Double Ended Banner, SSS Tiny Hearts
Other: Copic Markers, Foam Tape, Glossy Accents, Sakura Black Gloss Pen

Sunday, April 26, 2015

Guest Designing for Butterfly Reflections Ink - Day 2


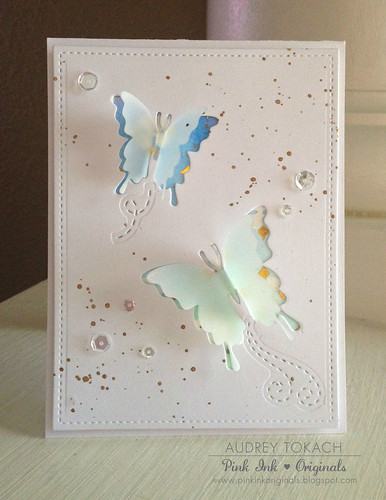
Hello there!  Happy Sunday!  Today I have another card being featured over on the Butterfly Reflections Ink blog!  I was in need of a sympathy card... those are the hardest for me to make.  I am used to creating with bright colors and whimsical images, so when I need to tone it down for something like a sympathy card, it's tough.  After lots of doing and un-doing, here is my finished card:

Artsy Butterflies

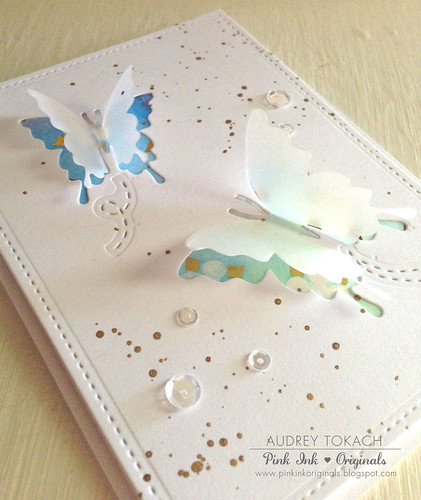
To create my card, I first watercolored a piece of patterned paper from the Cosmo Cricket 8x8 Just Add Watercolor Paper pad.  Let me just say that this line is awesome!  The paper pad is made of watercolor paper, and embossed with clear embossing and gold foil accents.  There are so many designs, and the possibilities are endless!  When I first heard about this line, I emailed Vanessa to see if she was going to carry it, and she looked into it and ordered some!  She's awesome like that :)  Ok, back to my card... After the watercoloring was dry, I used the largest rectangle from the Lawn Fawn Small Stitched Rectangles to diecut a piece from the fullsize sheet.  Then I used the same die to cut a piece of white cardstock.  I placed the Paper Smooches Butterfly Duet dies where I wanted them on the white cardstock and ran that through my diecut machine.  Then I added the flight trails using the Paper Smooches Stitched Flourishes dies.  I diecut the butterflies again, this time from vellum.  I then adhered the watercolor piece to the back of the white diecut panel so that the watercolor would show through the die cut openings.  Using a glue pen, I added a few dots of glue to the bodies of the vellum butterflies and glued them onto the watercolor piece.  I placed acrylic blocks on top of the butterflies until I knew that the glue was dry, and then carefully folded up the wings of the vellum butterflies.  Then I took a paintbrush and some gold metallic watercolor, and added paint splatters all over the panel.  I wanted to bring out the gold foil in the watercolored layer, but I didn't want anything too over-the-top.  Finally, I added some clear sequins and popped the entire panel up on a white card base using foam tape.

Here is another view so that you can see the layers a bit better:


Artsy Butterflies

This card was a bit challenging for me for a number of reasons, but sometimes, it's good to stretch your creative legs...

That's all for me today!  Thank you so much, Vanessa, for having me this month!

Supplies:
Dies: Lawn Fawn Small Stitched Rectangles, Paper Smooches Butterfly Duet & Stitched Flourishes
Paper: Cosmo Cricket Just Add Watercolor 8x8 paper pad, White cardstock, Vellum
Other: Kurtake gold watercolor, Pretty Pink Posh 4mm and 6mm Sparkling Clear sequins, Foam Tape

Monday, April 20, 2015

Lawnscaping Challenge #104

Hello there!  Happy Monday!  It's time for another Lawnscaping Challenge!  Challenge #104 is to follow this sketch:


This challenge is sponsored by the fabulous Lawn Fawn!


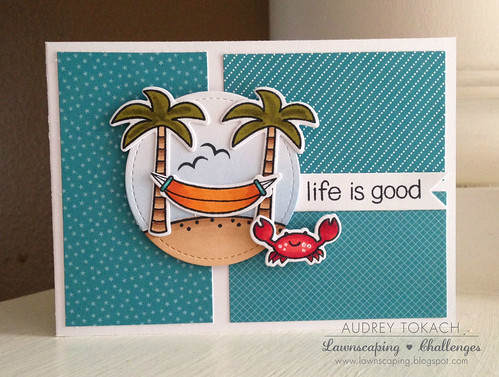
For my card today, I pulled out my Life is Good stamp set and coordinating dies.  Our neighbor is retiring this week, and I wanted to give him a card and a case of his favorite beer to start off his retirement right! *wink*  I just love this stamp set.  It is just so cute and that little crab is one of my favorites! :)  The patterned papers are from the Pint Sized Patterns: Beachside 6x6 paper pad.

Life is Good

Be sure to visit the blog for lots more inspiration from the design team and for all of the challenge details.  I hope you'll join us! :)

Thanks for stopping by!

Supplies:
Stamps: Lawn Fawn Life is Good
Dies: Life is Good, Stitched Party Banners (circle), PTI Double Ended Banner
Paper: Lawn Fawn Pint Sized Patterns: Beachside, PTI White
Other: Foam Squares, Copic Markers, Uniball White Gel Pen

Wednesday, April 15, 2015

Sparkle and Shine Challenge #4 - Sketch

**This is my second post today.  If you are looking for my Papertrey Ink Moments Inked Planner post, please scroll down**


Hello there!  It's time for another Sparkle and Shine Challenge!  This time, it's another sketch challenge, and we are sponsored by our friends at Winnie and Walter!


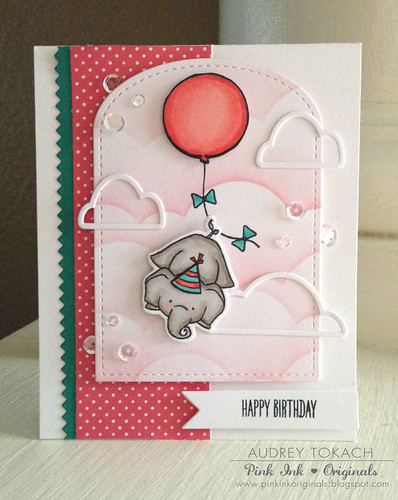
For my card today, I used some goodies from WPlus9, including the Unforgettable stamp set, Sunshine Layers die set and the new Love Shower Layers die set.  I used Little Piggy ink and a cloud template that I made with the Mama Elephant Landscape Trio dies and acetate to create the cloud pattern on the stitched diecut from the Love Shower Layers die set.  The WPlus9 inks blend SO well.  I bought a bunch from the last ink release, and now my wishlist is a mile long!  It's love!  I stamped, colored and cut out all of my pieces, and then laid them out on my card before gluing them down.  The polkadot paper is from the Lawn Fawn Let's Polka 6x6 paper pad, and the pinked edge is the PTI Pinking Shears border die.  To finish things off, I sprinkled on a scattering of my favorite Pretty Pink Posh sequins - Sparkling Clear in 4mm, 6mm and 8mm.

Happy Birthday

That's all for now!  Thanks for stopping by!!

Supplies:
Stamps: WPlus9 Unforgettable
Dies: WPlus9 Sunshine Layers, WPlus9 Love Shower Layers, PTI Pinking Shears Border, Mama Elephant Landscape Trio (to create the cloud patterned paper)
Ink: WPlus9 Little Piggy, Memento Tuxedo Black
Paper: PTI White, Tropical Teal, Lawn Fawn Let's Polka 6x6 pad
Other: Pretty Pink Posh 4mm, 6mm, and 8mm Sparkling Clear sequins, Foam Tape, Copic Markers

Moments Inked Details


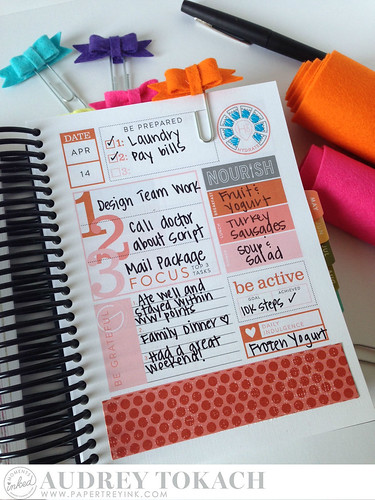
Hello there!  Happy Papertrey Ink Release Day!  Today the Moments Inked Team is showcasing fun ways to use the newest Papertrey products with your Moments Inked Planner!  These goodies are so versatile and fun!

I have lots of pictures to share, so grab a cup of coffee or tea and settle in...

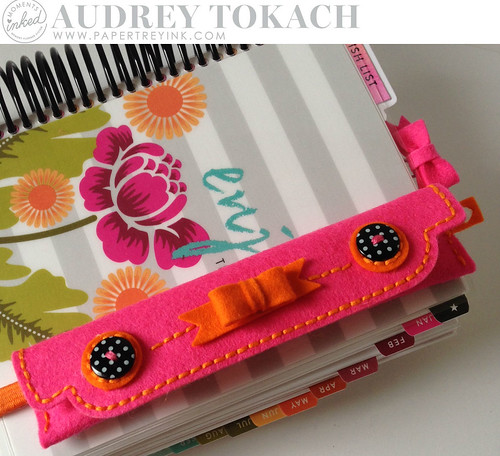
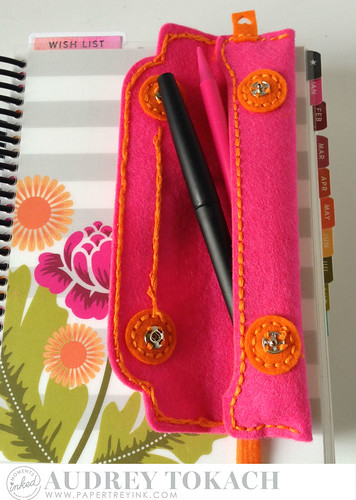
This month, Erin Lincoln, the mastermind behind the stitching product line has come up with a Pencil Pouch that can be attached to your planner via elastic band.  Here is a peek at mine:


PTI Moments Inked

I am sure you are not surprised that it's pink... I mean, what other color would it be?! :)

As you may have seen in the other design team member's examples earlier this week, you run a piece of elastic through the inside of the pouch before you sew it closed.  I found plain white elastic at the store, but instead decided to use a girl's elastic head band that I found at the Dollar Tree.  It is thick elastic, and they came in a pack of 6 bright colors, for just $1.  I really adds so much to have a color coordinated band on your pencil case, and for the price, head bands are the way to go!

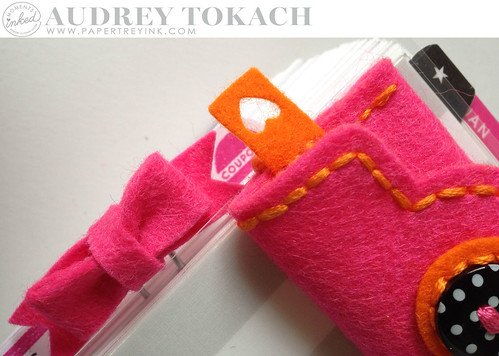
There is also a Pencil Pouch Trim die that allows for an added decorative detail, but I did not use it on mine.  Instead, I cut a tiny Orange Zest bow from the new Bow Clip dies, and hot glued it to the center of my pouch. I will share more on those below.  I added a tiny felt tag using the Coffee Cozy Details die collection.  I love little added touches like these!


PTI Moments Inked

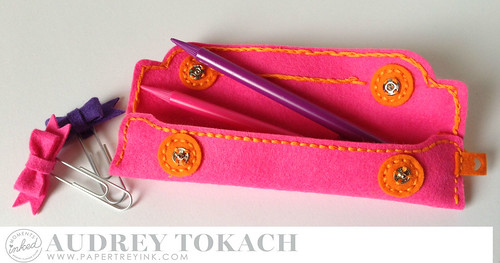
There are several different ways to add closures to your pouch.  In searching for ideas, I can across sew-on snaps and thought they would be perfect.  I am not good at sewing, and I was able to put these on with no problem.  You just separate them, and sew one half to each side of the felt circles included in the Pencil Pouch die collection.  After I sewed on the snaps, then I sewed the circles onto the pouch.

PTI Moments Inked

I use Papermate Flair pens in my planner and the little pouch fits them perfectly.  I also prefer mechanical pencils, and these, also by Papermate, fit perfectly too. 
PTI Moments Inked

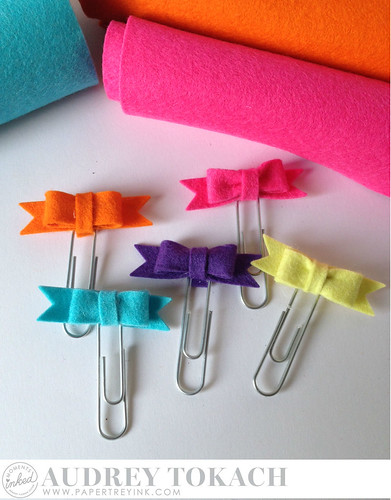
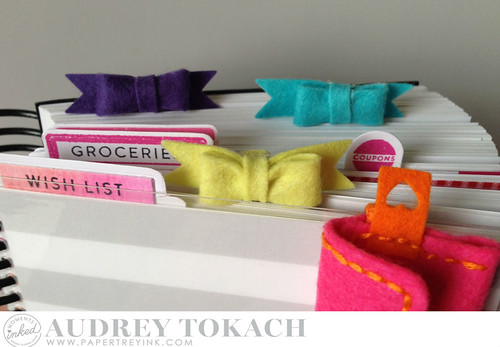
Now, let's talk about those little Bow Clips... I can't get enough of them!  They are just so adorable and EASY to assemble.  I recommend hot glue to ensure that they stay stuck once you've assembled them.  I just want to keep making them and use them for everything... they are just plain CUTE!

PTI Moments Inked

See what I mean?!  And I just love that you can make them in all of your favorite colors!  You can certainly use them for other things besides paper clips.  I added on to the front of my pencil pouch for added cuteness.  You can see it in the first photo that I shared today.  They add so much fun to your planner with a ton of added bulk, even with them being made of felt.  You can see here that they just peek over the top edge of your page and don't get in the way of writing at all.

PTI Moments Inked

And I love how they look from the top view, all lined up so bright and pretty.


PTI Moments Inked

Cute huh?  So what do you think?  Will any of these products be coming home to you?  Are you looking forward to bringing felt to your planner?  Are you planning to give these as gifts?  If you are on Instagram, please be sure to share your planner pics with us... we'd love to see!!  Use the hashtag #momentsinked so that we can find them easily! :)


All of the new products that I used today will be available for purchase in the Papertrey Ink store at 10pm EST.  You can see all of the Moments Inked Planner products that are already available here.

That's all for now... thanks for stopping by! :)


Suppies:
Dies (available at 10pm EST on 4/15): Pencil Pouch, Bow Clips
Dies (available now): Coffee Cozy Details
Felt: Raspberry Fizz, Orange Zest, Hawaiian Shores, Royal Velvet, Limeade Ice
Other: Paper Clips, Buttons, Elastic head band (Dollar Tree), DMC Floss, Sew-on Snaps (walmart)

Sunday, April 12, 2015

Guest Designing for Butterfly Reflections Ink!

Hello there!  Happy Sunday!  I am so excited to share that I will be guest designing for my friend Vanessa's shop, Butterfly Reflections Ink, this month!  If you are a stamper and/or cardmaker, I am sure that you have paid a visit or two to Butterfly Reflections, and if not, you are missing out!  The store is full of all kinds of stamping and papercrafting goodies from so many awesome companies!   


Today, I have a card to share with you using some Avery Elle patterned papers and some fabulous stamps and dies from WPlus9!


Sending Sunshine
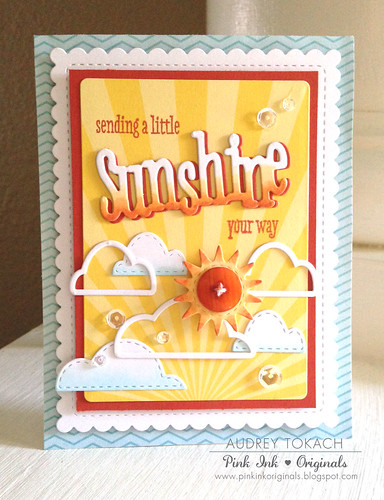
To create my card, I started off with a piece of blue chevron patterned paper from the Avery Elle Everyday Collection 6x6 paper pad.  I used the scalloped frame from the WPlus9 Sunshine Layers die set to cut a piece of white card stock.  Then I used the rounded rectangle die from the same set to cut a piece of sunburst patterned paper also from the Everyday Collection paper pad. I matted that piece on some dark orange card stock to give nice contrast and a pop of bold color.  I cut the word "sunshine" (also from the Sunshine Layers die set) from both white and dark orange card stock.  Using copic markers, I created an orange ombre effect on the white diecut word, then adhered it slightly offset, onto the dark orange diecut to create a shadow.  I cut the clouds from the die set from white card stock and used copic markers and my colorless blender to add a faint blue shadow to the bottom of the solid clouds.  The sun is also diecut from white card stock and colored with copics.   I stamped a coordinating sentiment from the WPlus9 Sending Sunshine stamp set on the top of the sunburst panel, then adhered the diecut word on a slight angle for some added interest.   The clouds were adhered with a glue pen and the sun was popped up with foam tape.  Before I adhered it down, I threaded some twine through an orange button and glued that in the center of the sun.  The entire scalloped panel is popped up on the card front using foam tape, and to finish things off, I added a scattering of sequins.  I had SO much fun with this card!

That's all from me for now!  I'll be back later this month with another fun project.  In the meantime, be sure to visit the Butterfly Reflections Ink blog for tons more inspiration, and do a little shopping in the store!  

Thanks for stopping by!! :)

Supplies:
Stamps: WPlus9 Sending Sunshine
Dies: WPlus9 Sunshine Layers
Paper: Avery Elle Everyday Collection 6x6 paper pad
Other: Copic Markers, Foam Tape, Pretty Pink Posh Sparkling Clear sequins, button, bakers twine

Friday, April 10, 2015

Little Chickadee {WPlus9}

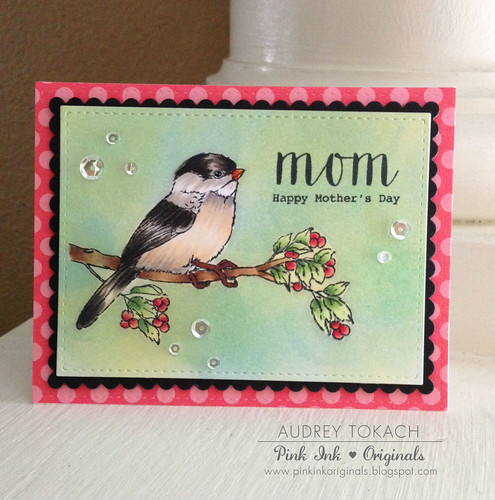
Good Morning!  TGIF!  So a few days ago, I got my WPlus9 new release order and I had to dig right in!  When I saw the first peeks of this adorable chickadee from the A New Day stamp set, I knew I had to have him.  About 6 months ago, I put a bird feeder outside my kitchen window, and I have really been enjoying all of the different birds that come to visit.  I have not seen a chickadee yet, but I've been on the lookout!

This image is a little different than I am used to coloring,  but I have to say that I really loved coloring more life-life images!  I think I will be picking up a few others that I have been eyeing...

To create the background, I masked off the bird and branch and then used an ink blending tool with WPlus9 Bo Peep and Falling Star inks to create this soft almost watercolor looking effect.  I am SO impressed with these inks.  They blend like a dream!  The sentiment is from another new set, Love Mom.

I used the scallop frame from the Sunshine Layers die set along with the stitched frame from the Mama Elephant Femme Frames set for the main panel and that is popped up on a patterned paper covered card base.

Chickadee

This card is for my mom... hope she doesn't pay a visit to my blog today!  If you do mom, act surprised on Mother's Day! ;)

That's all for now... thanks for stopping by!!

Supplies:
Stamps: Wplus9 A New Day, Love Mom
Dies: WPlus9 Sunshine Layers, Mama Elephant Femme Frames, Peek a Frames
Paper: PTI White, True Black, Berry Sorbet Pattern Pack
Ink: Memento Tuxedo Black, WPlus9 Bo Peep, Falling Star
Other: Copic Markers, Foam Tape, Pretty Pink Posh 4mm, 6mm and 8mm Sparkling Clear sequins

Tuesday, April 7, 2015

Avery Elle Challenge #23 - Watercolor


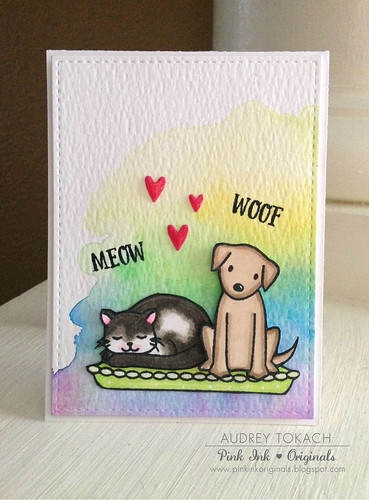
Hello there!  Today I have a card to share for the newest Avery Elle  AEI*heart*U challenge.  Challenge #23 is a watercolor challenge, and I have been LOVING watercolor lately.  I can't seem to put away my paints!  I got the new Furry Friends stamp set not too long ago, and so I pull that out, too!

I started out by watercoloring a piece of Tim Holtz Distress watercolor paper, then I stamped, colored and cut out the cat, dog and pet bed from the stamp set.  The little hearts are the Simon Says Stamp Mini Hearts die, which I glittered with Wink of Stella glitter pen and then added a layer of Glossy Accents.

Furry Friends

That's all for now!  Thanks for stopping by! :)

Supplies:
Stamps: Avery Elle Furry Friends
Ink: Memento Tuxedo Black
Dies: Mama Elephant Femme Frames, SSS Mini Hearts
Paper: PTI White, Raspberry Fizz, Tim Holtz Distress Watercolor paper
Other: Watercolor palette from Michaels, Copic Markers, Wink of Stella Glitter Pen, Glossy Accents, Foam Tape

Monday, April 6, 2015

Lawnscaping Challenge #103 - Dimension


Hi there!  Happy Monday!  It's time for another Lawnscaping Challenge!  This challenge is all about dimension!

We are sponsored this week by our friends at Ellen Hutson!


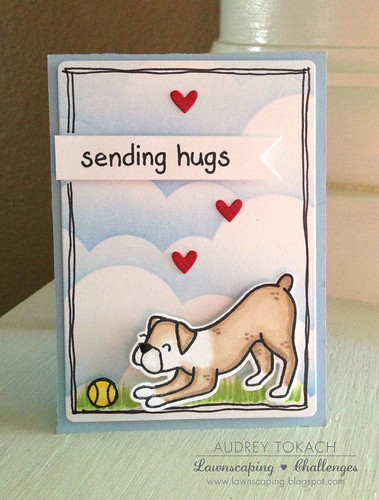
For my card today, I pulled out my Critters in the Dog Park stamp set.  Unfortunately, by cousins lost their beloved Boxer a few weeks back and I wanted to sent my love to them during this tough time.

I used ink and a blending tool to create a background of clouds and then stamped, colored and diecut the dog.  He's popped up with foam tape as is the banner sentiment.  I don't think I can make a card without foam tape.  It's true love! :)

Sending Hugs

Be sure to visit the blog for lots more inspiration from the design team and for all of the challenge details.  Hope you'll join us for a chance to win an awesome prize!

Thanks for stopping by! :)

Wednesday, April 1, 2015

Sparkle and Shine Challenge #3

Hello there!  Happy Wednesday to you!  Today I have a card to share with you for the newest Sparkle and Shine Challenge, which is starting today!  The inspiration for this challenge is this photo:


Challenge #3 is sponsored by Pretty Pink Posh!


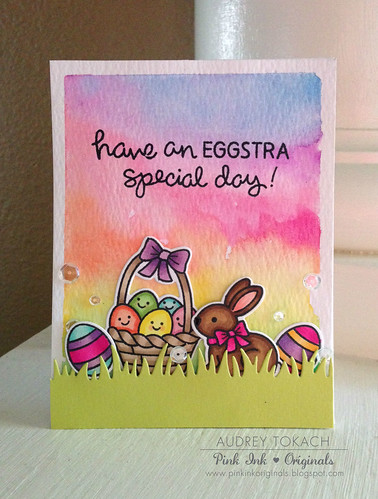
For my card, I created a bright, watercolored Easter card!  I started by watercoloring a piece of Tim Holtz Distress Watercolor Cardstock with a watercolor palette from Michaels.  Then I stamped, colored and die cut images from the Lawn Fawn Eggstra Special Easter stamp set.  I popped a grass diecut on the bottom of the card front first, and then arranged my images behind the grass.  Once I had them placed where I wanted them, I stamped a sentiment from the same set and then added some Sparkling Clear sequins in the 4mm, 6mm, and 8mm sizes.


Happy Easter

Be sure to stop by the blog for lots more inspiration from the design team and for all of the challenge details!  Hope you'll join us for a chance to win some Pretty Pink Posh goodies! :)

Thanks for stopping by!

Supplies:
Stamps: Lawn Fawn Eggstra Special Easter
Dies: Lawn Fawn Eggstra Special Easter, Grassy border
Paper: Tim Holtz Distress Watercolor Paper, PTI Limeade Ice, Stampers Select White
Other: Pretty Pink Posh Sparkling Clear 4mm, 6mm and 8mm sequins, watercolors, copic markers, foam tape