Monday, August 30, 2010

Thank you Nichole!

Some of the girls on the Papertrey Ink message boards thought up a great idea! A "Thank You Nichole" Blog Hop! For those of you who don't know, Nichole Heady is one of three owners of PTI. She wears many hats - owner, designer, wife, mother, magician... the list goes on. All too often, she doesn't get the thanks and recognition that she deserves, and so, as a tribute, we are making thank you notes for her and posting them for all to see. :)

Nichole, this is my personal thank you to you. I truly appreciate all that you do for your PTI customers. Thank you for all of your time, hard work, dedication and inspiration. Though I have never met you, I consider you a friend and am thankful for all that PTI brings into my life. Because of your company, I am able to sit back and relax and create with beautiful products, I can go and get in some giggles on the message boards, and I can practice my stalking techniques while I wait for the mailman in the days following release day. In all seriousness though, all that you do does NOT go unnoticed or appreciated. From the bottom of my heart, thank you!!

Here is my card created especially for Nichole, using all PTI products:


And a closeup of the center:


Supplies (All PTI unless noted):
Stamps: Flutterby Friend, Embellishments
Ink: Momento Tuxedo Black, Aqua Mist, Hawaiian Shores
Cardstock: Stampers Select White, Aqua Mist
Ribbon: Hawaiian Shores Satin
Copics: BG11, BG13, BG18, BG49, YG93, YG95, YG97
Other: Prisma Glitter, 2-way glue pen, Mat Stack 4 die, 1.75" circle punch

Getting ready for Halloween!

Getting ready for Halloween is going to be so much fun this year! I have lots of new halloween goodies to play with thanks to Papertrey Ink! I am in LOVE, LOVE, LOVE with their Tiny Treats stamp sets. Yesterday, I sat down in my craft room set out to make halloween tags for the boys for their classmates, and I just kept making them, and making them, and making them. LOL! So, about 60 tags later (I made a bunch extra), I am done (for now!) I used the frame image from Tiny Treats: Valentine, and of course, the images and sentiments from Tiny Treats Halloween. Aren't they cute?


Supplies (all PTI unless noted):
Stamps: Tiny Treats: Valentine, Tiny Treats Halloween
Ink: Momento Tuxedo Black, Orange Zest, Plum Pudding, New Leaf
Cardstock: Stampers Select White
Other: Copic Markers, unknown orange satin ribbon, large circle punch

Saturday, August 28, 2010

Thank you to my BFF!

My 30th birthday was back in July, and with it being summer vacation and having the boys home, we had to take a raincheck on my birthday present from my BFF. This past Tuesday, Brandi surprised me with a trip to a beautiful local spa, and I got to enjoy my very first Swedish massage. It was 50 minutes of pure heaven. Then after the spa, we went to lunch at my favorite Mexican restaurant, and then to the local scrapbook store. It was a perfect day :) To thank her for her thoughtfulness, I make her this card...


Supplies (all PTI unless noted):
Stamps: Embellishments, Gobble Gobble, Polkadot Basics, Tiny Treats Valentine
Cardstock: Sweet Blush, Stampers Select White, Hibiscus Burst
Ink: Hibiscus Burst
Other: Uniball Signo white gel pen, Quikutz Heart Die, PTI Embellishment die

Friday, August 27, 2010

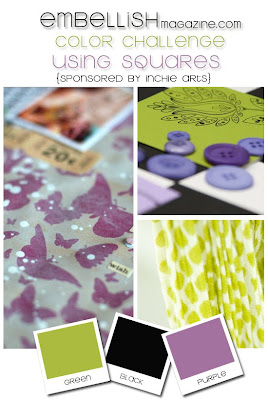
Embellish Squares Color Challenge


Embellish Magazine is hosting a challenge this month and I wanted to participate! You can see more details here: http://embellishmagazine.com/blog/2010/08/embellish-squares-color-challenges-sponsored-by-inchie-arts/

For the challenge, you had to use the colors purple, green and black, and you had to use squares in your project. I took the opportunity to get started on some halloween projects, and got to ink up my new Been Boo'd stamp set by Papertrey Ink.

Small cards are so fun to make, and this one measures 4.25" x 4.25". The little ghost is stamped on an inchie, and matted. I can't wait to make more! :)

Our neighborhood does lots of "BOO-ing" and inside the card is the little "BOO" poem (which is part of the Boo'd stamp set). If you have never heard of "BOOing", you can find out more here: http://hubpages.com/hub/How-to-Start-the-Halloween-Boo-in-Your-Neighborhood


Supplies (all PTI unless noted):
Stamps: Been Boo'd, Star Prints
Ink: Momento Tuxedo Black, Plum Pudding, Fresh Snow
Cardstock: Stampers Select White, Simply Chartreuse, Plum Pudding
Ribbon: Plum Pudding Satin
Other: Uniball Signo White gel pen

Thursday, August 26, 2010

Rudolph the red nosed Turkey?!?!

Along with Papertrey Ink's August release came a cute thanksgiving stamp set which features an adorable turkey. He has a matching die. So I was playing around with the die yesterday and discovered that if you turn the turkey body upside down, it sort of resembles a reindeer head. For some, it may be a stretch, but I think he could totally pass for Rudolph :)


Supplies:
Stamps: PTI Distressed Stipes
Ink: PTI Pure Poppy, PTI Ripe Avocado, PTI Vintage Cream, PTI Tea Dye Duo
Paper: PTI Vintage Cream, PTI Ripe Avocado, PTI Kraft
Other: PTI Turkey die, PTI Mat Stack 4 Die, PTI Rickrac die, PTI Pure Poppy Bakers Twine and Buttons, White Gel Pen, Google eyes, E57 Copic Marker, red glitter, two way glue pen

Wednesday, August 25, 2010

August Papertrey Ink Blog Hop!


It's that time again at Papertrey Ink! Time for the monthly blog hop! For the month of August, we are encouraged to turn a plain old brown paper lunch bag into a papercrafting work of art. For this challenge, I made a halloween treat holder using cardstock and a lunch bag. These are super fun to make, and could be used to hold a bunch of different fun things! Obviously nothing big or bulky will fit (not with the dimensions that I used anyway), but there are still tons of possibilities! How about using one as a gift card holder? Or maybe to hold a pack of baseball cards for a little guy? Or some cute hair bows for a little girl? A mini bag of microwave popcorn? Some Silly Bands? FUN! :)

This has been on my "to-try" list for awhile now. I came across this video here: http://www.youtube.com/watch?v=56tgRKEw5Dg

I used one of my favorite images from the Tiny Treats Halloween set from PTI. Isn't he SO cute?!?!

Here is the outside all folded up:


And here is a look inside... a pack of gum fits perfectly...


Supplies:
Stamps: PTI Tiny Treats Halloween, PTI Polka Dot Basics
Cardstock: PTI Stampers Select White, PTI Summer Sunrise
Ink: Momento Tuxedo Black, PTI New Leaf
Copics: YG11, YG17, RV10, YR12, T1, T6
Other: PTI Mat Stack 4 Die

Monday, August 23, 2010

More fun with Friendship Jar Fall Fillers

I spent nearly all day yesterday in my craft room playing with all of my new goodies, and I have to say that Friendship Jar Fall Fillers is definately my new favorite. I LOVE LOVE LOVE it! :)


Supplies:
Cardstock: PTI Kraft, PTI Oranze Zest, PTI Stampers Select White
Stamps: PTI Friendship Jar, PTI Friendship Jar Fall Fillers, PTI Distressed Stripes
Ink: Momento Tuxedo Black, PTI Tea Dye Duo, PTI Dark Chocolate
Copics: YR12, YR15, YR18, R29, R59, E55, E57, YG93, YG95, YG97, T1
Other: PTI Rustic Twine, PTI Friendship Jar Dies, Pop Dots

Sunday, August 22, 2010

A Tiny Little Love Note

In my opinion, love notes are so much cuter when they are little. :) I got some PTI gift enclosure envelopes a bit ago, and thought I would make a bitty little love note for my awesome husband. The finished size of the card is 2.25" x 4". The envelope looked a little bare, so I stamped a heart from Tiny Treats in the corner. :)


Supplies:
Cardstock: PTI Stampers Select White, PTI Pure Poppy
Stamps: PTI Friendship Jar, PTI Tiny Treats: Valentine
Ink: Momento Tuxedo Black, PTI Spring Rain, PTI Enchanted Evening
Copics: T1, R29, E55
Other: Friendship Jar Dies, PTI Pure Poppy Bakers Twine, Pop Dots

Autumn Wishes

My favorite part of the month is Papertrey Ink release time! I just got my August order from them, and couldn't wait to try out my new stamps! Among others, I ordered the Friendship Jar stamp set, and the Friendship Jar Fall Fillers set and matching dies. I can't tell you how excited I am about these sets. The fall fillers can be used alone, without the jar as shown today. I love Copic markers on kraft cardstock, and these images are awesome for coloring! :)


Supplies:
Cardstock: PTI Kraft, PTI Terracotta Tile
Stamps: PTI Friendship Jar Fall Fillers, A little Argyle
Ink: PTI Fresh Snow, PTI Dark Chocolate, PTI Terracotta Tile
Copics: YR12, YR15, YR18, YG93, YG97

Friday, August 20, 2010

A Birthday Gift!

Hey there! My boys were invited to a birthday party this weekend, for a friend from school. SHE is turning 7. Now, I am the girliest of girls, but having two boys, I was stumped as far as what to do for a gift for her. In talking to her mom, I found out that she loves doing arts and crafts so I made her an art box and filled it with all kinds of great goodies!! :) I used a photo box and inside, she will find markers, colored pencils, crayons, watercolors, glitter pens, beads, pipe cleaners, stickers, letter stencils, ribbon and more! I wanted to personalize it, and this is what I ended up with...


Supplies:
Stamps: PTI Flutterby Friend, PTI Outlines Alphabet, PTI Fresh Alphabet
Ribbon: PTI Raspberry Fizz Satin Dot
Copic Markers: PTI Hibiscus Burst Trio, Orange Zest Trio, Aqua Mist Trio, New Leaf Trio

Tuesday, August 10, 2010

More Candles and a new Etsy Shop!

I made some more candles this week that I wanted to share with you and I also wanted to announce the opening of my new Etsy shop! You can find a link on the right side of my blog. I have lots more to add so keep watching! :)

On to the new candles I have been working on...

Red Flower:


Supplies:
Stamps: PTI Beautiful Blooms
Ink: PTI True Black, PTI Pure Poppy, PTI Ripe Avocado
Ribbon: PTI Pure Poppy Satin Dot

Aqua and Green Medallion:


Supplies:
Stamps: Nameless stamp from G Studio
Ink: Momento Tuxedo Black
Copics: YG11, YG17, BG13, BG
Ribbon: PTI Hawaiian Shores Satin Dot

Aqua and Pink Medallion:


Supplies:
Stamps: Nameless stamp from G Studio
Ink: Momento Tuxedo Black
Copics: BG11, BG14, RV10, RV13, RV17
Ribbon: PTI Raspberry Fizz Satin Dot

Thank you Teacher:


Supplies:
Stamps: PTI School Time
Ink: PTI Pure Poppy, PTI Ripe Avocado, PTI Enchanted Evening
Ribbon: PTI Enchanted Evening Satin Dot

These are all now in my etsy shop! :) Thanks for looking!

Friday, August 6, 2010

Stamping on Candles

Hello there! I am back today with a super fun, and highly addictive project! I found a few tutorials on youtube for candle stamping, and I had to try it. Here is a very quick tutorial on how to do it... It is SO easy!

You will need:

-A white, or light colored candle
-Stamps
-Markers if needed
-Plain white tissue paper
-Scissors
-Wax paper
-A heat gun (you could probably use a hairdryer too, but it will take longer)

First, you start out stamping your images onto the tissue paper. Make sure that you stamp on the shiny side of the tissue. You can use any color ink. If your stamps are outline images, you can color them, but beware that the ink and marker will bleed through, so make sure there is something covering your work surface. After you have stamped and colored your image, trim around the image with scissors. You don't need to be super careful, and you can leave a border around the image. It won't matter later. After you have cut out your image, position it on your candle where you'd like it, and cut a piece of wax paper, long enough to wrap around the candle and long enough to have some to gather at the back of the candle to hold on to so that you don't get burned with the heat gun. Turn on your heat gun and let it heat up for a few seconds and then aim it at the candle and move in circular motions, being careful not to leave it in one spot too long because the wax melts quickly. You will notice the edges of the tissue start to melt into the candle, and beads of sweat will form on the waxpaper. After about 20-30 seconds, carefully peel away the wax paper and your stamped image will be on the candle! If you notice after the first heating that there are still some noticable edges to the tissue paper, get a new piece of wax paper and repeat the heating process. It is important to use fresh wax paper each time, because wax residue will build up on the paper as you heat the candle. You can use any color candle, but lighter is better to show the true color of your ink. And cheaper candles are better to use because they will melt easier, and when they burn, the burn down the center of the candle so the design will never be distroyed. They are QUICK and easy, and I am planning to make a ton of these for holiday gifts.

Here are the 3 I did tonight...

#1 - Pink Butterfly

Supplies:

Stamps: PTI Flutterby Friend
Ink: Momento Tuxedo Black, PTI Raspberry Fizz
Copic Markers: YG11, YG17, RV10, RV13, RV14, R59
Ribbon: PTI Raspberry Fizz Satin Dot
Other: The candle stamping materials listed above

#2 - Aqua Butterfly


Supplies:

Stamps: PTI Flutterby Friend, Fancy Flourishes

Ink: Momento Tuxedo Black, PTI Hawaiian Shores

Copics: BG11, BG13, BG15, BG18,
Ribbon: PTI Hawaiian Shores Satin Dot
Kaisercraft Clear rhinestones, the candle stamping supplies listed above

#3 - Sunflowers


Supplies:
Stamps: PTI Beautiful Blooms
Ink: PTI Ripe Avocado, PTI Summer Sunrise, PTI True Black
Ribbon: Unknown black and white gingham
Other: Candle stamping supplies listed above

Please let me know if you have any questions! I am off to the Dollar Tree tomorrow to clean them out!! :D

Monday, August 2, 2010

Copics and Kraft Cardstock

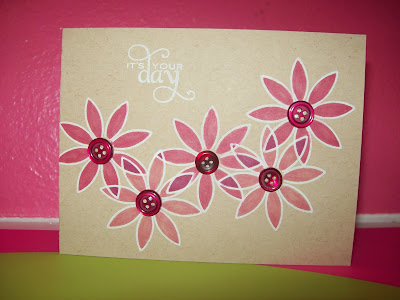
Hi there! I have been seeing alot of kraft cardstock and copic markers used together, and I just love the effect. It almost looks like stained glass! I had to try it for myself today, and I think I will be using this technique alot for a variety of projects :)


Supplies:

Paper: PTI Kraft Cardstock

Stamps: PTI Beautiful Blooms, PTI Star Prints

Ink: PTI Fresh Snow

Other: PTI Scarlet Jewel Buttons, Copic Markers - RV13, RV14, RV17

BLOG TEMPLATE BY DESIGNER BLOGS